
Transfer Case Problems & Solutions
note: these problems are with the design, the issues affect every 55S17W Iveco 4x4,
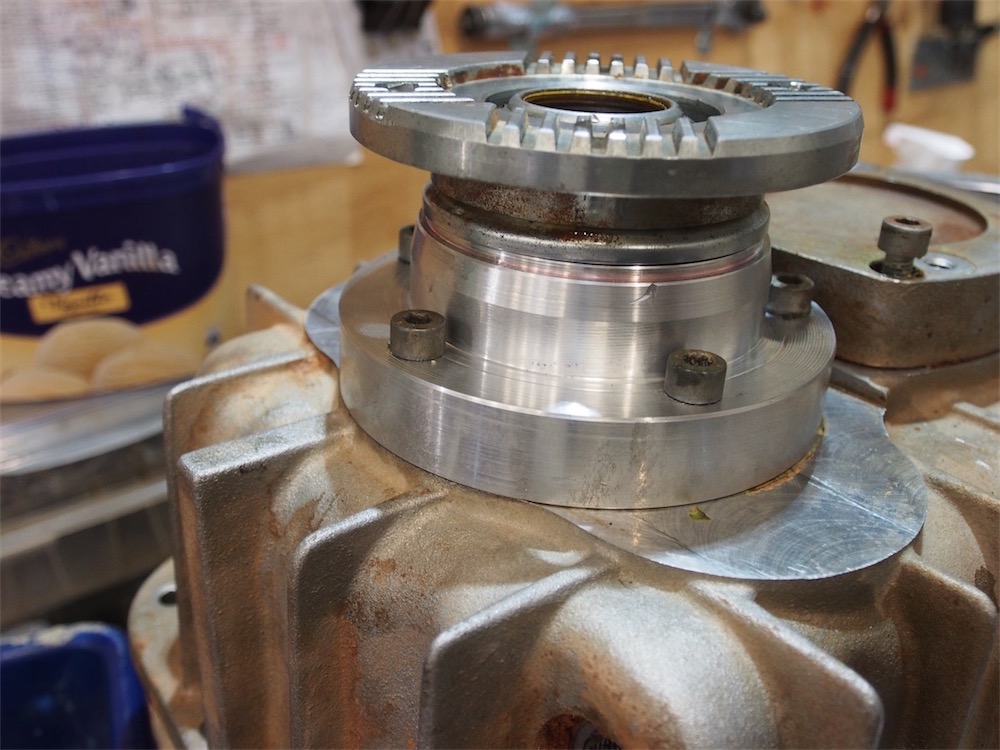
not just the odd lemon


Transfer Case Explained
New Information as of December 2016, I made this 10 min video on the point of failure in the Transfer Case , and how the transfer case works.A few owners contacted me to say their transfer cases also failed in High Range, In the video I failed to mention that when the circlip pops out, even in high range with the selector dog against the gear cluster the outer thrust plate can still come forward and the 3 gear pins are free to float forward, dropping their uncaged needle bearings into the cluster, the protuding pin will then be unable to slide back and take out the Low/High selector fork and rod, followed by a runaway train of unrepairable damage. When this happens, and its a matter of when , not if, the Transfer Case is usually so badly damaged that it is unrepairable.
The circlip, Iveco Part number 42567335 , comes out of its groove, weather a manafatruring error or bad design it has nothing to do with driving style, oil levels or type of oil used, the blame lies 100% squarely on SCAM Italy, the Transfer Case designer & manafatruer and Iveco Australia. My contacts have told me Iveco Australia know about the issue and was told that there was a batch of transfer cases made with a groove that was not cut deep enough.
To me that is just Iveco Rhetoric, .... My Circlip groove is certainly the correct depth for that size and application, but the circlip at 90,000km was only in the groove by 0.5mm, and could easily be removed just by catching the end and pulling it out without tools. Is is more an incorrect circlip style or size choice in my opinion, but there has been no revision of the circlip by Iveco.
How to stop your Transfer Case grenading
Anyway , enough polotics, .... how to fix , Bear in mind if you do the modto stop your Transfer Case from grenading, you will void your warranty. Thats Irony.
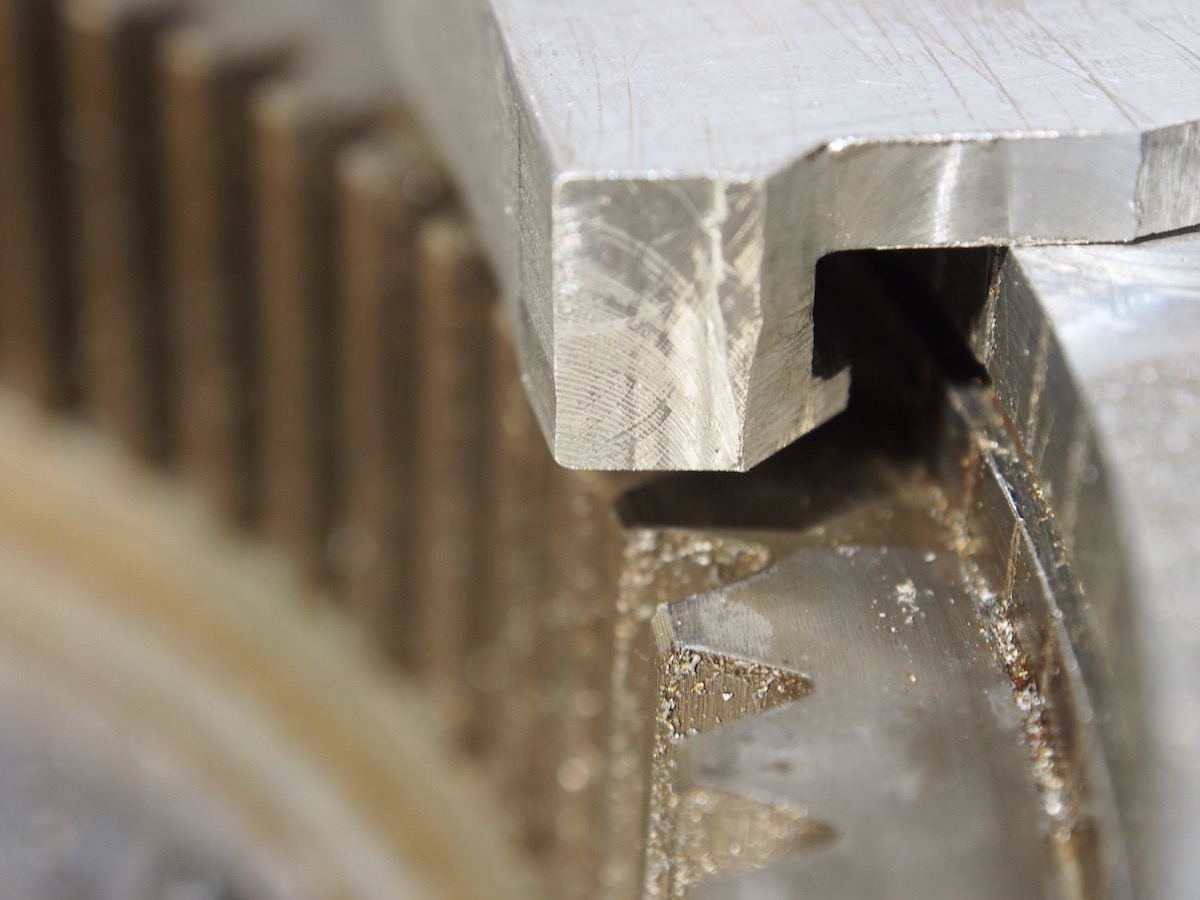
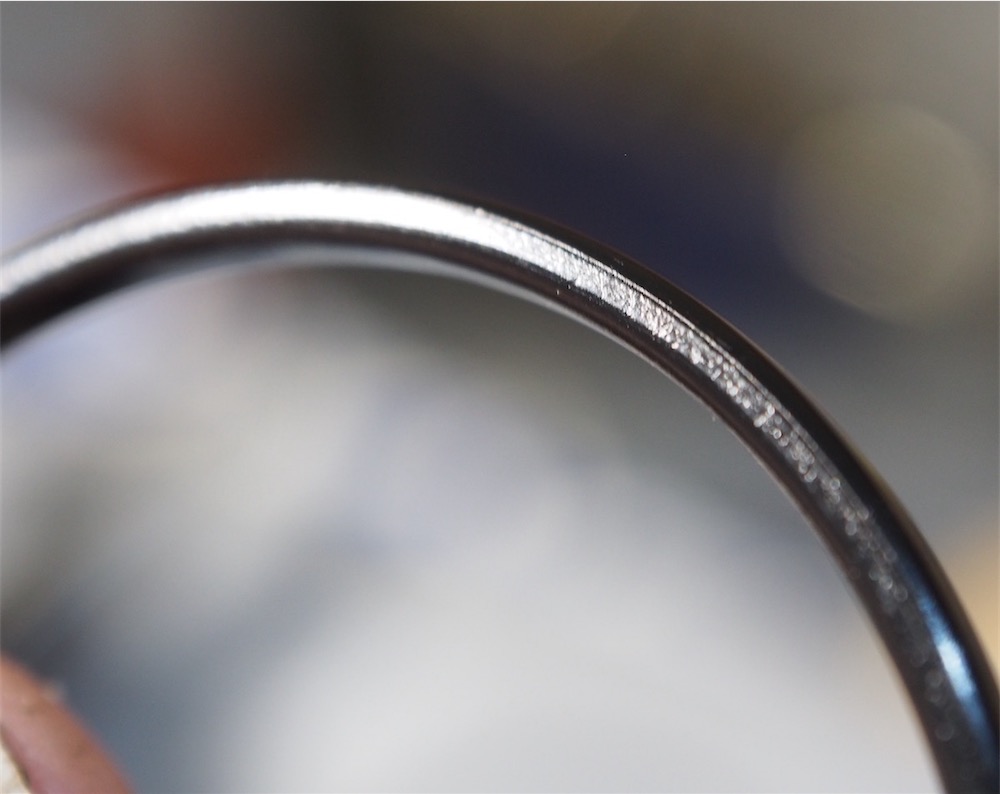
Image at left shows the groove with circlip inplace, one end of the circlip will need to be adjusted so they are both 45deg acute angles, thus making it difficult to pry out if needed. The circlip 'adjustment' can be either be done with a bench or angle grinder.

Milling a flat face on the Transfer Case 'shelf' so as to allow a 'circlip clamp' be bolted into position, The Circlip Clamp weill hold the circlip fully expanded in its groove so it can never collapse , thus preventing the only known cause of 55S17W Transfer Case failure.
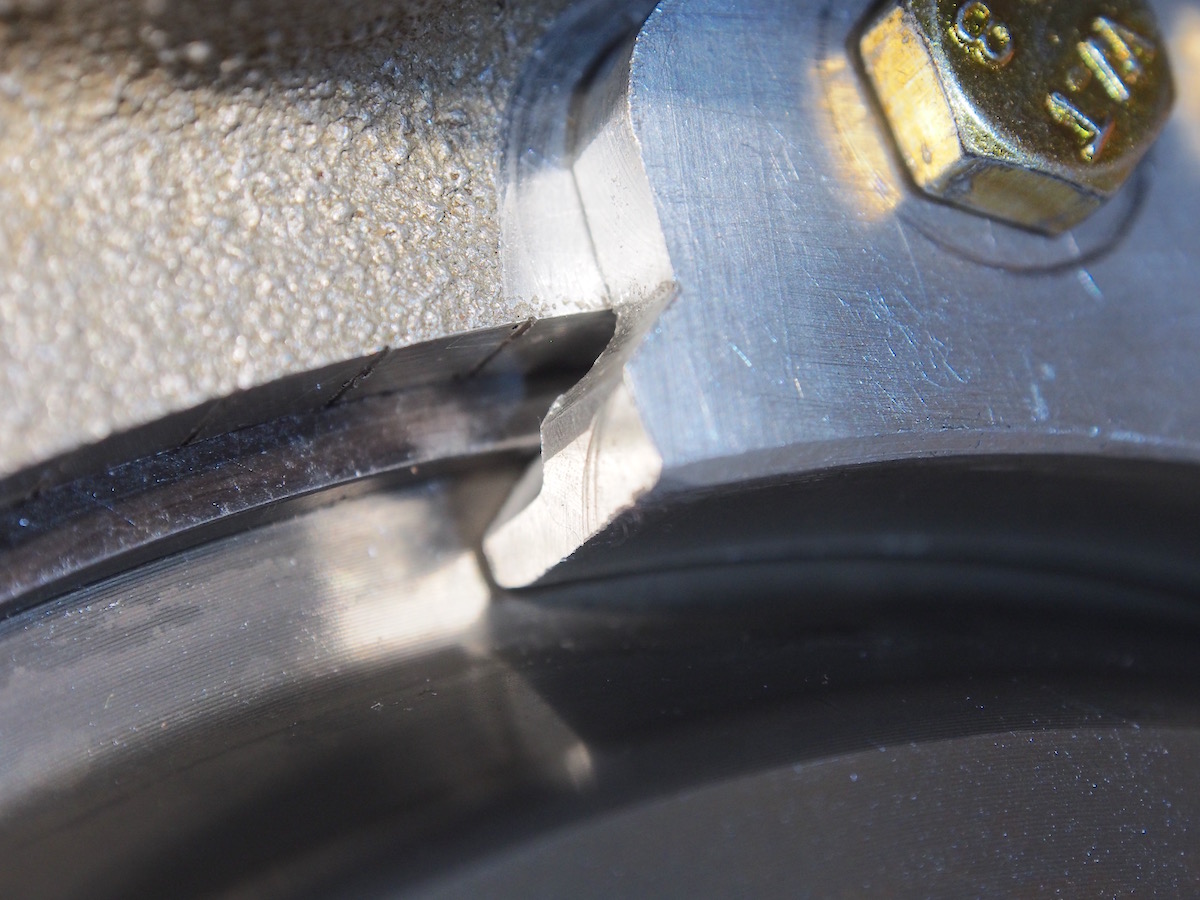
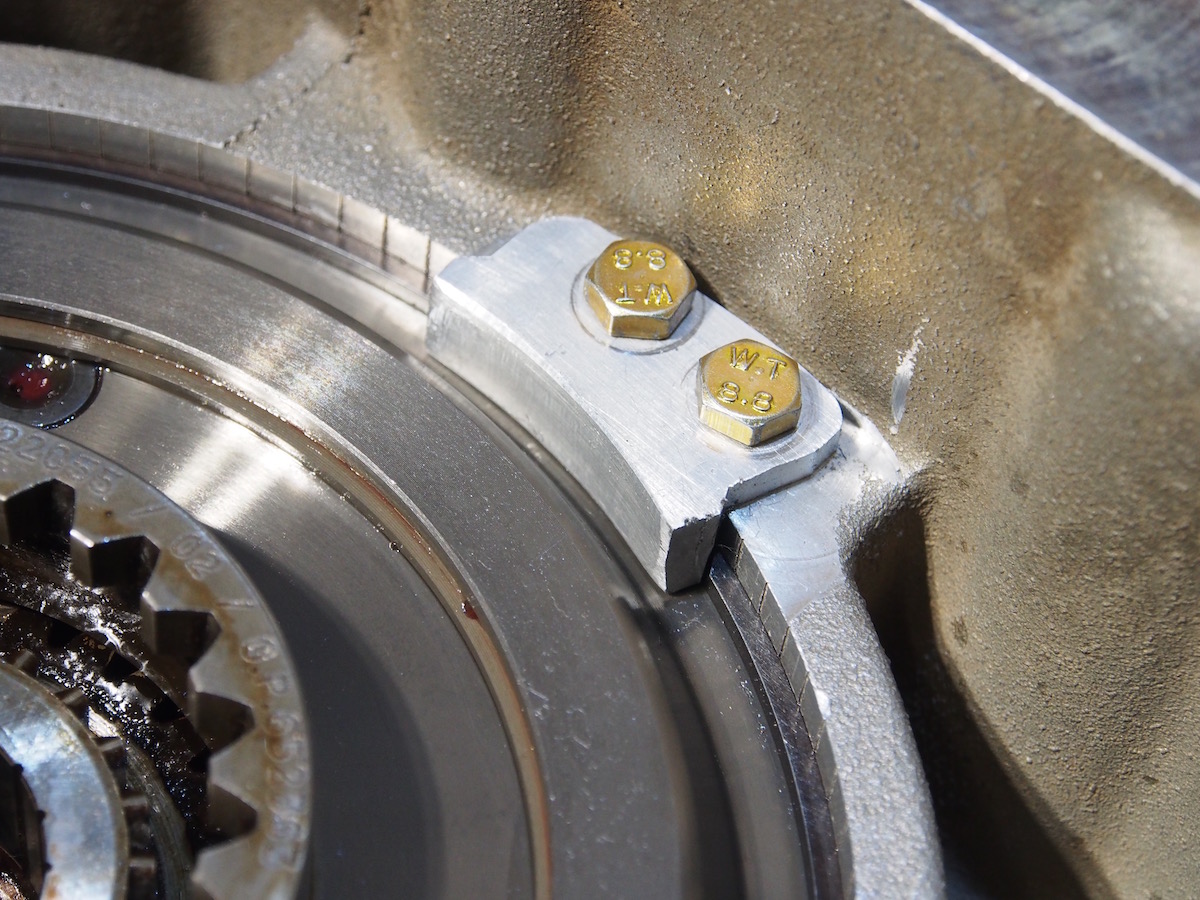
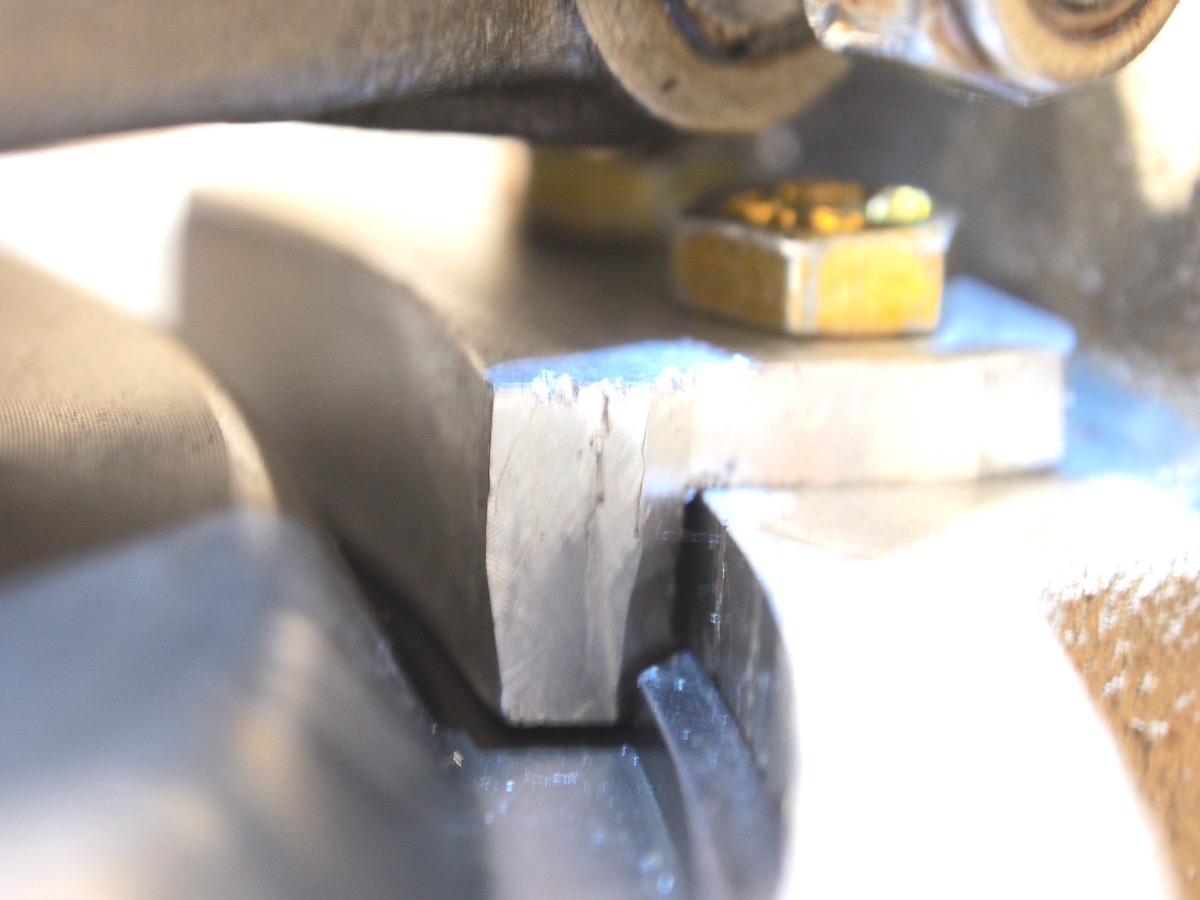
Above pictures show prototype "circlip clamp" in position, It has a tang in the circlip groove that positively locks it into position. This gives peace of mind knowing that paticular Transfer Case will never leave the driver stranded.
Feel free to download the DIY PDF Instructions outlining the above process to grenade proof the Iveco Transfer Case
Transfer Case Overheating
There has been more disturbing reports of transfer case failures, most likely due to oil foaming and overheating.
( foamed oil loses its lubricity - if you look in your sight glass after a long drive and see bubbles, or notice foam residue coming out the breather you need to be pro-active)
I put a TM4 temerature monitor on my Gearbox and Transfer case, After an hour at Highway speed the Gearbox reaches 85-90c but the transfer case goes off the scale at 125c , Another owner is reporting his Transfer case goes over 140c . The GL5 Oil Iveco reccomend is good to 120c , once the oil is burned it loses its ability to lubricate effectively, even after it cools down. I have been running Castrol Syntrax since 20,000 km with regular changes and each time I noted the oil has darkened to treacle color from overheating, its should be honey colour.
Iveco have replaced a number transfer cases (not mine) under warranty but do not seem to be adressing the problem.
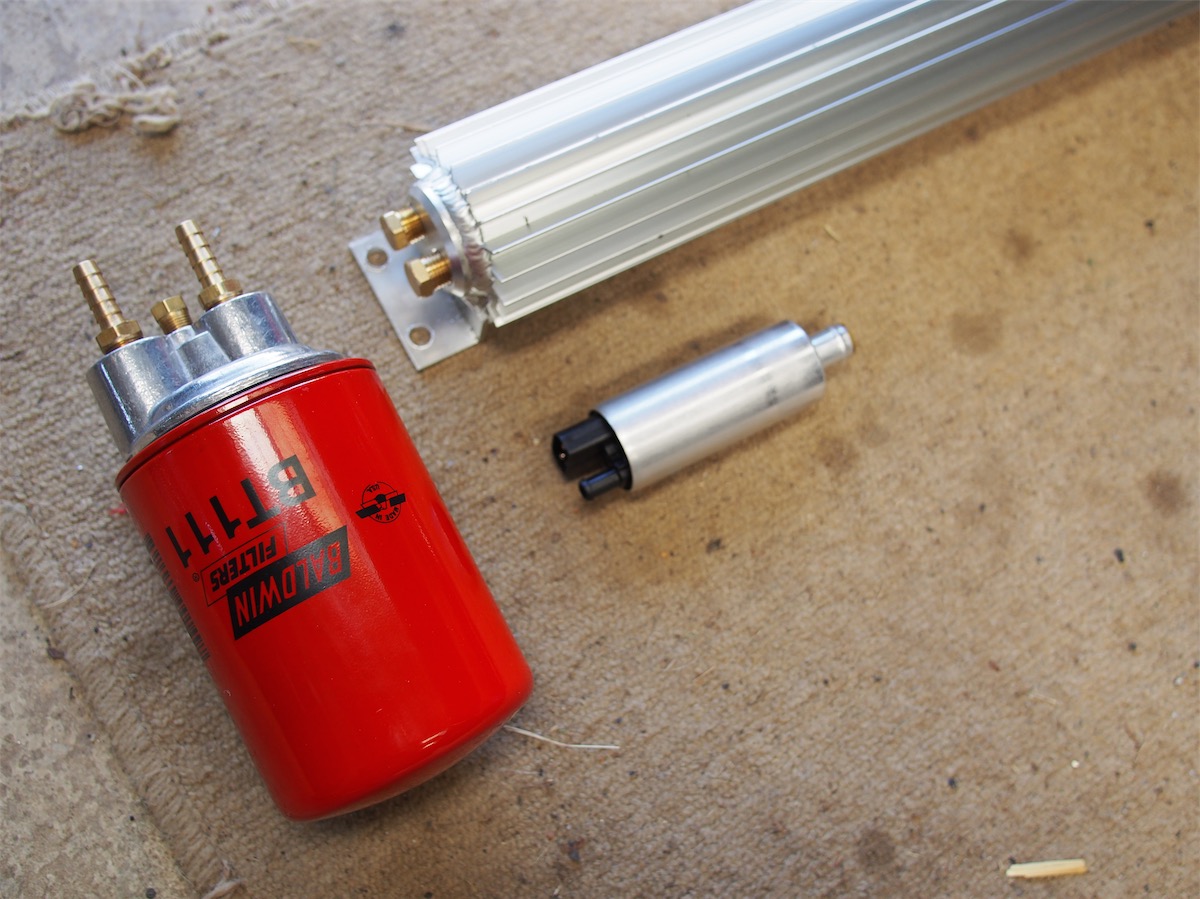
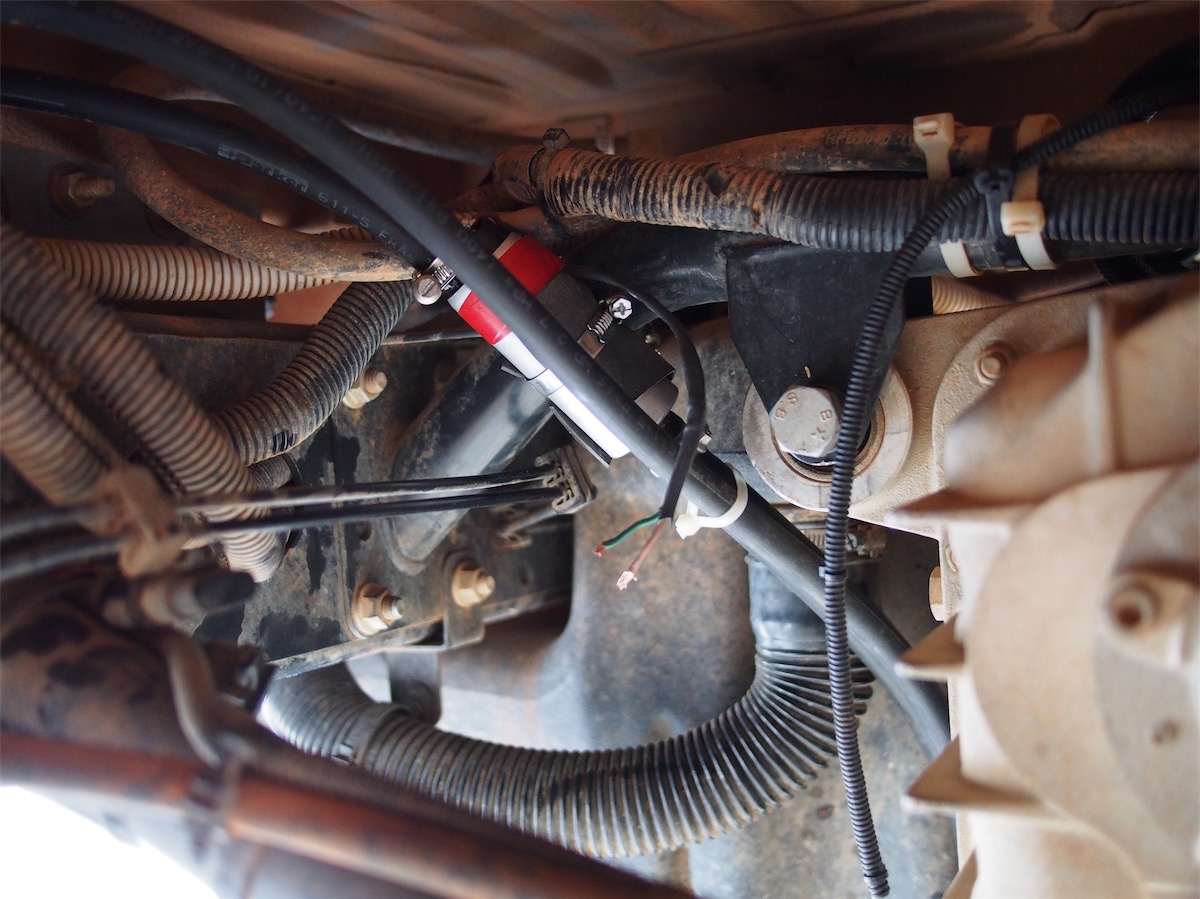
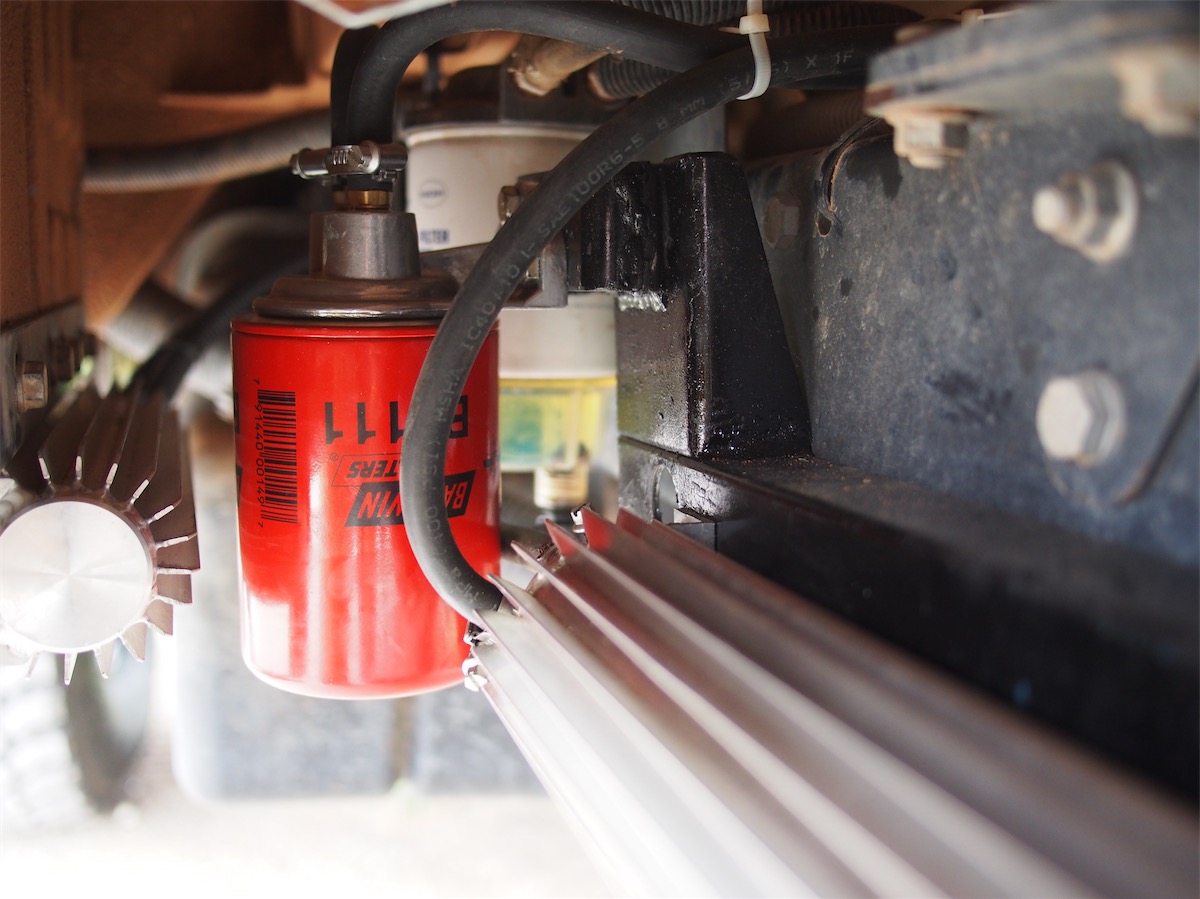
I have installed a 18" dual pass finned cooler, with BT111 Transmission filter ( this filter has no restrictive ADBV) and VDO 12v oil pump
Thve VDO Pump is impressive for such a small unit, with an operating range of 100-150c , 160 Lph @ 4bar, they are typically used as Turbo scavenge pumps or Transmission / Diff cooler pumps on race cars ! I have the pump triggered to turn on when my Transfer Case sensor reads 90c.

MAY 2017 Update: A new development
Some time ago fellow Iveco 4x4 troubleshooter Marcus Tuck came to the conclusion that the Transfer Case overheating has more to do with airflow, or lack thereof. It had been noticed that during a Tail wind when the vehicle is not working as hard the transfer case temperature increases, I thought it should be the oppisite, this can only be due to a lack of airflow. Some enterprising owners are finding posetive results by installing ducting or fans to direct air onto the Transfer Case.I had been openly skeptical to the theory but am now a believer.
I recently diconnected my Muffler to access bolts to modify the upper transfer case crossmember, and whilst muffler was off I started the engine to find the exhaust was no louder at all, instantly making a decision not to replace that 20KG muffler. I installed a straight through hotdog but a plain length of exhaust pipe would be just as quiet.

Now with revised exhaust I have noticed Transfer Case temperatures are from 15 to 20c lower than previous !!
Transfer Case Mounts
Grumbling Noise / Vibration at Low speed, Jan 2015
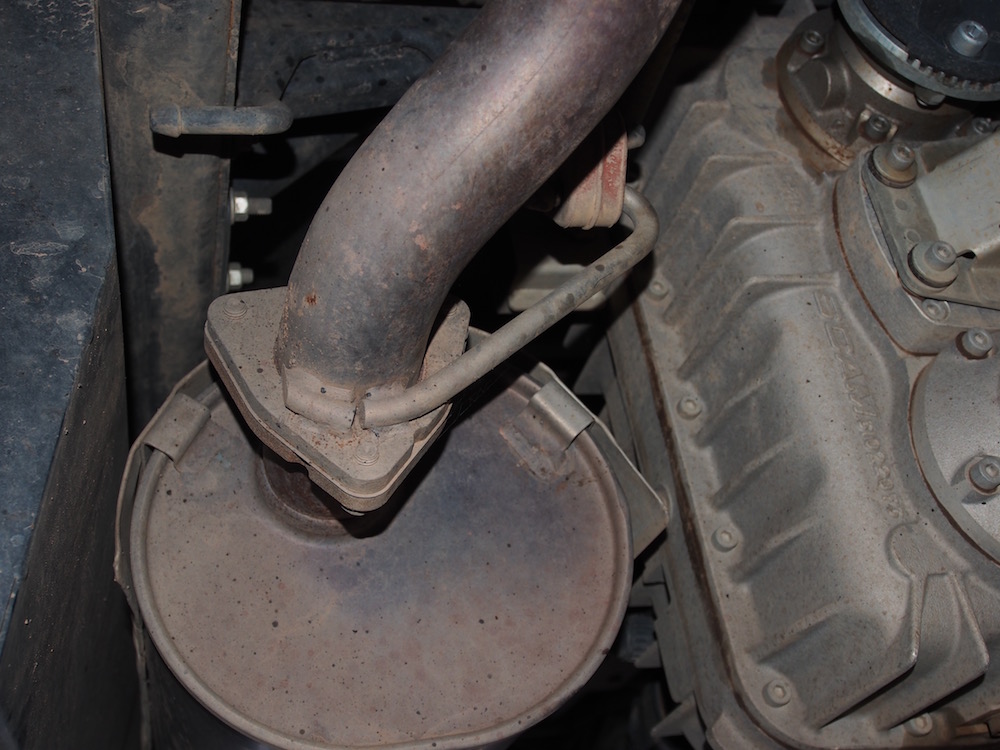
 Soft Transfer case silentblock bushes are the cause of a grumbling vibration when pulling away from a start on a hill, under load or towing.
In the case of another owners vehicle, his rubbers were completely flogged out and he could move the transfer case by hand.
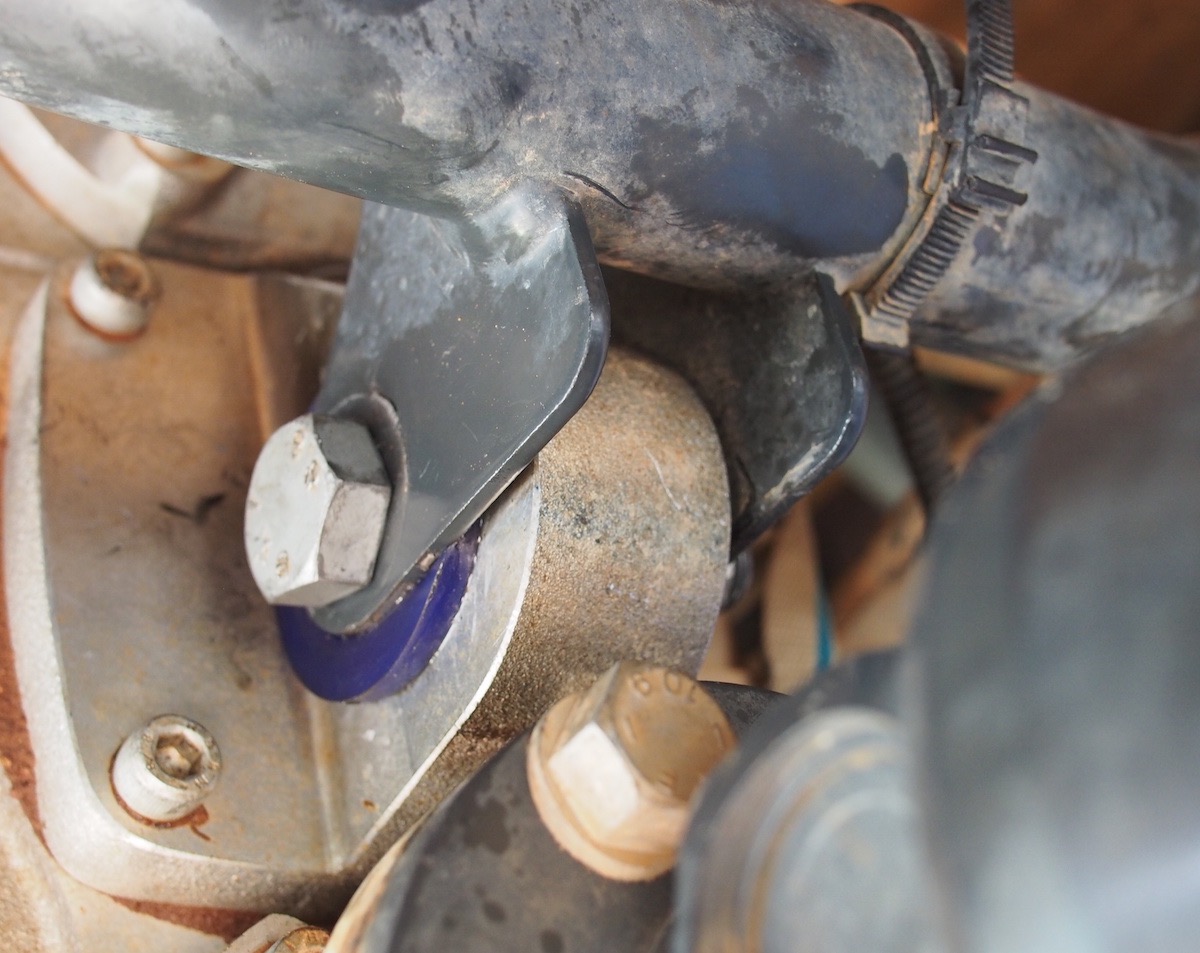
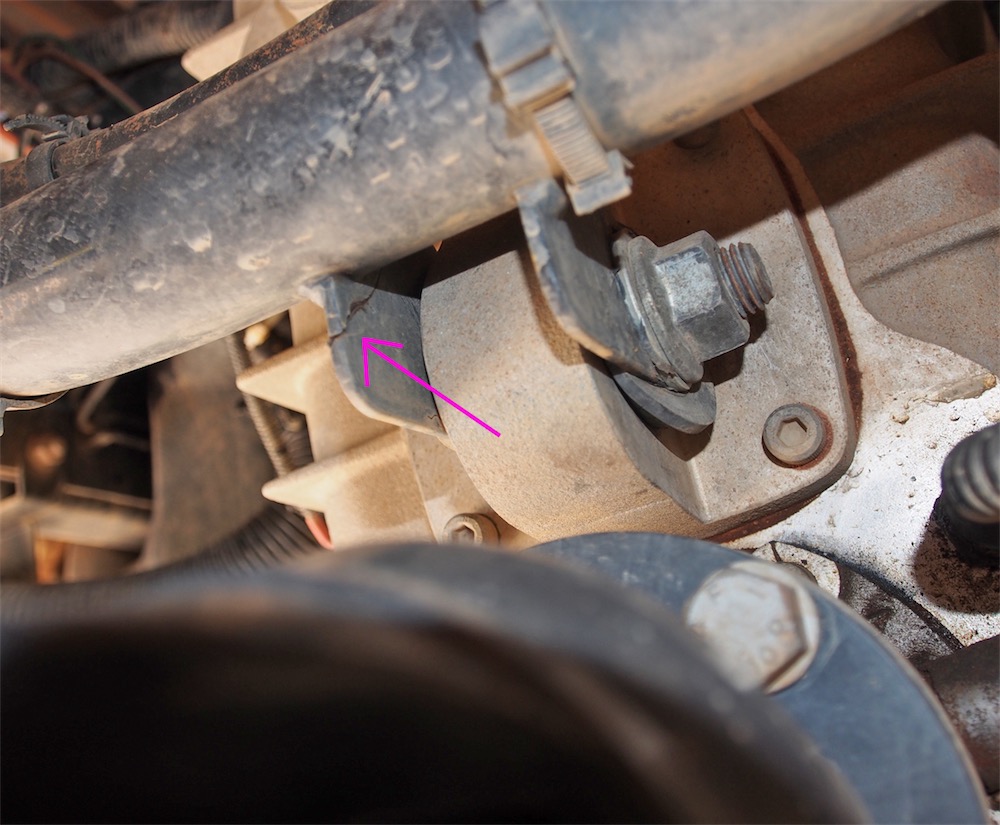
My truck has had this noise since new and was not too worried about it, but whilst I was at Sydney Iveco for a transfer case input seal leak to be fixed under warranty I asked them to check and replace the bushes, they said the bushes are OK. ... In the photo at right it looks stuffed to me. (click any photo to enlarge)
I decided to mount a camera under the truck to look at the transfer case, to see how bad the mount bushes really are, I was shocked to see the transfer case flopping about, This video was on a smooth bituimen road, up to 25kmh only. No wonder it makes a loud rumbling vibration when Im releasing the clutch when towing.

 If the bushes are so stuffed after 45,000 km I decided to fix it properley myself rather than get it fixed under warranty, after all the problem would be back soon enough if 'genuine' bushes are used, its my opinion that they are not 'fit for purpose'
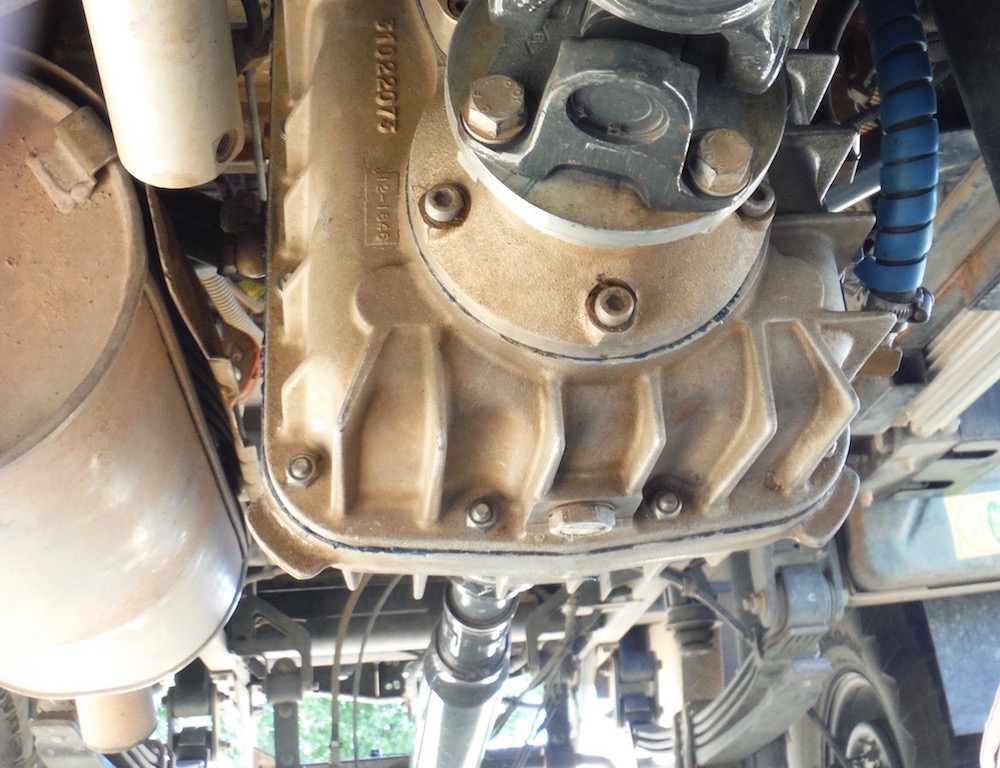
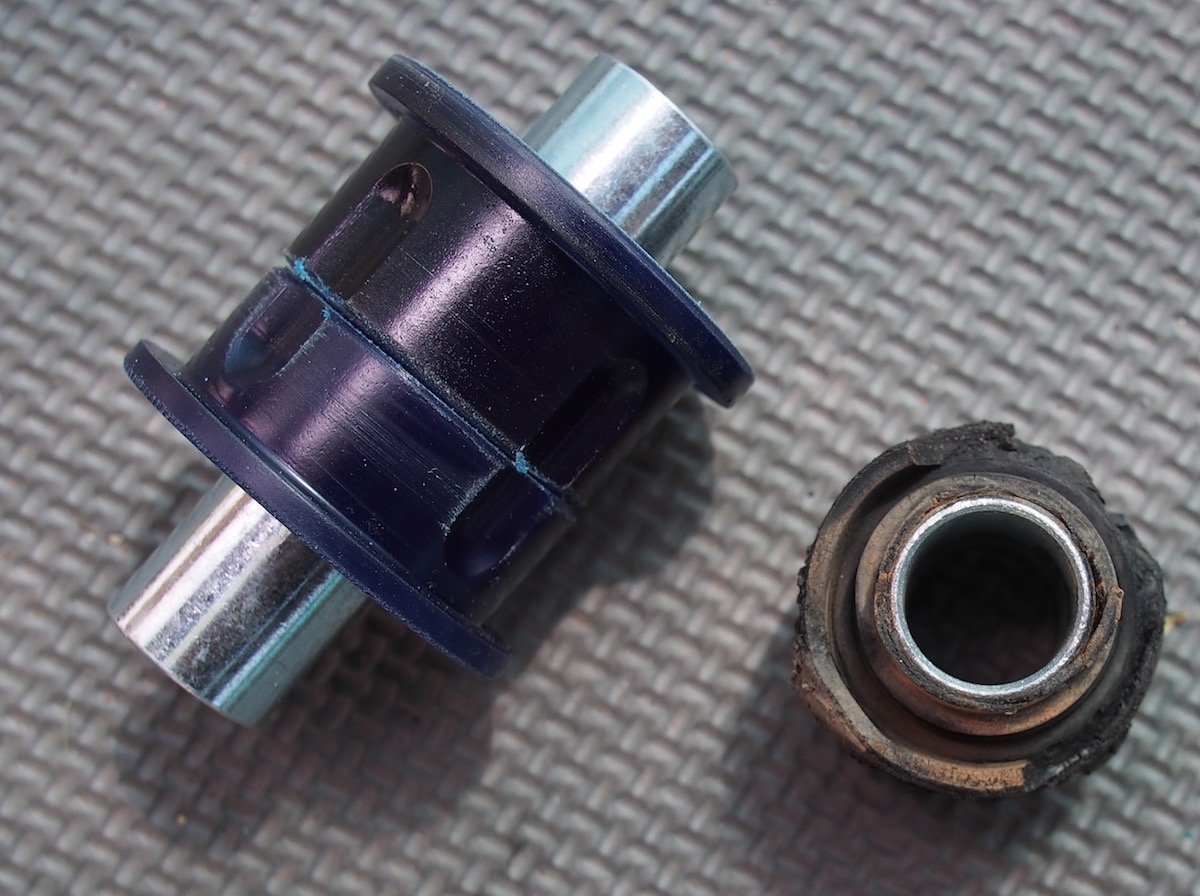
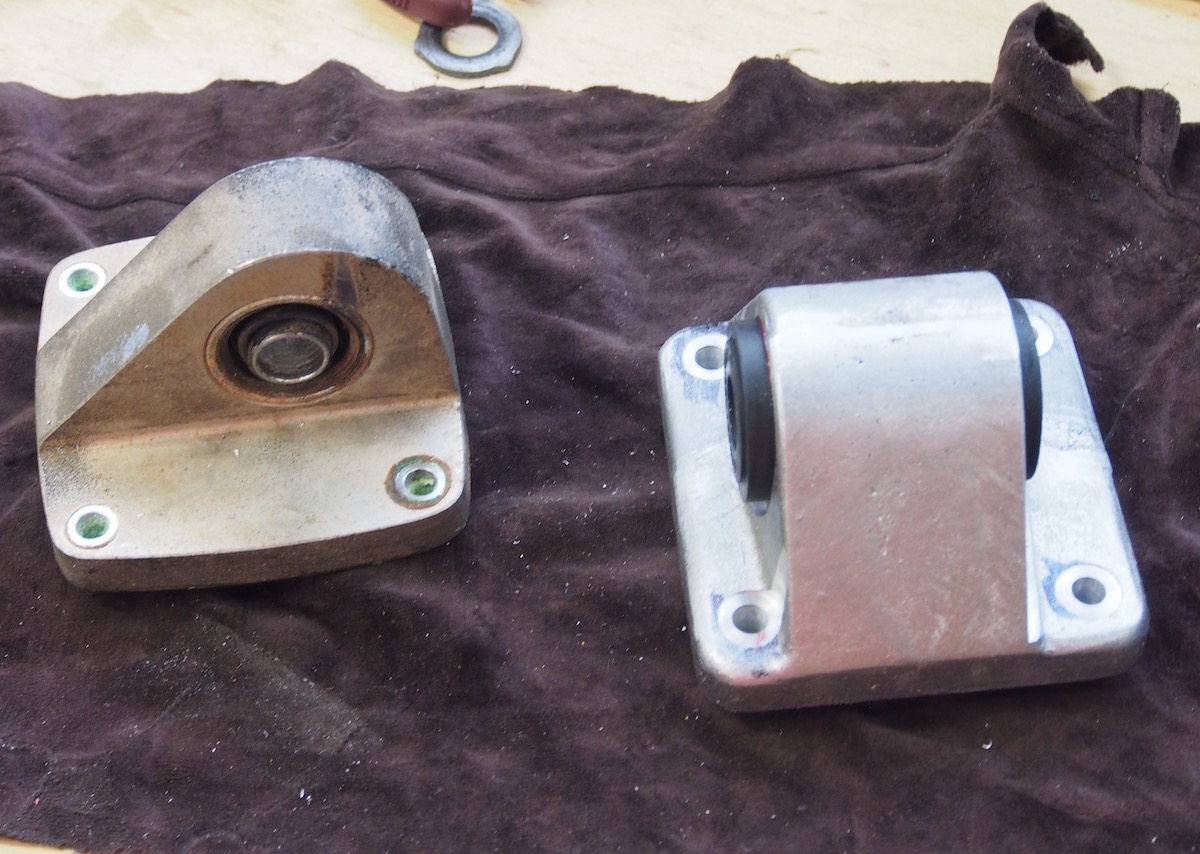
I modified some Jeep Superpro Urethane spring bushes to fit , I made a complete set but only installed the rear center bush at this stage, When I lowered the Transfer Case (using Jack below & a sling above) what was left of the rear bush just fell out onto the ground. The top two bushes still inplace. (Iveco part No 42559937) The photo shows a set of the Poly bushes I 'made' next to the failed Iveco bush, Rather than use the Jeep crush tube I cut the original tube from the mangled bush and burned off the excess rubber to clean it up ready for re-use, I was suprised at how easily I could cut the rubber with a pocket knife. I have been restoring and modifying 4x4 vehicles for 35 years and have only ever seen such a buggered bush in the spring eye of a 1950 Series One LandRover that had been lying forlorn under a tree for 20 years.
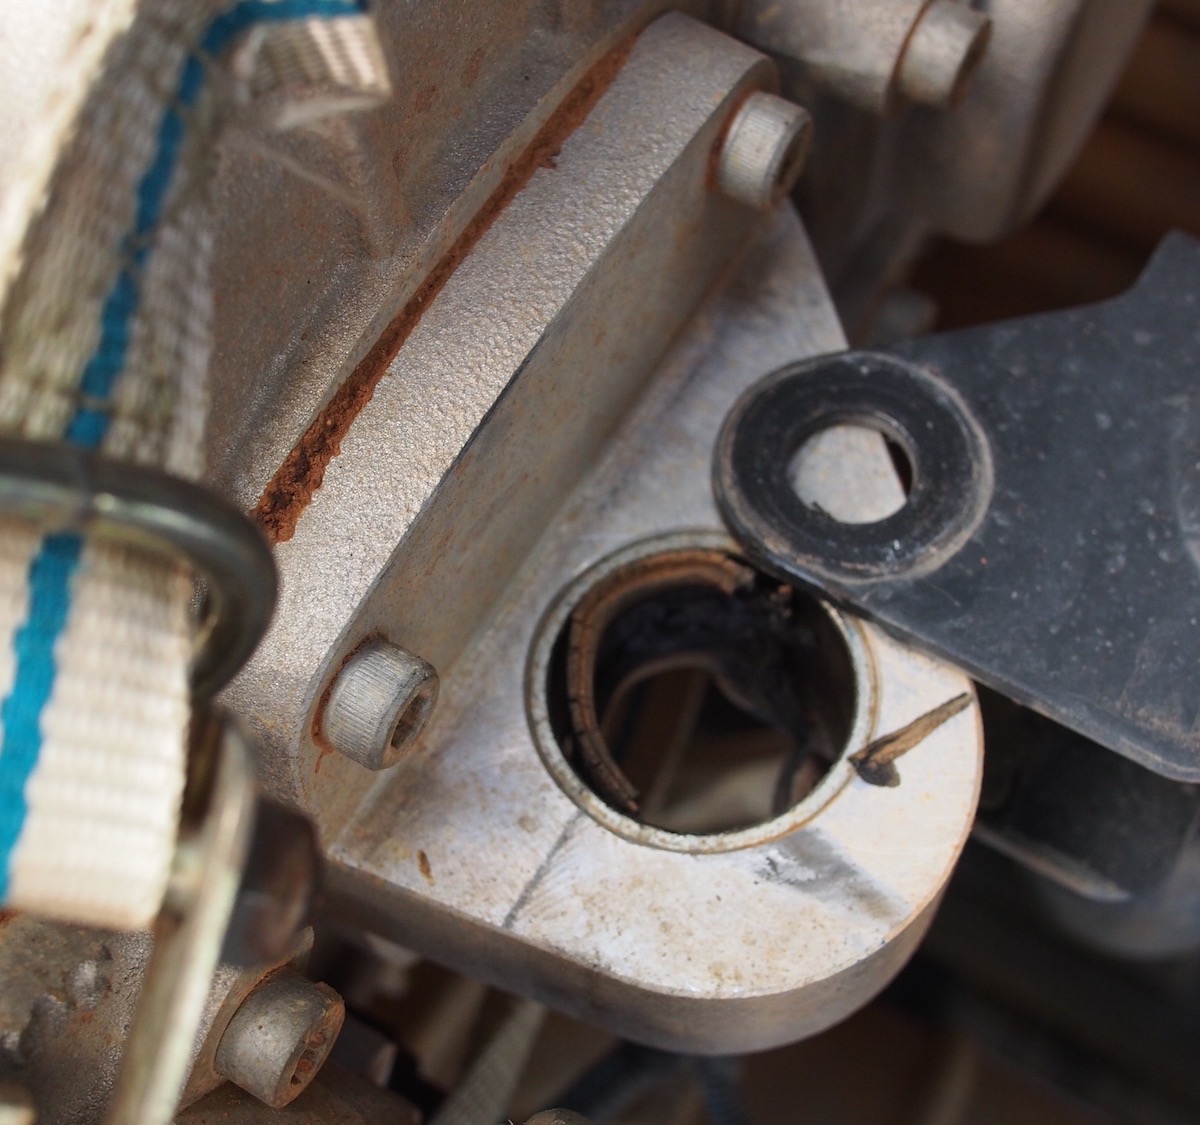
 Check out the photo at left, It's the empty hole where the bush fell out. Note that I'm leaving the outer steel sleve from the original bushing. No need to get it pressed out. ( replacing with genuine bushes involves complete removal of transfer case and a hydraulic press to remove and replace bushes) You can see by the marks on the alloy that the transfer case has been banging onto the mounting lug. And the photo at right is the top left TC mounting ear, the alloy has also been banging onto the mounting lug. The original top bushes are still intact.
 The photo at left shows the new bush installed, this is done insitu, using a bolt and washers to 'press' it into position using special installation grease, once the poly bush was fitted I carefully jacked the transfer case back into place, using a pair of butter knifes to guide the flanges of the bush into place, The flanges help locate the bush as it's not adhered to the crush tube (a lot of use that was on the genuine) and will stop the metal to metal contact with the mounting lugs. The bushes can be made by machining down SuperPro SPF0108, or SPF0109 Jeep rear spring eye bushes.
The video below shows the transfer case movement is now acceptable, even with original worn top bushes. No banging or vibration felt yet, the big test was taking off in 1st gear uphill whilst towing the van - no wobbles. Got up to about 60kmh in this video. OH and no more excessive backlash through the gears that I had become accustomed to as would do in a 30 year old Range Rover.
Update, May 2015 Iveco are now well aware of the transfer case mounting bush issue, and now actually check and replace as part of normal sevicing,.... they are working on a solution.
Update, December 2016 Strike out the above comment, Apparantly Iveco do not give a shit. A fellow owner just had his truck in to an Iveco Service Center to have an oil seal replaced . They failed to diagnose a loose transfer case. Graham actually knew about the failing Iveco bushes and had Travel Trucks Poly bushes fitted.
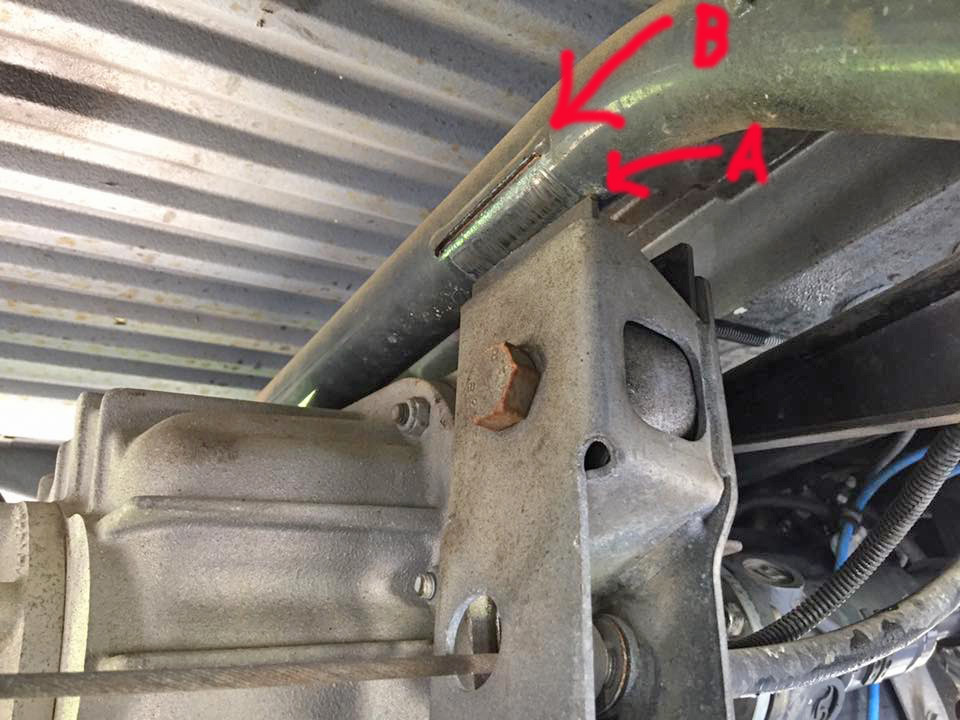
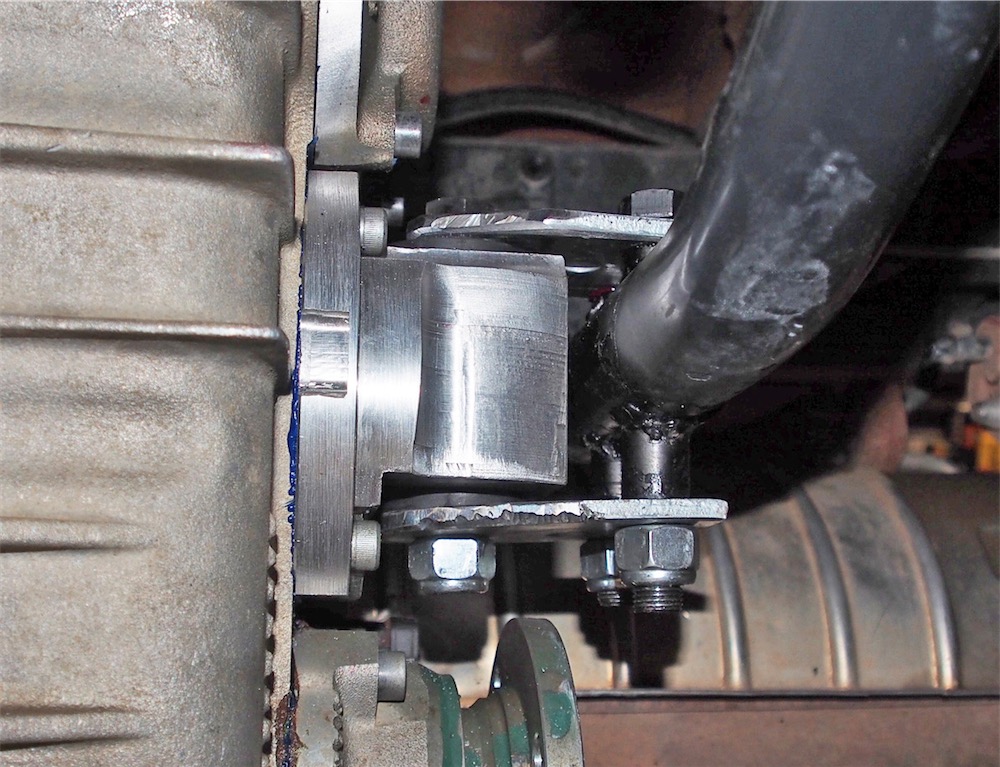
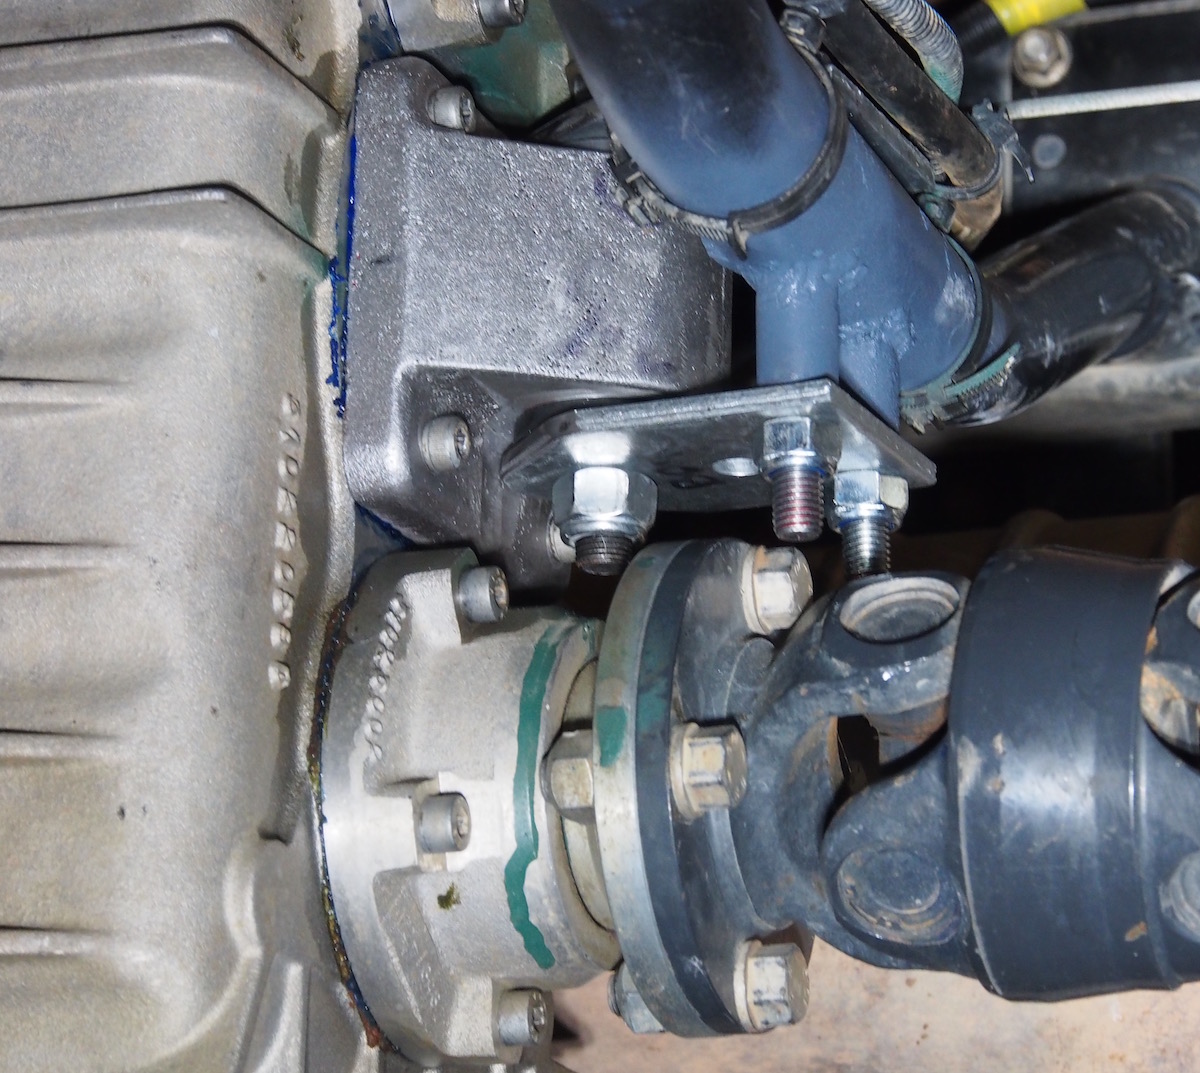
Photo at right (click image to enlarge it) shows the right hand side mounting bracket had broken completely off the transfer care upper mounting crossmember. You can clearly see the welds have broken, bracket (A) is supposed to be attached to the crossmember by the weld (B)
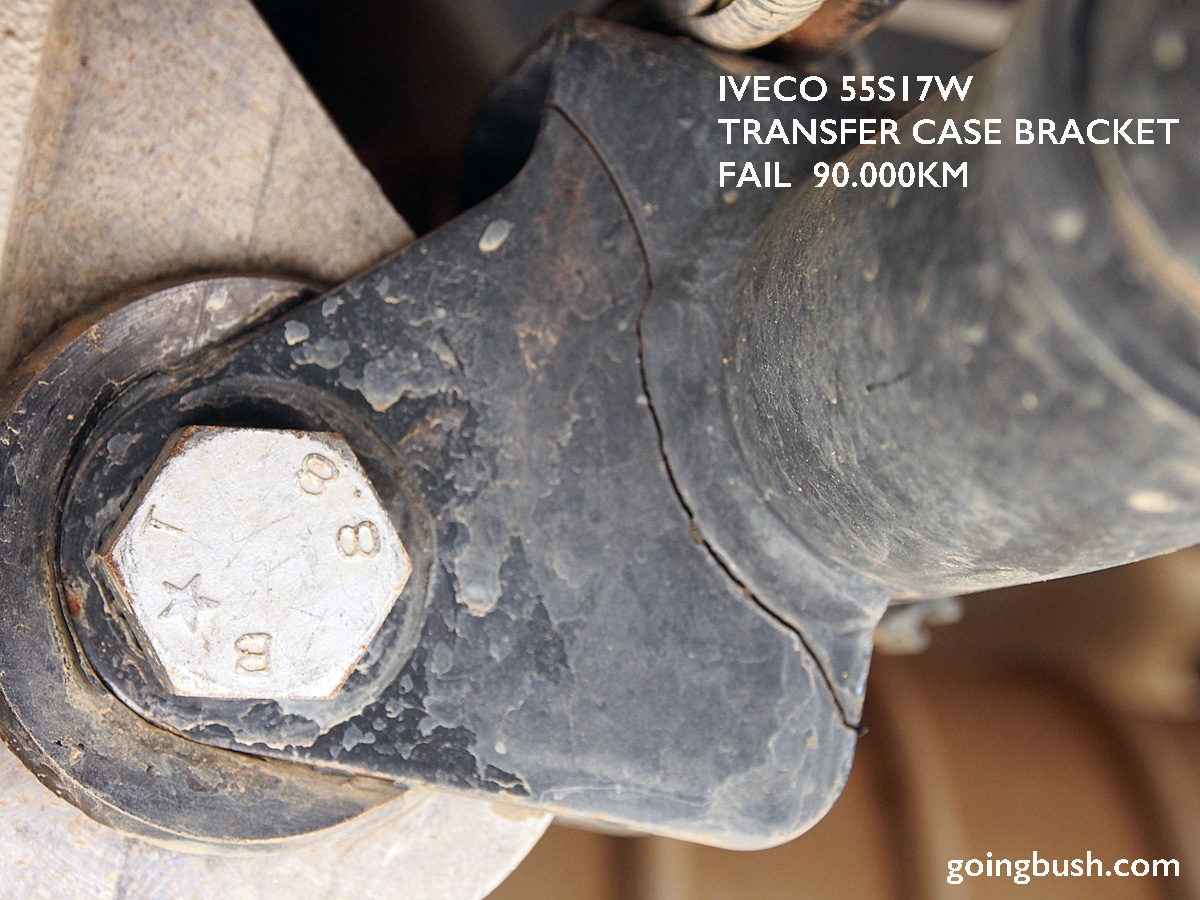
The Rear cross member mount broke on my truck at 90.000km This was also with Polybushes fitted
Fellow Iveco 4x4 owner and master of lateral engineering (Bush Mechanics) Marcus Tuck of Tucks Travels had a theory that the rear Transfer Cash bush needs to be vertical to counter the rotational torque of the transmission.
I have been collecting images and information , as scant as they are, from all over the internet for the 3.5 years that we have owned our truck.
Its actually quite frustrating searching for information on SCAM because google results return 56,486,437 hits 56,486,436 being internet scams and 1 being what I'm looking for.
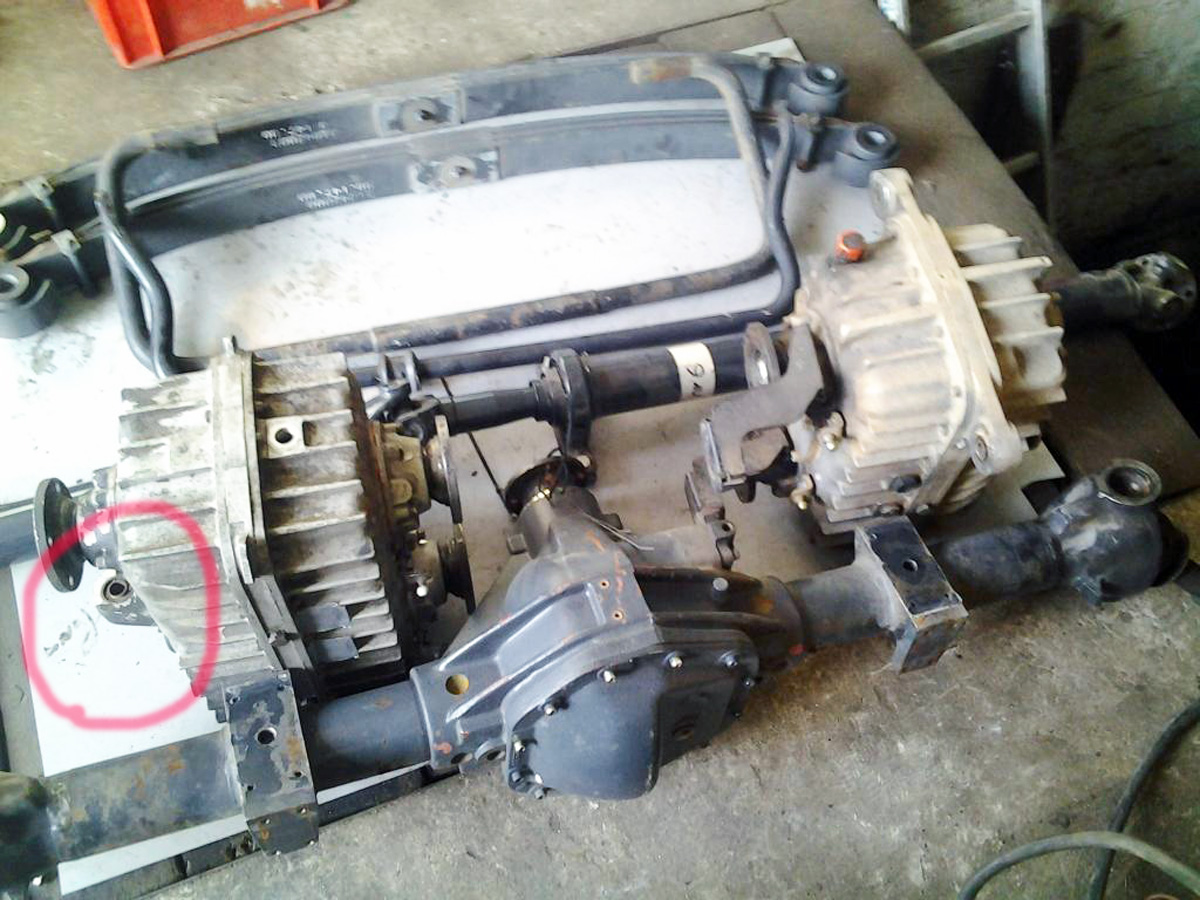
Lo & Behold in my image collection is a picture of a very early SCAM transfer case with a vertically orientated rear transfer case bushing. Perhaps this is how it was originally intended. (click image at left for enlargment)
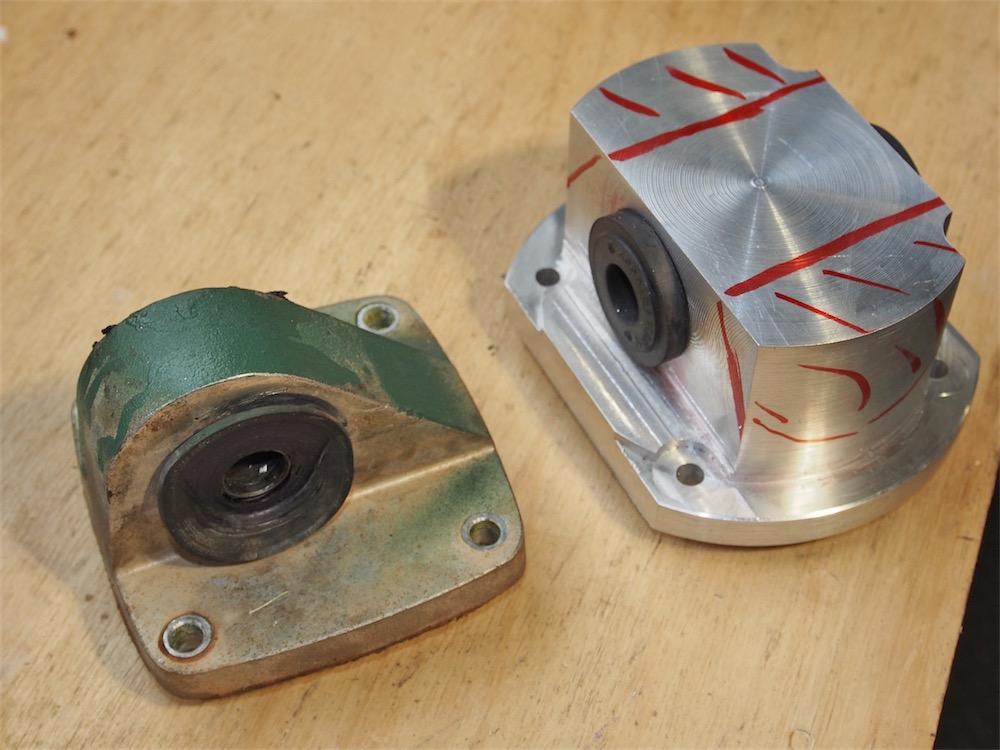
The Vertical orientated TC mount makes so much sense to me that I made up a proof of concept rear mounting block with a vertical rubber bush ( LandCruiser 40 series Suspension rubbers) . In operation it is silky smooth & rock solid. The top two mounting rubbers are polybushes. Think this may be the answer to TC mount failures.
Rear mounting re-engineer Prototype
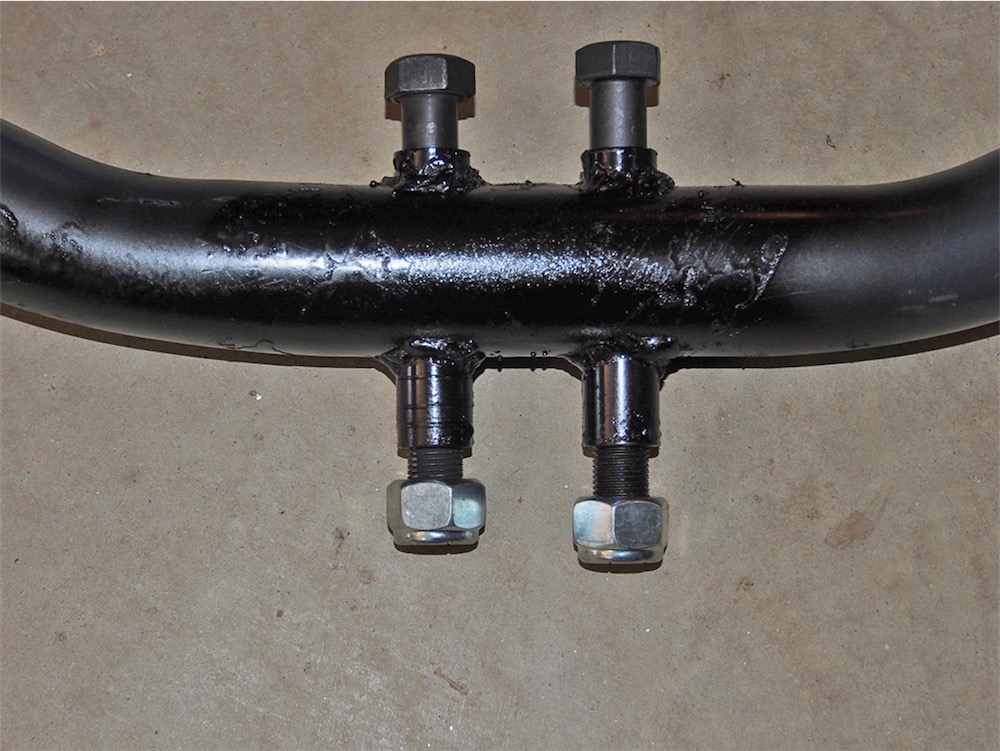
18mm Tubes have been welded into the original rear mount crossmember (which has the original mount brackets removed & flipped) , 18mm crush tube inserted into Landcruiser rubbers. 3x Bolts are UNF Landrover Series shackle pins. 6mm steel plates to hold the lot in place ( original Iveco brackets are 3.0mm)
Prototypte Billet version is completely successful but too expensive to produce, Cast versions are now on the cottage industry production line.
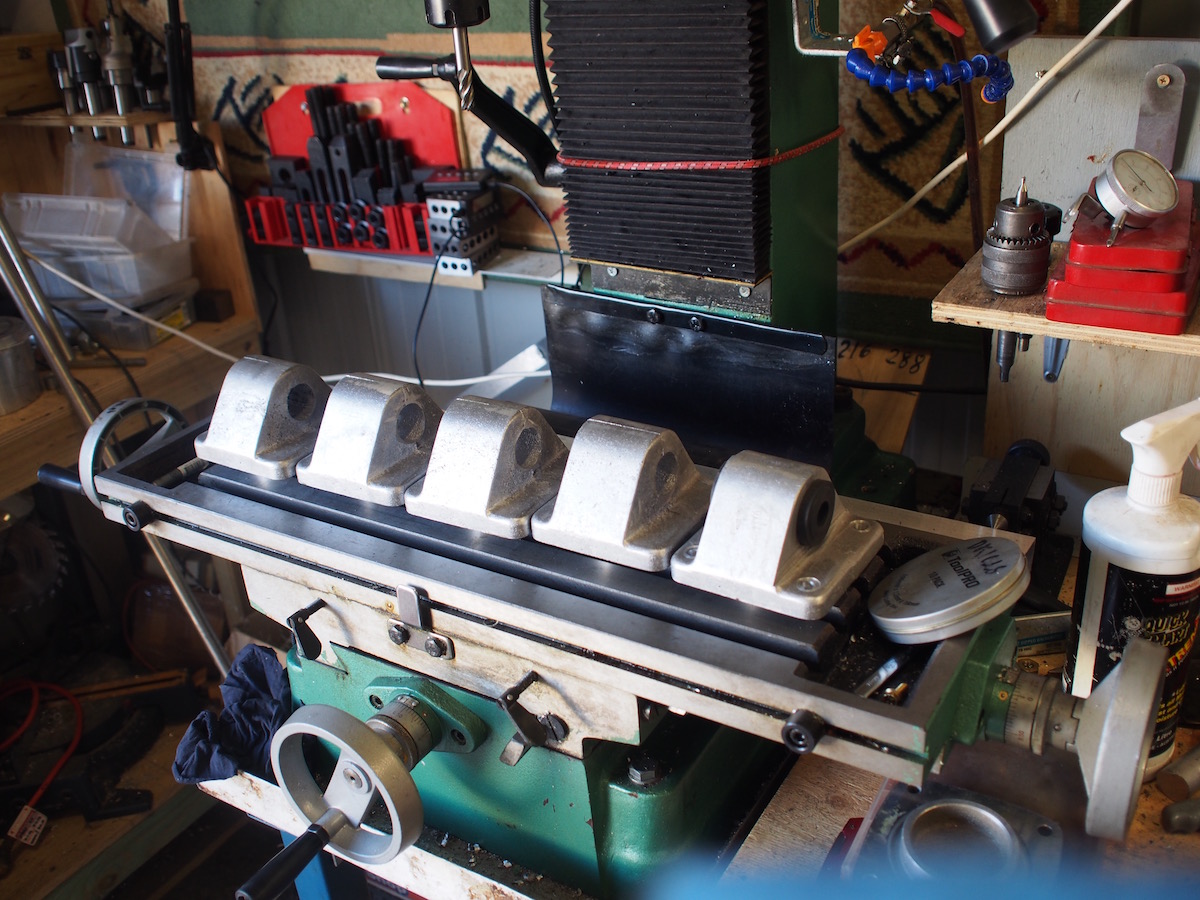

A limited number of Redesigned TC Mounting Kits are avaliable as of April 2017, enquiries to goingbush@mailcan.com Feel free to download the DIY PDF Instructions outlining the steps to install redesigned rear mount
More Transfer Case improvments
 The other Issues I needed to address :
1/ Leaking selector rod seals
2/ Leaking input shaft seal
3/ Leaking center diff lock actuator
4/ Relocate Level plug to correct height
Selector Rod seal upgrade

These transfer cases leak oil, They leak a lot of oil. Leaking Selector Rod o-rings are not unusual. The bad thing is to replace a $1.00 selector rod o-ring requires full Tranfer case removal & dissasembly (2 days) for what would otherwise be a 1 hour, under the truck job to replace external oil seals.
The image at right is from the SCAM TC manual & shows replacement of selector rod o-ring on a very early TC (the casting is different) , as you can see the o-ring fits into a groove in the meat of the front of the transfer case. Selector rod has to be removed to insert o-ring which requires full dissasembly.

 I found both of my selector rod o-rings had been hardened and flattened, one cracked and broke on removal. The nitrile o-rings are only good to 120c but these transfer cases run way up past 120c unless a cooler is fitted, so obviously the o-rings have a limited lifespan.
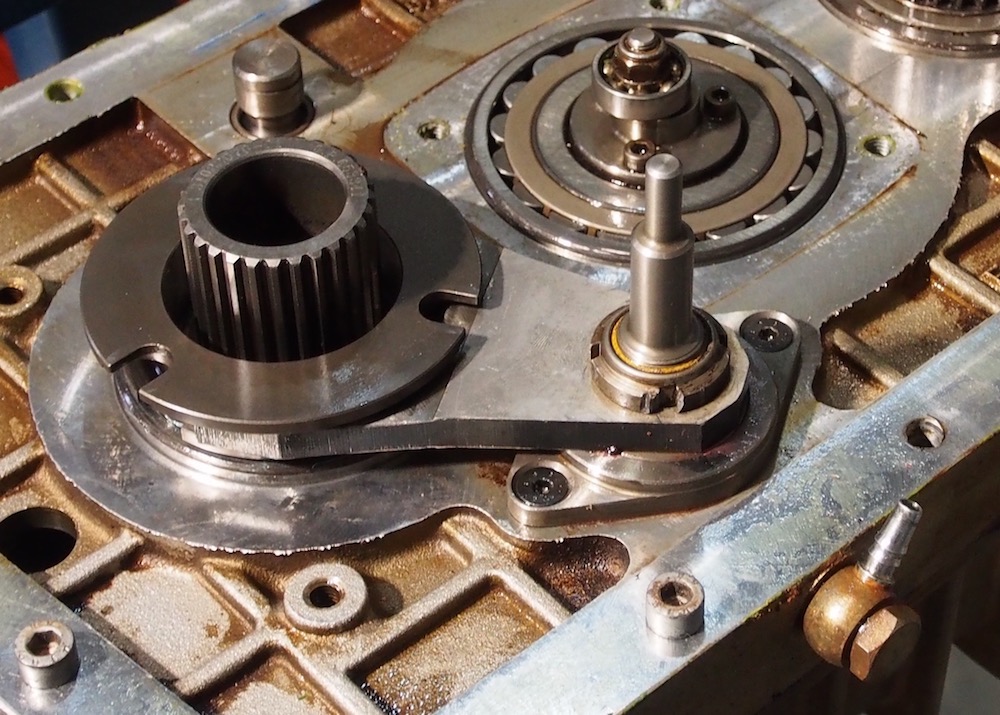
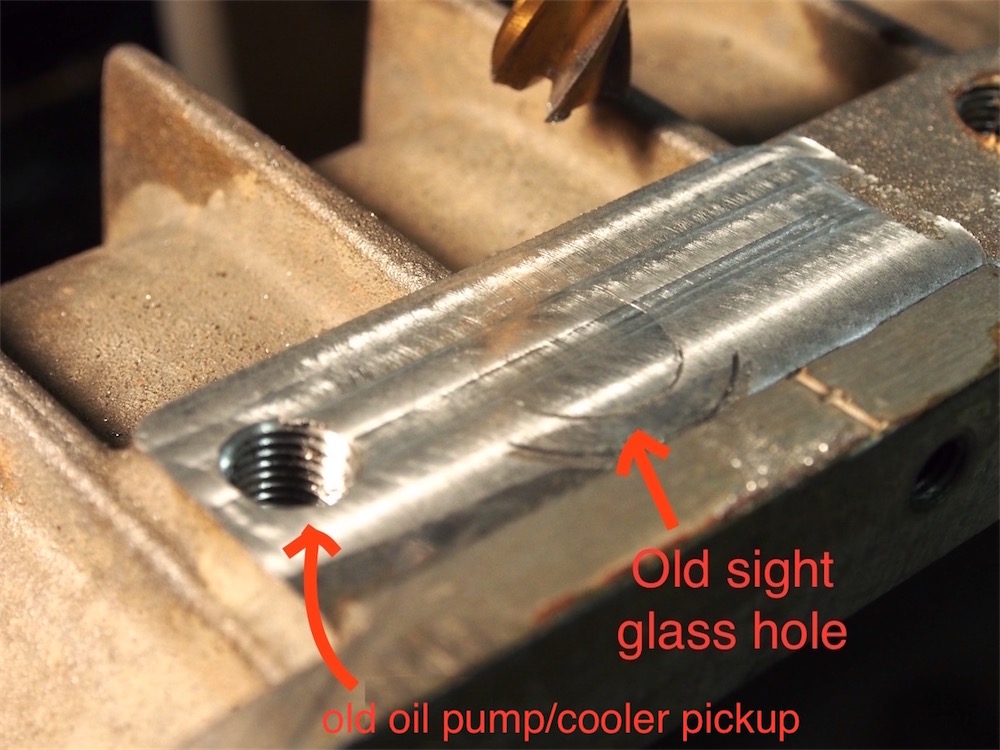
These o-rings stopped sealing oil long ago. My intention was to mill out the front of the housing and insert proper oil seals, but I found the selector rods had worn & ovalated the holes in the casing, so I decided to also insert some steel bushings. Interestingly there is steel bushings in the alloy where the rods pass through the center plate of the transfer case sandwich, but just plain cast aluminium on the front case.
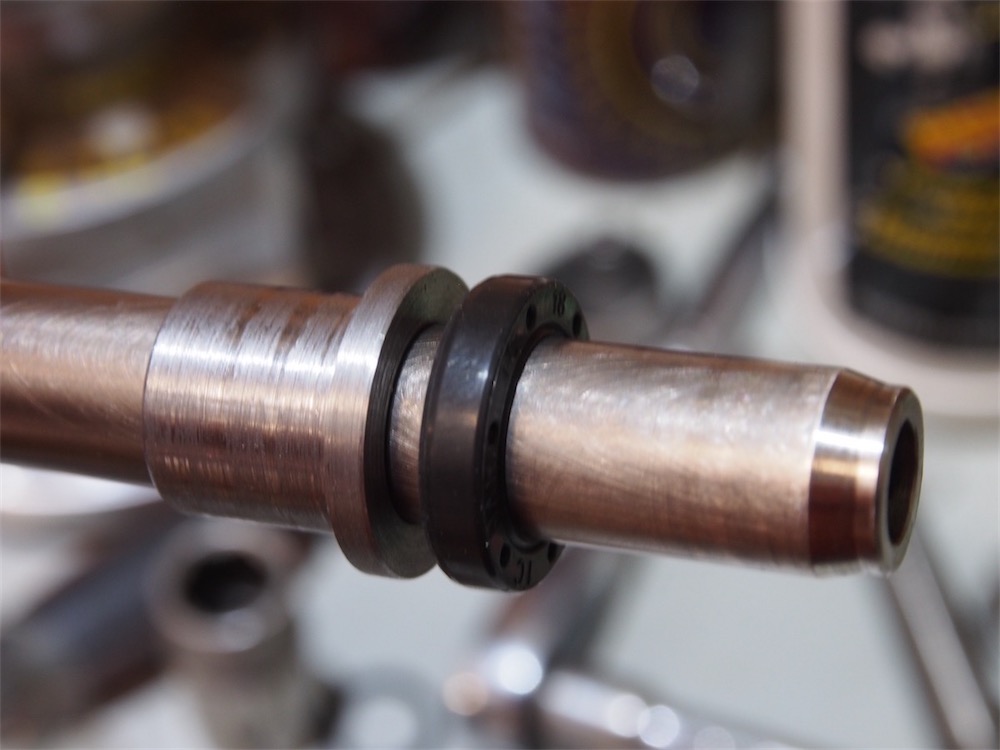
Shown at right is one of the selector rods with steel sleeve and 18x28x7 double lipped Oil seal . The Sleeve is getting shrink fitted into the bored out hole of the front case. (Sleeve cooled to -18c & Case heated to 100c , then slewve pressed in with retaining compound). Once sleeves are fitted to case it is temporarily reattached to the center sandwich plate, and holes are reamed through 18mm all the way for the length of selector rod travel to account for any misalignment.

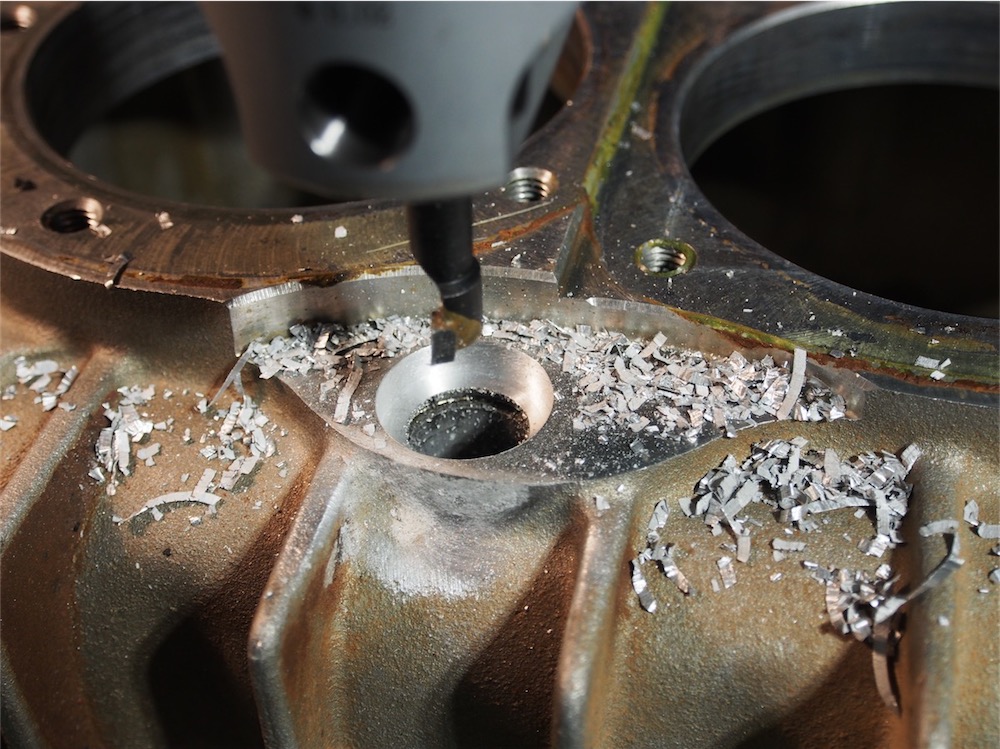
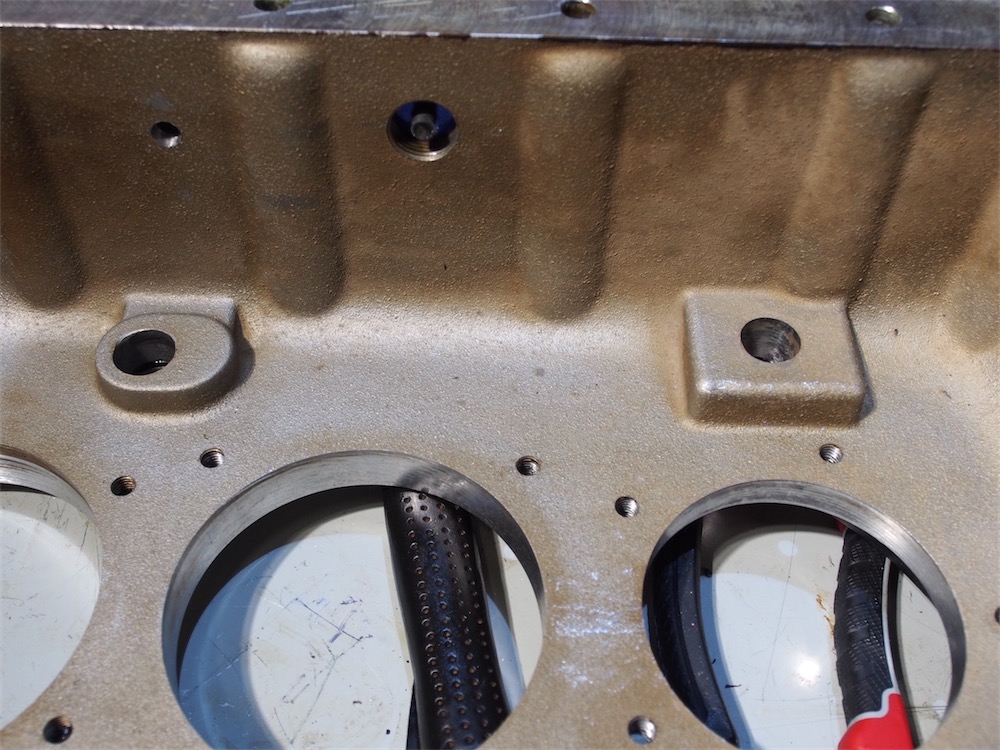
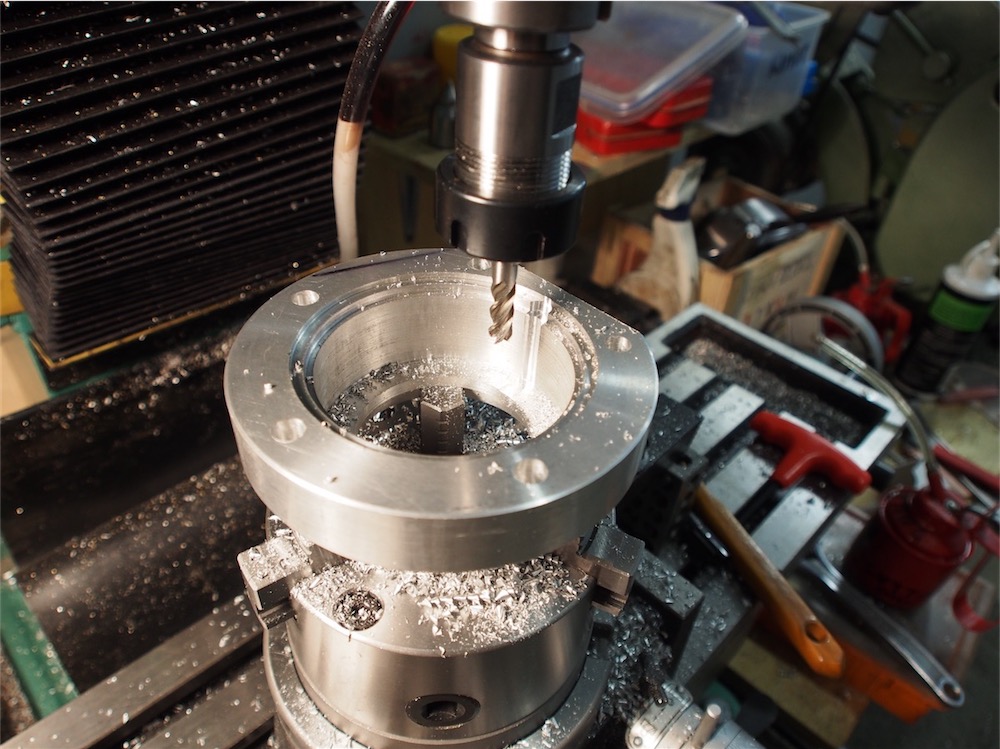
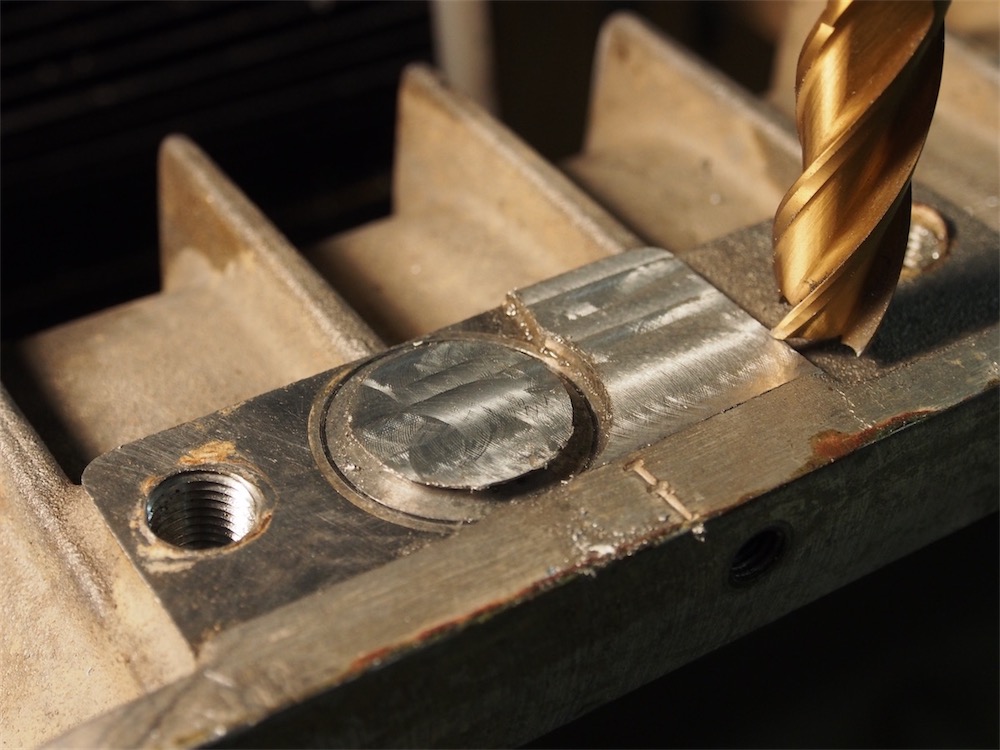
Point of no return, boring oversize holes for sleeve & oil seal
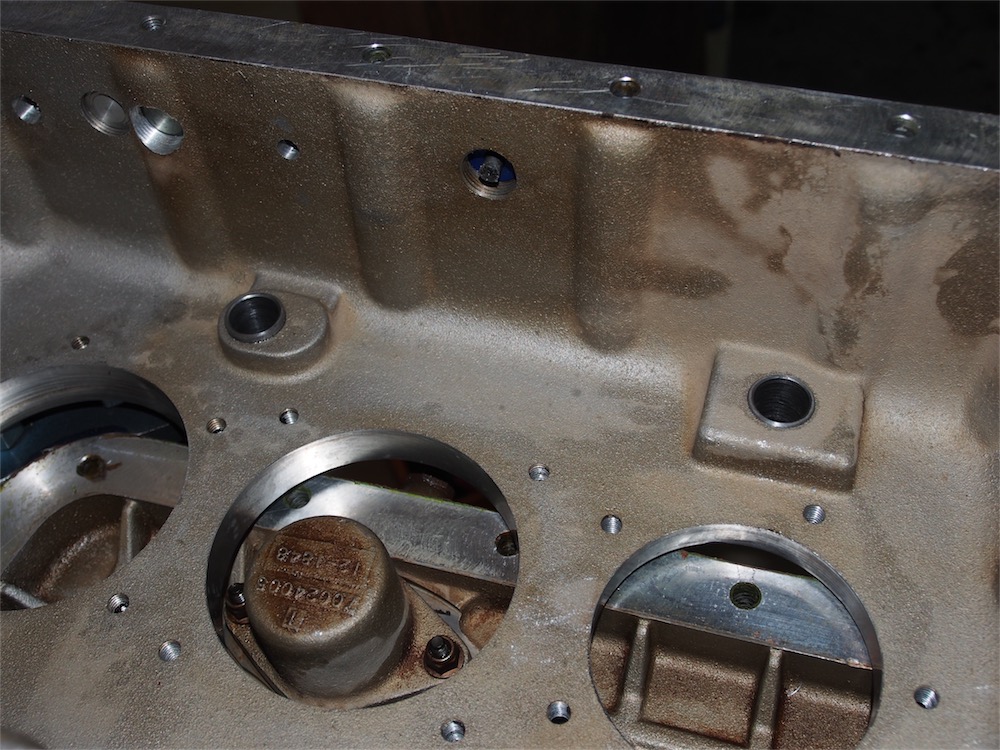

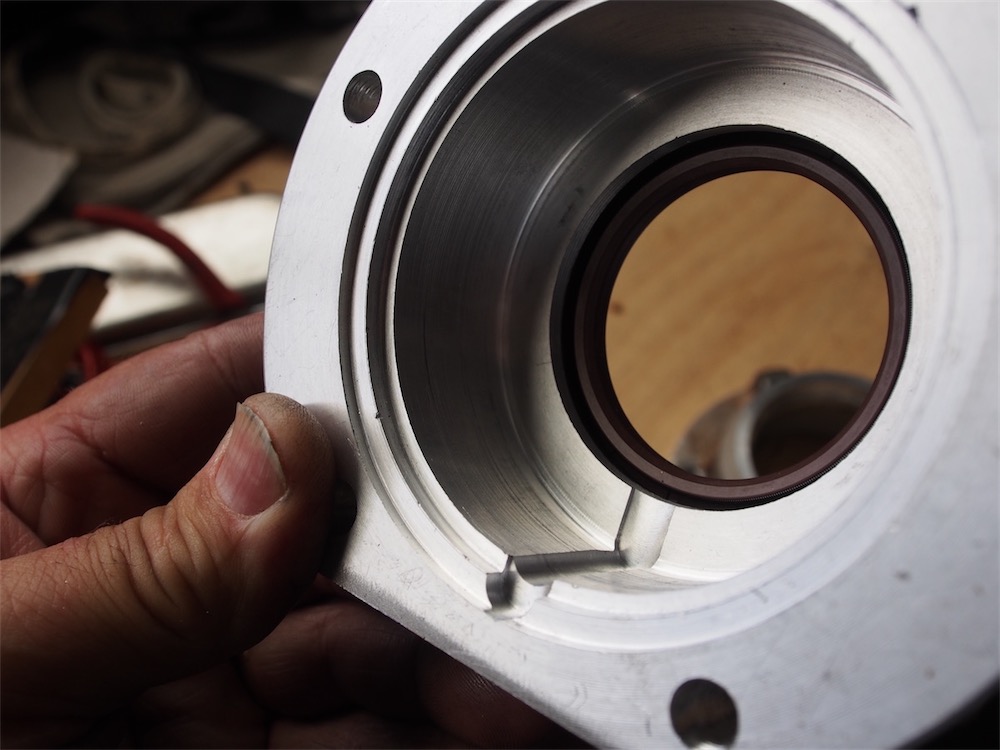
Inserted sleeves and oil seal, how it should be from factory
Input housing seal upgrade
 For some unknown reason SCAM put the Input (and output) housing seals on the inside of the housings, instead of the outside. That is really really stupid, requires removal of housing to replace a simple seal.
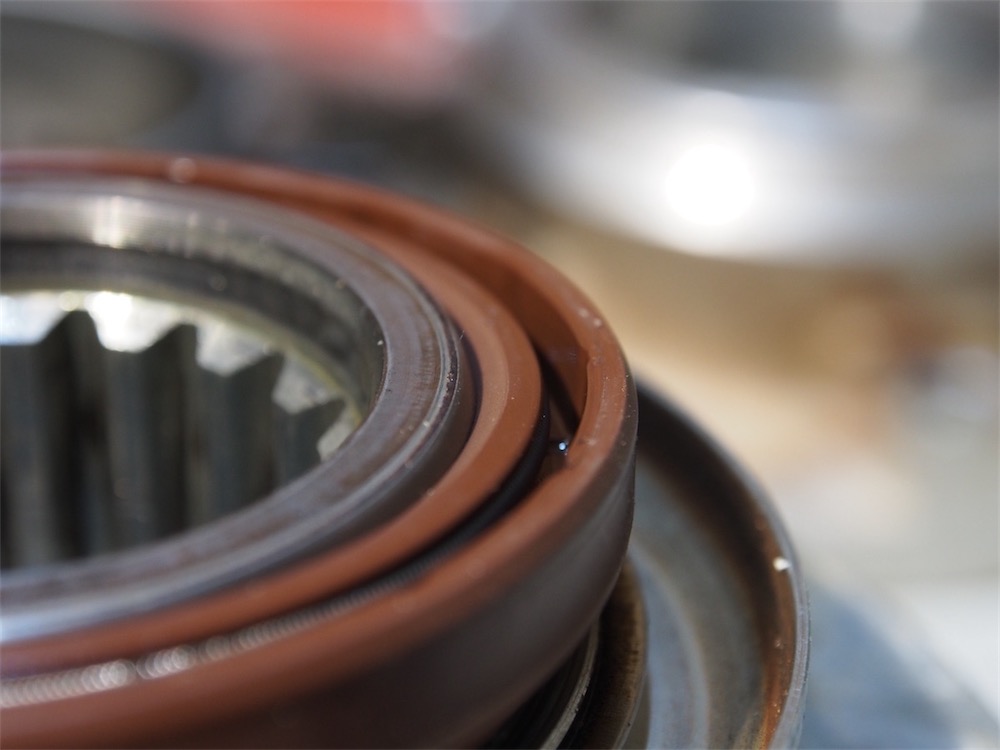
 As can be seen in the image at left the oil seal needs to be pressed into the internal surface of the input shaft bearing housing, This means removal of the housing and disturbing the bearing. It makes no engineering sense.
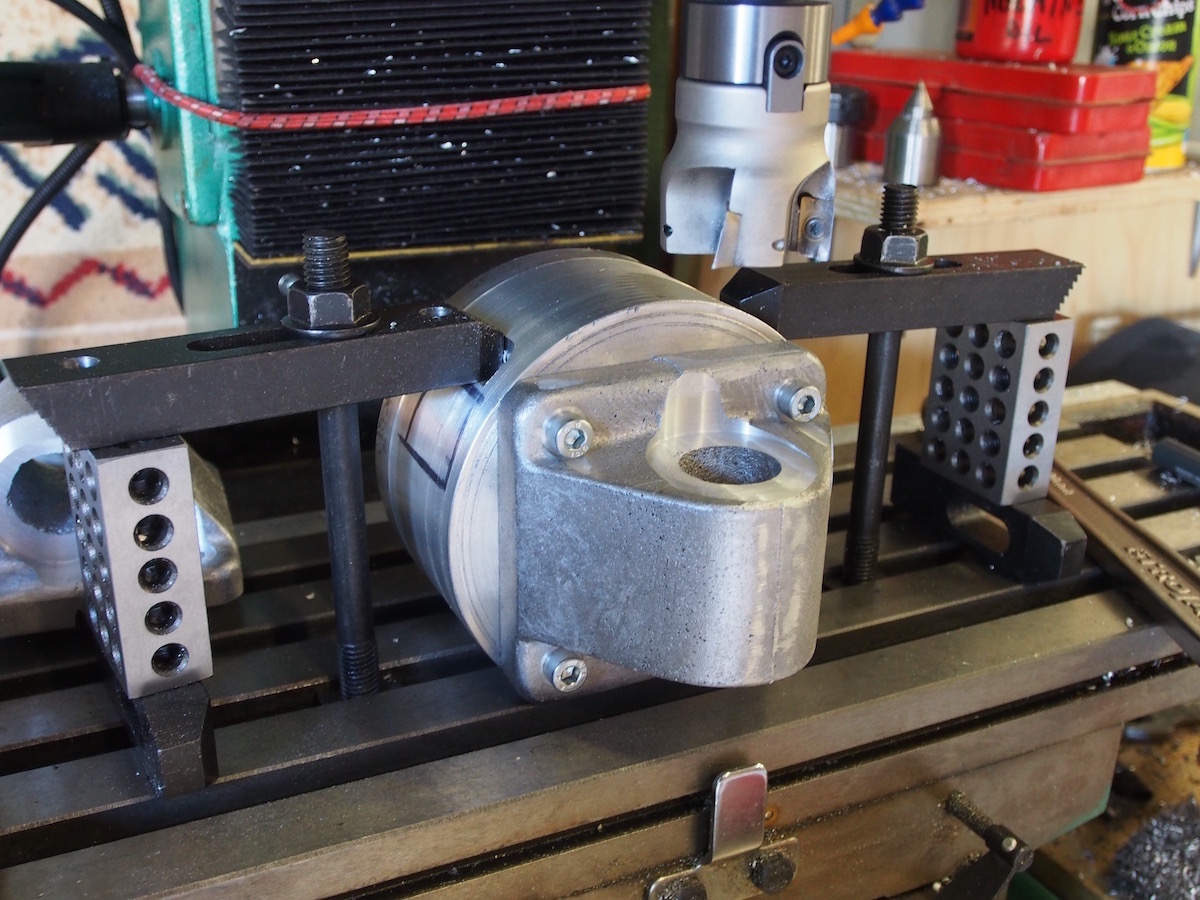
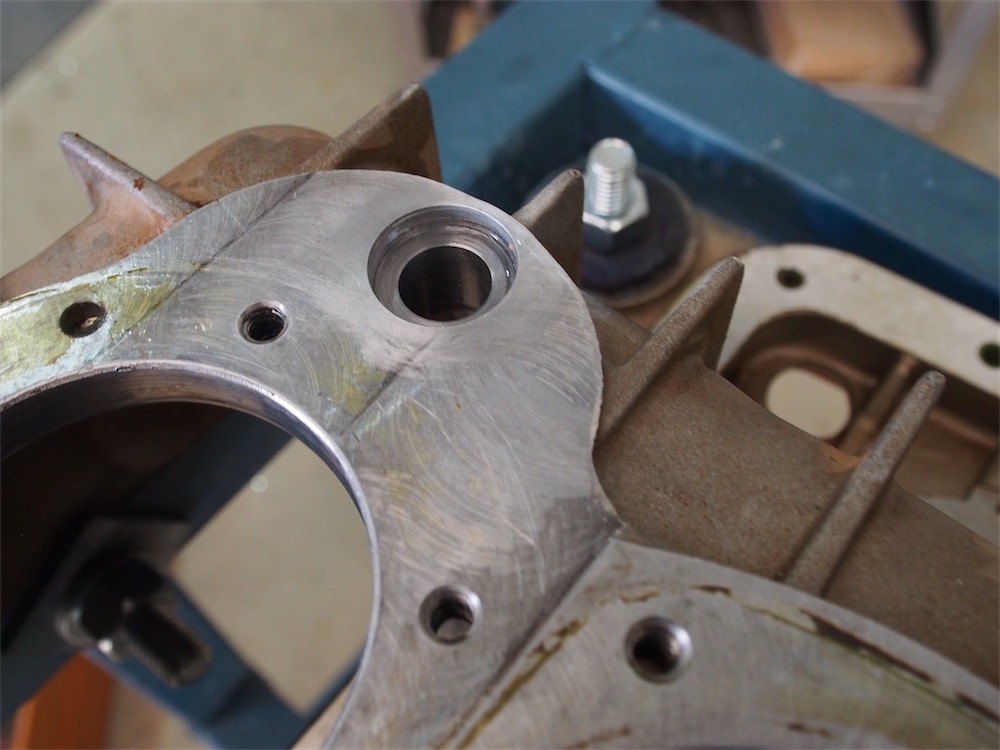
The housing can easily be modified on a lathe to accept an oil seal with the same internal diameter but a larger external diameter (72x52x8mm instead of the original 68x52x8). Future seal changes only need the drive flange removed to replace the seal.
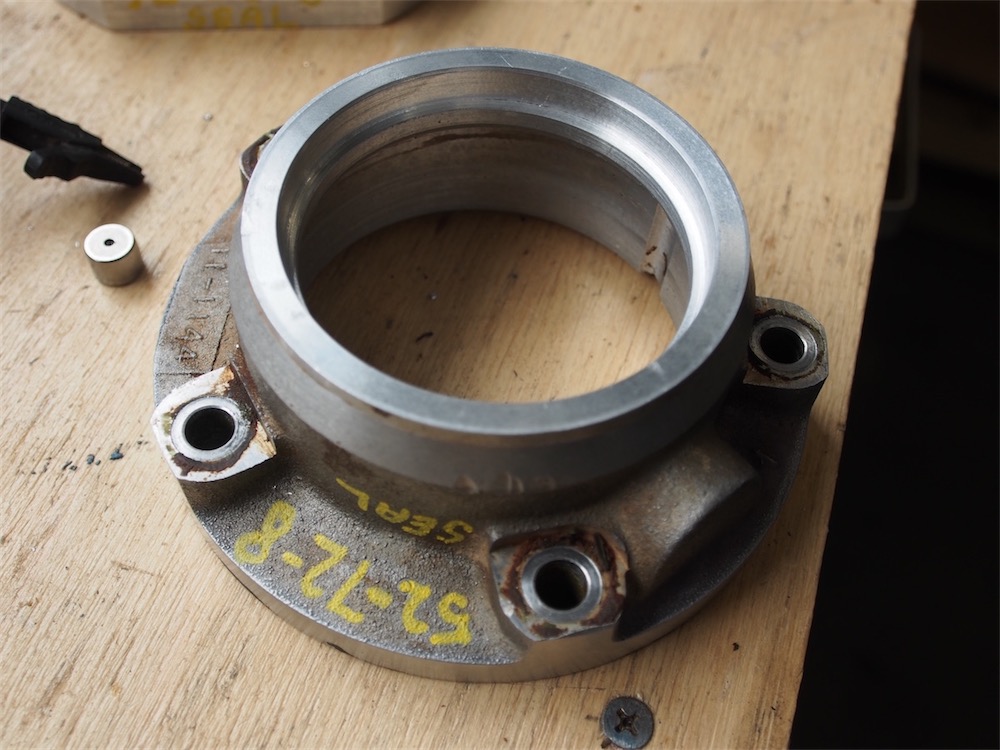

 Above images show modified Input housing, (can do same to output housings), It is clearly a much better idea, The original seal drain gallery fits the bigger seal size perfectly.
No other Transfer case or gearbox in the world has the seals fitted internally, it's just so inconvenient and time consuming to replace a seal, why would the Italians even think to do this ??
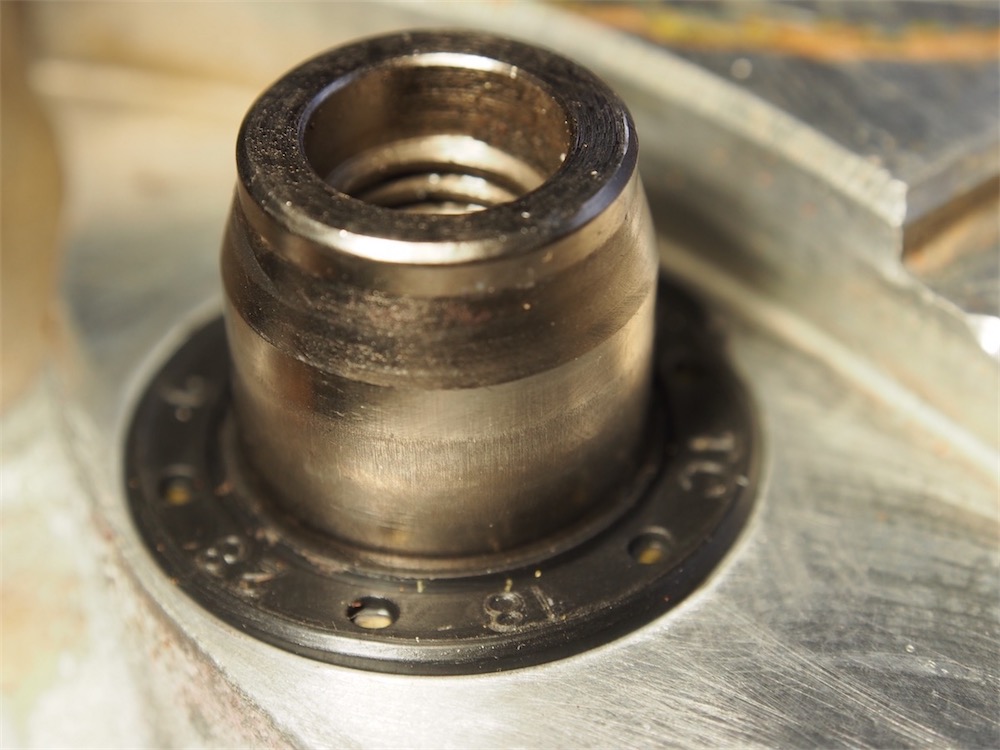
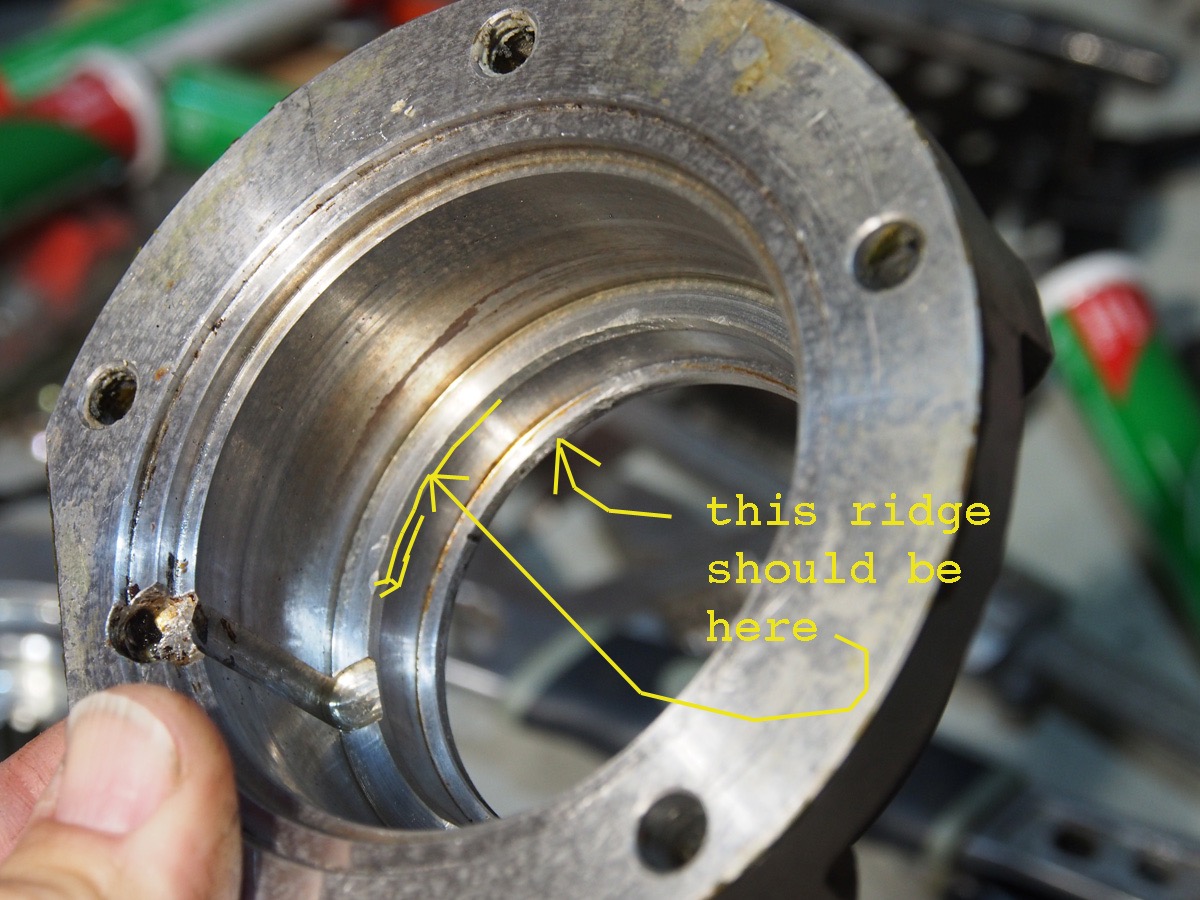
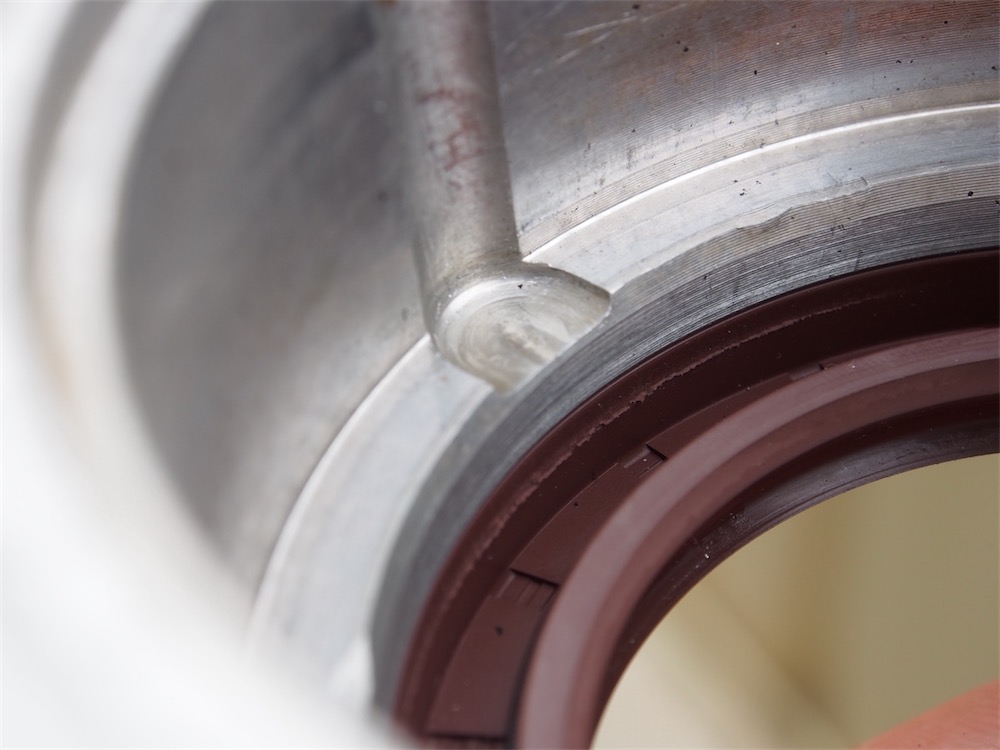
Also note the last image in the above series, it shows where the seal sits on the drive flange surface, in its original position, the seal surface is sitting right on the chamfer where it can not possibly seal effectively and will quickly wear away. Modifying the housing moves the seal forward approx 2.5mm and it sits in the perfect spot. This explains why so many Iveco Daily 4x4 leak oil from the TC input shaft.
The modified Input housing is perfect but I decided to make a new input housing from scratch (as if I dont have enough waste swarf), I had a spare original 68x52x8 seal so made the new housing to suit (per images below).

Center Diff Lock Auctuator
For almost 2 years my Center Diff Lock actuator has been leaking. The Fluid drains out of the APU (Diff Lock hydraulic pump) and pollutes the transfer case with Hydraulic oil, causing an increase in TC oil level with the excess blowing out my breather into a catch can. This also has not helped with the above oil leak issues.The leaking occurs even without using CDL, because when you start the truck the APU self checks & charges the accumulator, when the APU runs dry the dashboard "Check" light illuminates. It got to the stage where I started using Synthetic GL5 Gear oil in the Pump so at least it did not pollute the TC, this also slowed down the leak & operates the Diff Locks just fine.


Oil Fill / Level Plug
Early on there were some alarming reports about some transfer case failures on Australian delivered Ivecos, attributed to the them having been over filled, The problem with overfilling is oposite to what one might think, the oil foams, which causes overheating & lack of lubrication.
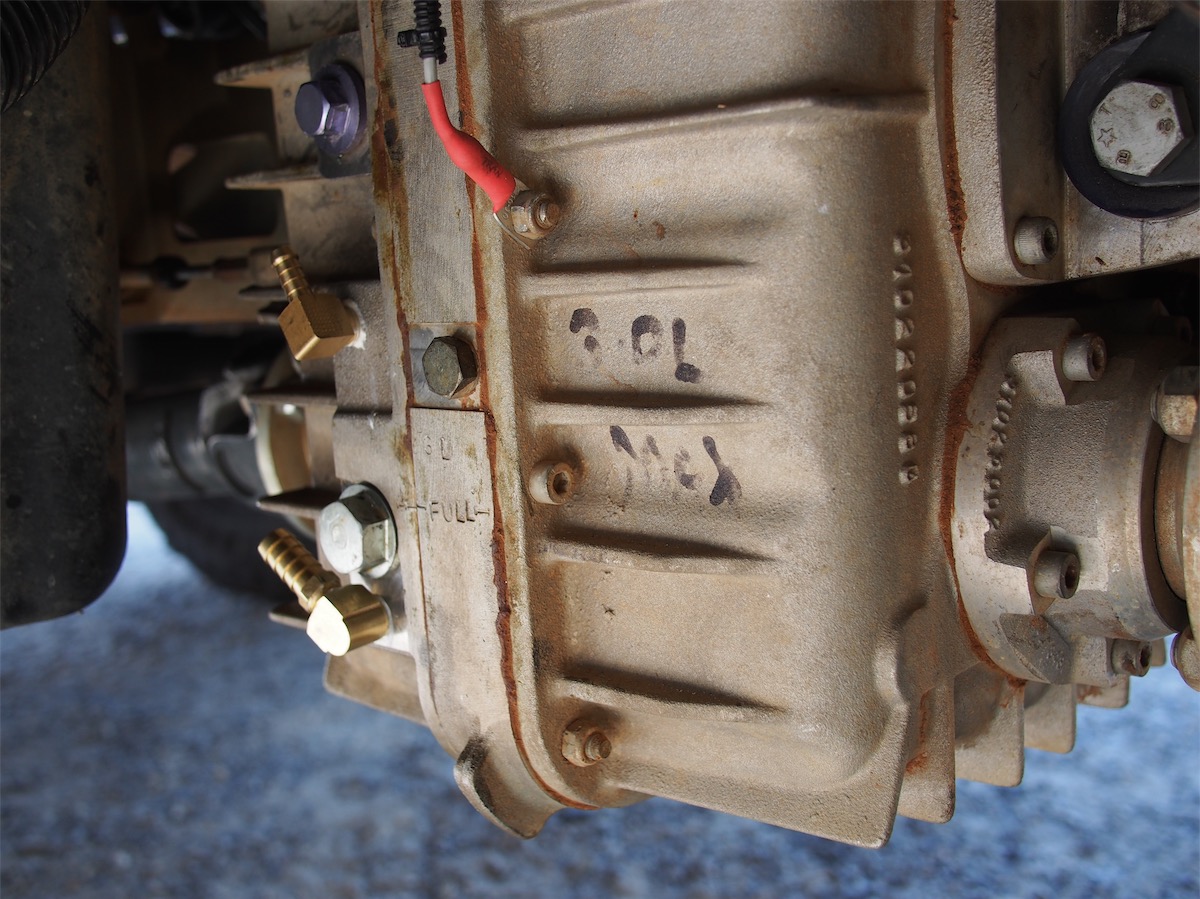
 I can understand how confusion as to the correct oil level exists, because the oil fill plug is about 150mm higher than the oil level, Just about every other piece of mechanical equipment ever built has the fill plug where the oil level is, but not so this transfer case.. There is a plastic oil level "sight glass" sits just below the correct oil level.
 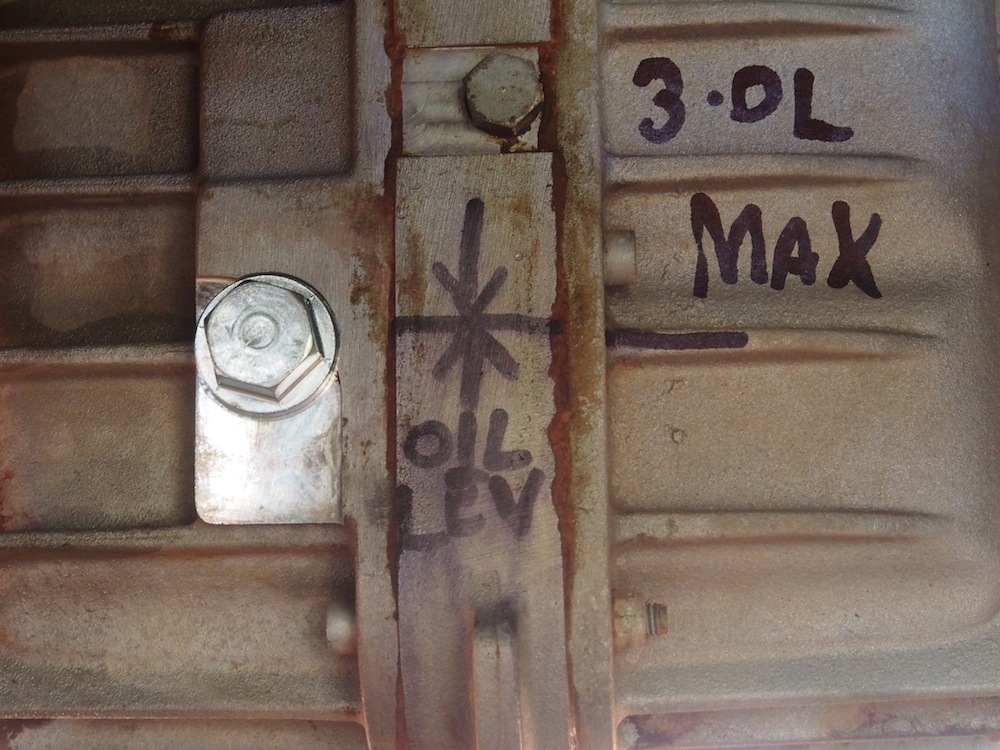 You dont really need a sight glass, if full the sight glass shows the same as if its over full, which is pointless, if the sight glass shows low or nothing, well you'd have to be blind freddie not to see a mess of oil over the transfer case and on the diff and up the backside of your truck !!
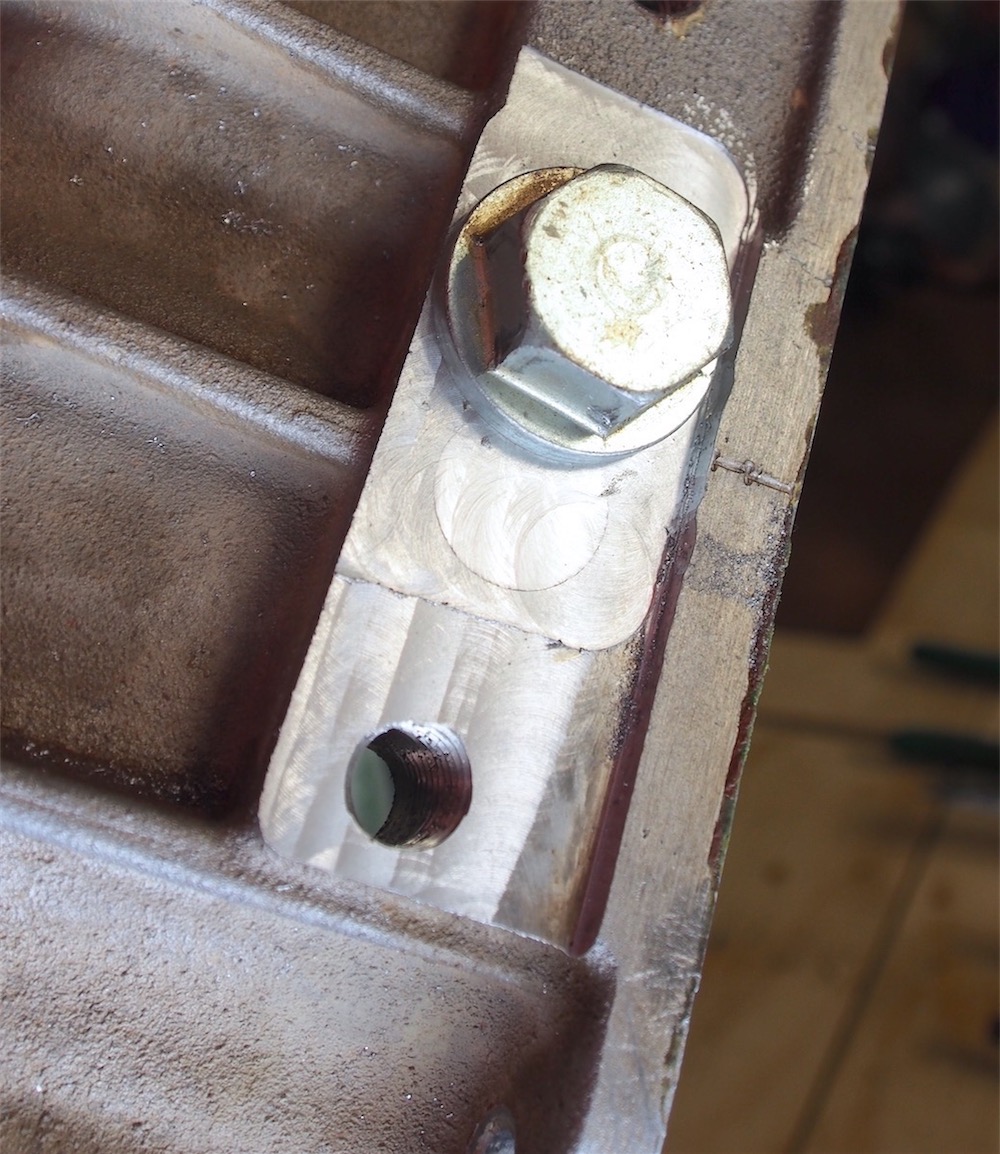
My advice is to replace the sight glass with a metal M20x1.5 sump plug! Also replace the plastic fill plug with a metal plug, the plastic plugs come loose - if you overtighten they will break, you do not want to loose one in the bush. ( Subaru WRX and Isuzu truck Sump plugs are both M20x1.5, so not impossible to obtain)
You dont actually need a sight glass, just fill with 3.0 L 75w90 GL5 Gear oil (from the upper fill hole) & your done.
Not being one to leave things alone, whilst the transfer case was out for repair I decided to fill the sight gllass hole with an Alloy bar threaded to M20x1.5, premanently thread locked into place & sawn off. Then mill, drill & tap a new Bung hole where it should be, the bottom of the hole sits at the correct oil level. As it is on every other Gearbox & Transfer Case in the world.
makes me wonder who designed these things anyway .... 
IvecoCare to the Rescue Iveco Australia are using this rescue as a feather in their caps, but really the deeper issue is why did the Transfer Case fail, and many more have failed, Iveco Warranty is great, they keep replacing $15,000 Transfer Cases, but are doing nothing to solve the problem.
Report and Images from Mark at Earthcruiser
On the 18/06/15 our customers were 2 weeks into their Earthcruiser Expedition, their location was 1.4km south of Well 25 in the Harbutt Range, just north of where the Talawana Track crosses the Canning Stock Route, very remote & approximately 470km out of Newman the nearest town, when their vehicle experienced a setback, the transfer case had locked itself out of any range and the vehicle become immobile, their only communication was via a Sat phone with minimal reception.
Our customers advised us of their situation at about 7pm and in-turn we advised Iveco, and their response was immediate, Iveco Support actioned a plan within a couple of hours.
Iveco Support engaged, Chris @ WA Iveco for their support; the plan of attack was to remove a transfer box from a new going vehicle at WA Iveco on Friday 19/06/15, as towing was not really an option. The transfer box and all the necessary tools and equipment were then expedited to AHG Service Centre Newman, WA (Iveco Support & Response team).
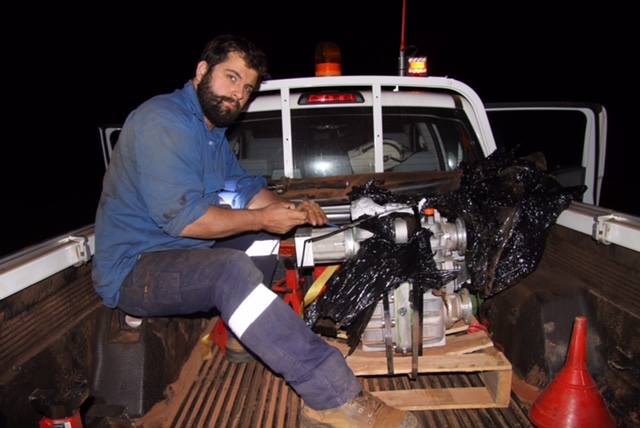
 The Transfer box and equipment were sent overnight “critical” to Newman 1200km away, after receiving the transfer box and all the necessary tools and equipment overnight from Perth, 20/06/15 Saturday, around midday the two mechanics (Tom & Cameron) from AHG Service Newman (Iveco Support & Response team) headed off with all the gear and also enough supplies required for the two mechanics and also their two stranded Iveco customers in a 4WD. It was a two day
  exercise in total & Tom & Cameron (Iveco Support) were required to camp out overnight due to Iveco’s fatigue management requirements. 450km of that distance was unsealed road & tracks and the condition of the track after the rain meant that travel time just to reach the Iveco and their customers was 9.5 hrs away. To give you an idea of how remote & how baron the terrain was it took Tom & Cameron 3.5hrs to drive the last 85km, one sand dune took the men 1hr to get over when they were only 4km from the stranded couple.
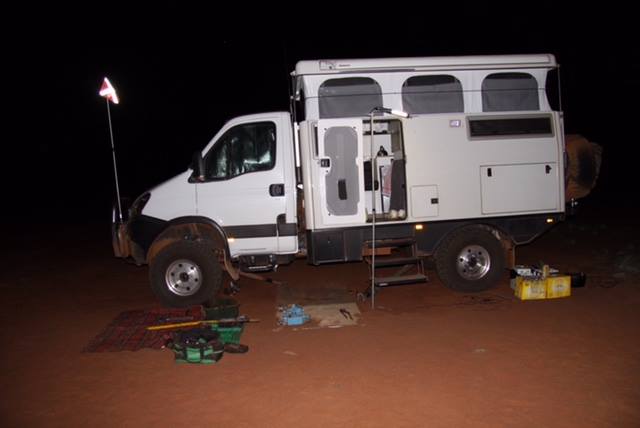 By10pm the mechanics had located the Iveco Earthcruiser and got to work immediately, the customers could not believe the response time that Iveco had managed (with help from Tom & Cameron, AHG Service Centre, Newman) to get all this organized and to reach them at such an isolated location.
By 1am the transfer box was out. Early next morning, Sunday 21/6/15 Tom & Cameron were at it again at 6 am and by 8.30 am the new transfer box was in, the oil was replaced and all other necessary components were checked and given the OK. Iveco didn’t stop there, they also included refreshments for all involved, the Iveco AHG Service Centre, Newman support & response team, Tom & Cameron and the customers all enjoyed a “post repair” celebration after their epic ordeal.
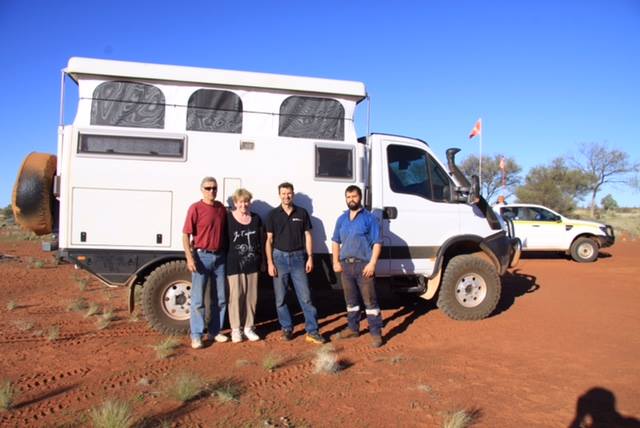
 The remote and stranded Iveco customers were mobile again in under 2 days after their distress call, now how can you beat that for Customer service and support, you can’t. We would like to commend and congratulate Iveco Support, WA Iveco and Tom & Cameron, the superior response team from AHG Service Centre, Newman for coming to the rescue of their customers in the best and quickest possible fashion!
Why would you buy anything else, well you wouldn’t!
Iveco Daily Links