
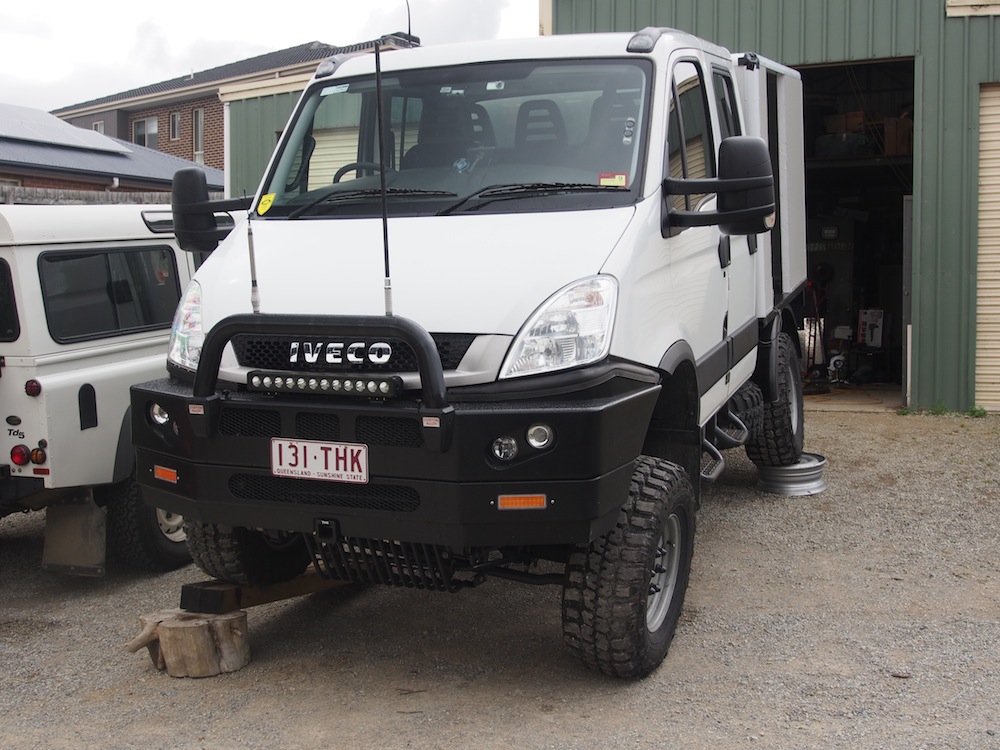
Iveco Daily 4x4 - Build Up


Wheels and Tyres


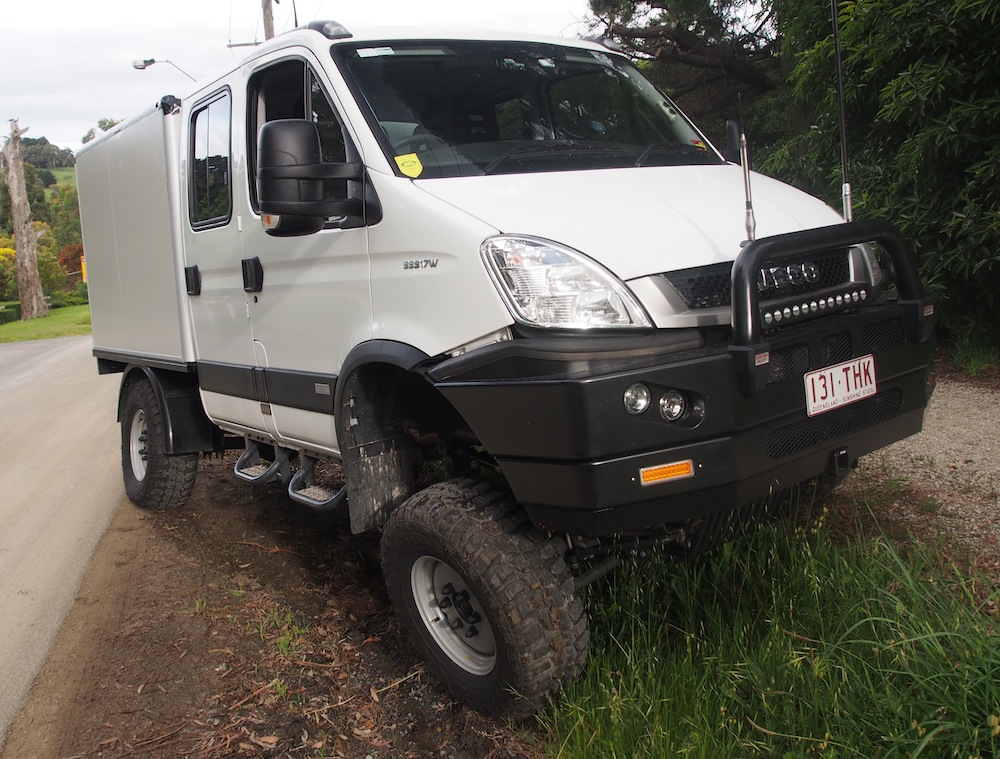
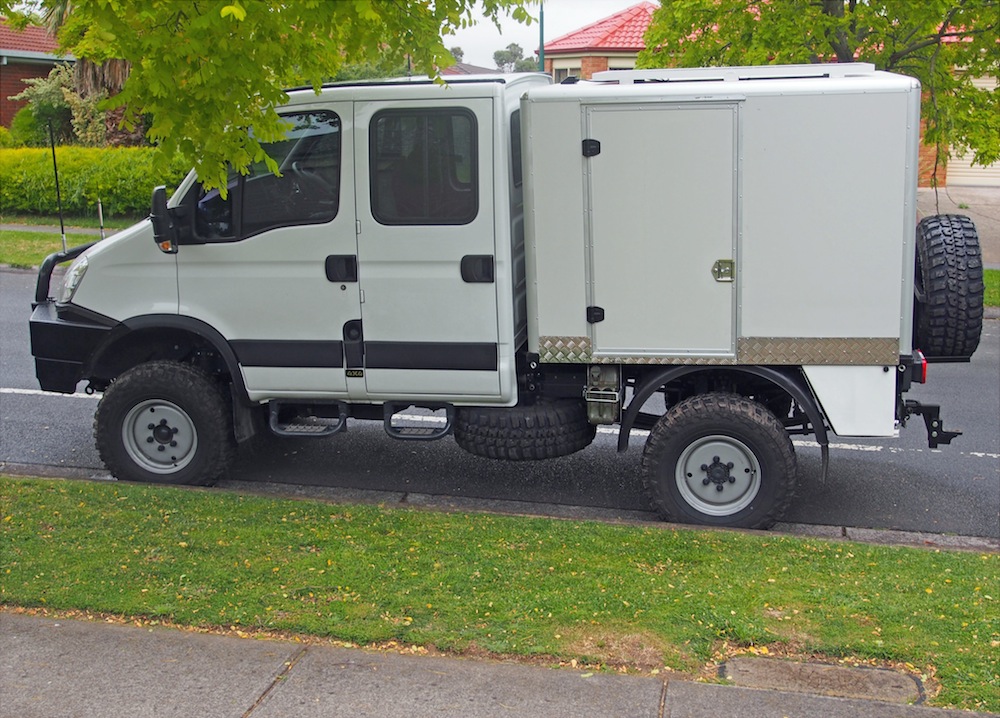
The Truck comes with 17.5x6" steel rims with 9.5R17.5 Michelin XZY road tyres, which are a great load carrying truck tyre but not good offroad, Iveco option is a 16x6 Split rim with Michelin 255/100R16 Michelin XZL Off Road tyres (with 100kmh speed limiter) . I have fitted Ridgeline 17x9 Rims with 35x12.5R17 125Q Mud Terrains.
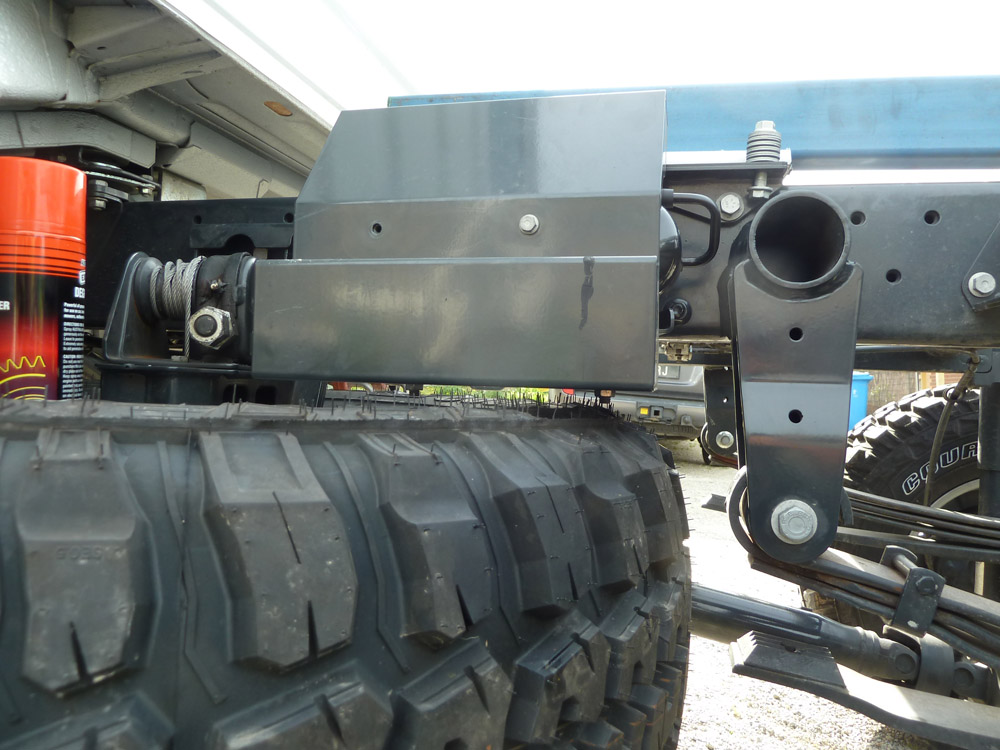
When 35 or 37" tyres are used on the existing spare wheel carrier the tyre sidewall is forced up against the Diff Lock Hydraulic pump, This will put pressure on the valve body & cause the Diff Locks to not operate correctly. The Hydraulic pump must be raised to give adequate clearence.
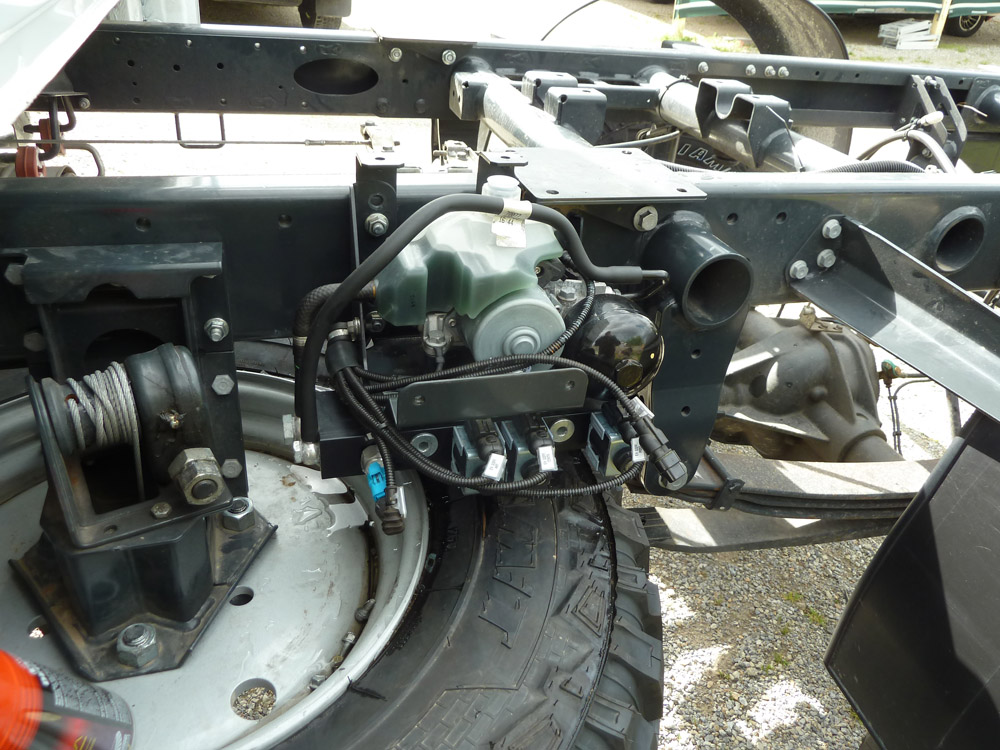

see bottom of page for upgrade to EVA rims and 37" tyres.
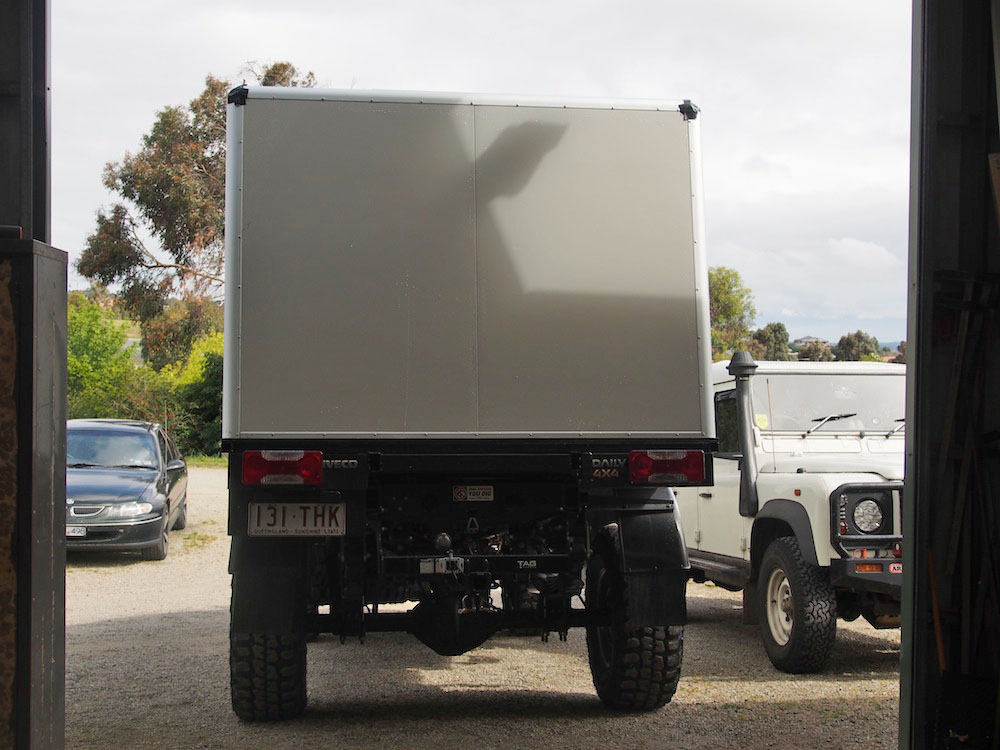
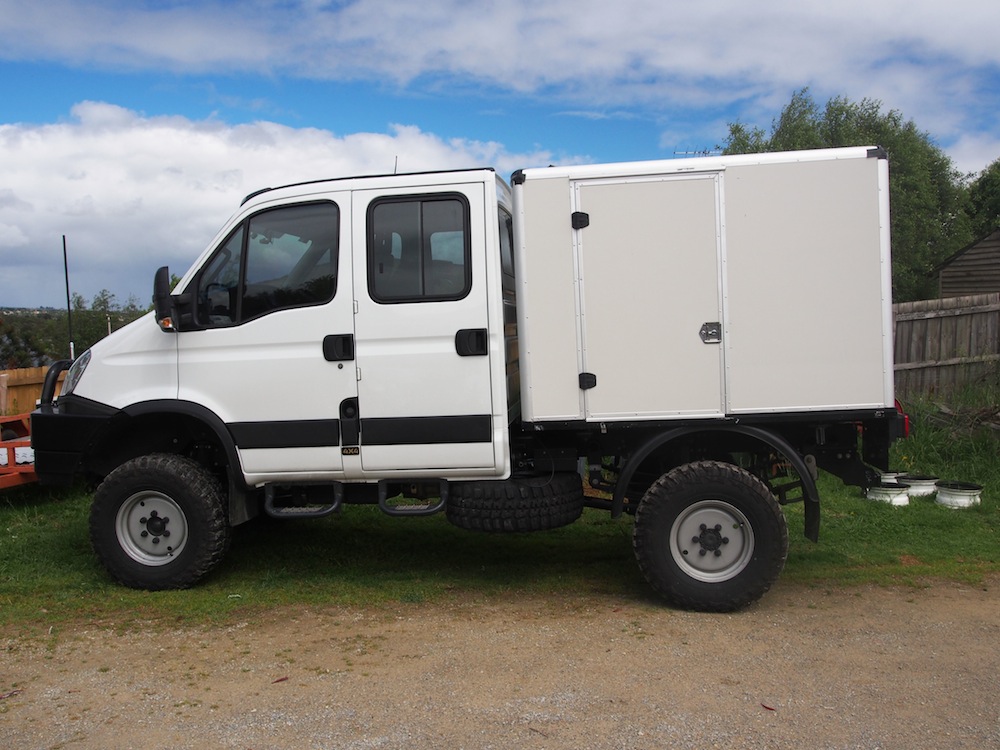
Rear Body
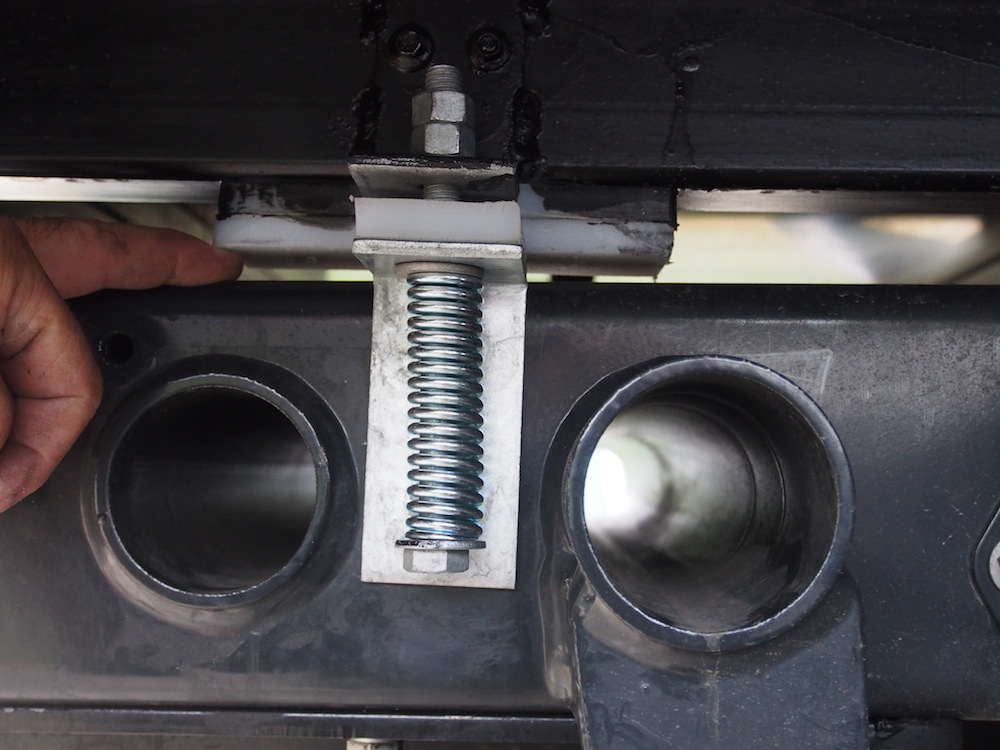
The first tray we fitted on the back was a used Minespec Tray with rollover protection from a GU Patrol, was going to take a lot of work to modify it to suit our purposes & I realised it was be easier to make one from scratch. I did have intention of using a 3 point flexi mounting system so that the tray was always flat while the chassis twisted over rough ground but decided to go with a more traditional flexi mount subframe. This way I can use the existing front mount plates with spring washer pack and poly isolator pads, rear mounts have poly blocks between subframe and chassis with compression spring kinematic mounts to account for chassis twisting under full axle crossup.


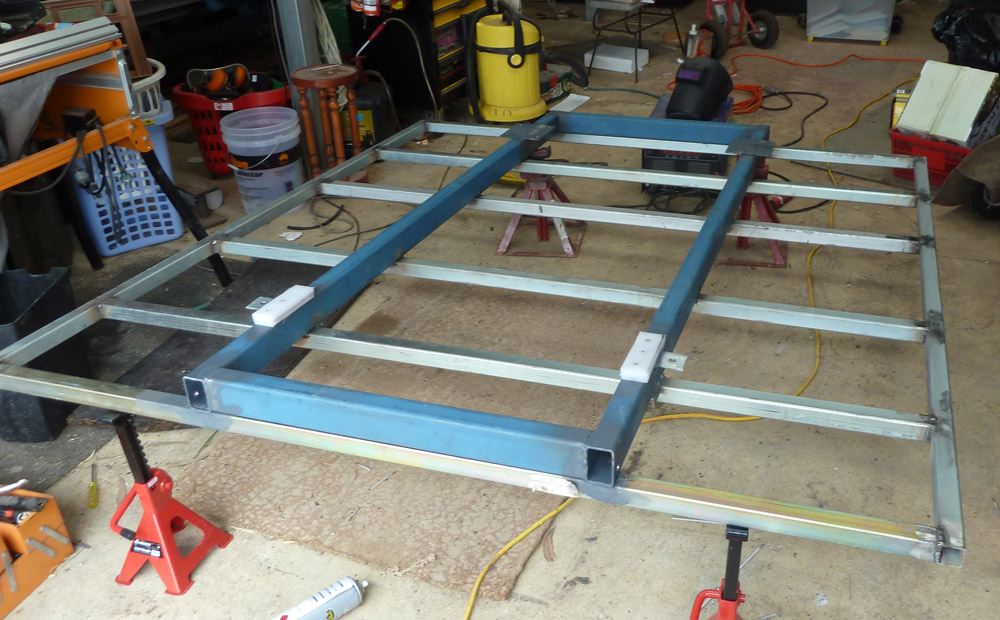
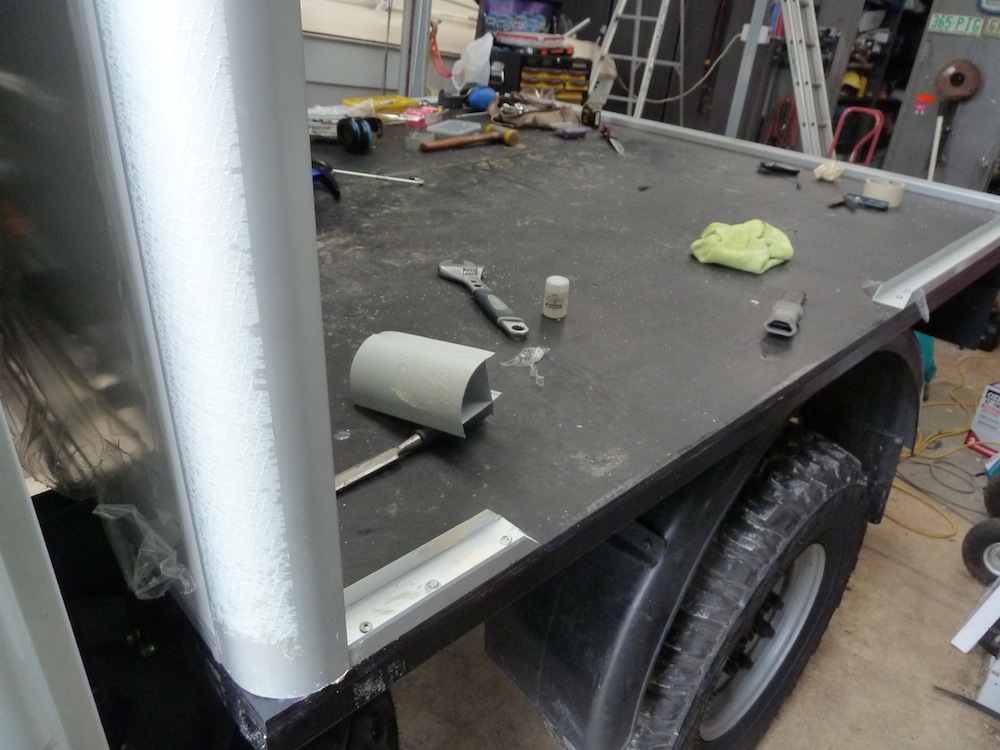
 Subframe (tray) is made from 75x50x4 RHS Bearers and 40x40x3 RHS joists. 2100 Long x 1980 wide.
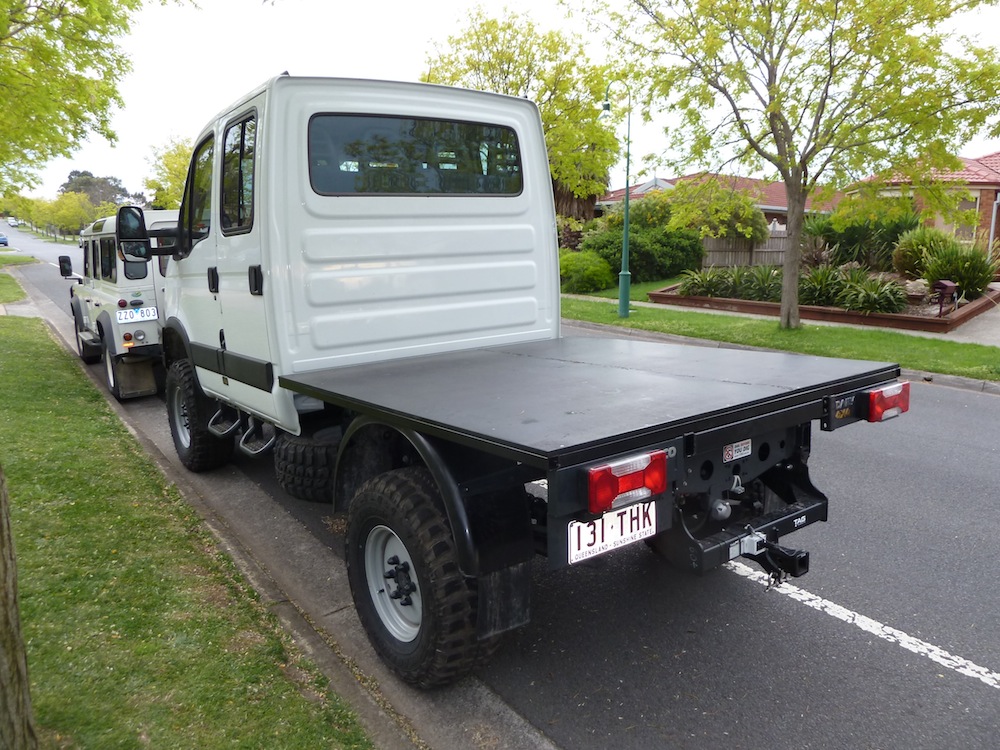
The tray is cladded with 19mm Formply bonded with Sikaflex and countersunk metal screws.
Subframe (tray) is made from 75x50x4 RHS Bearers and 40x40x3 RHS joists. 2100 Long x 1980 wide.
The tray is cladded with 19mm Formply bonded with Sikaflex and countersunk metal screws.
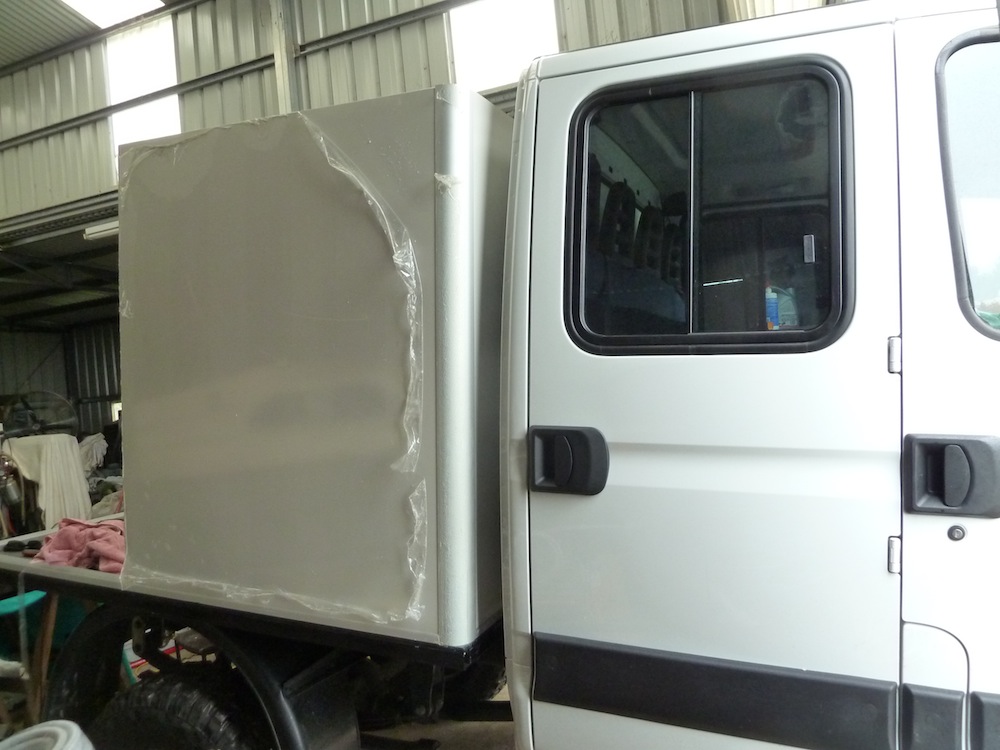
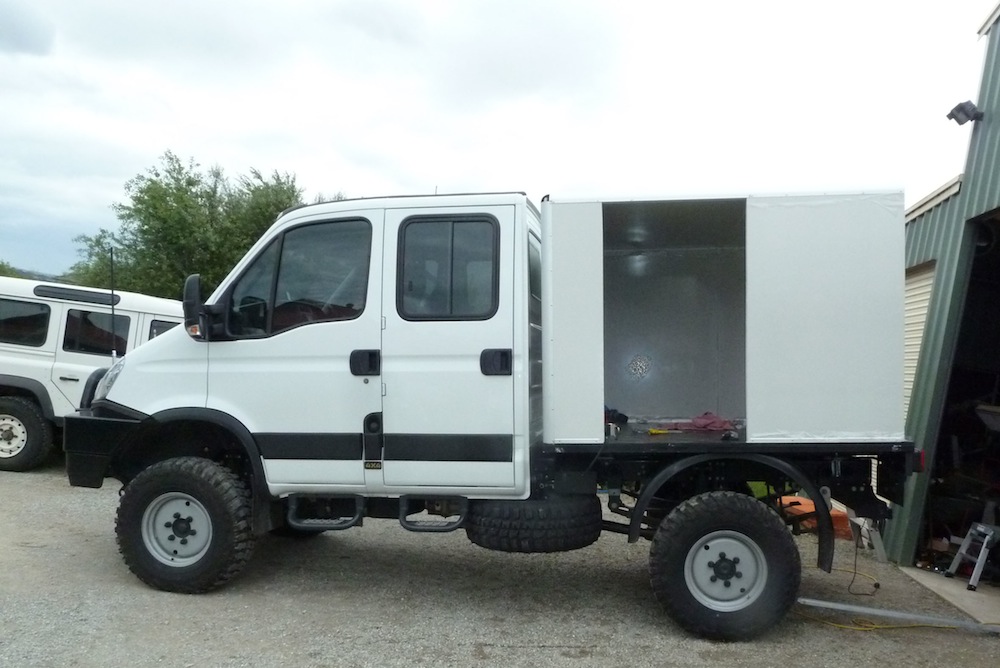
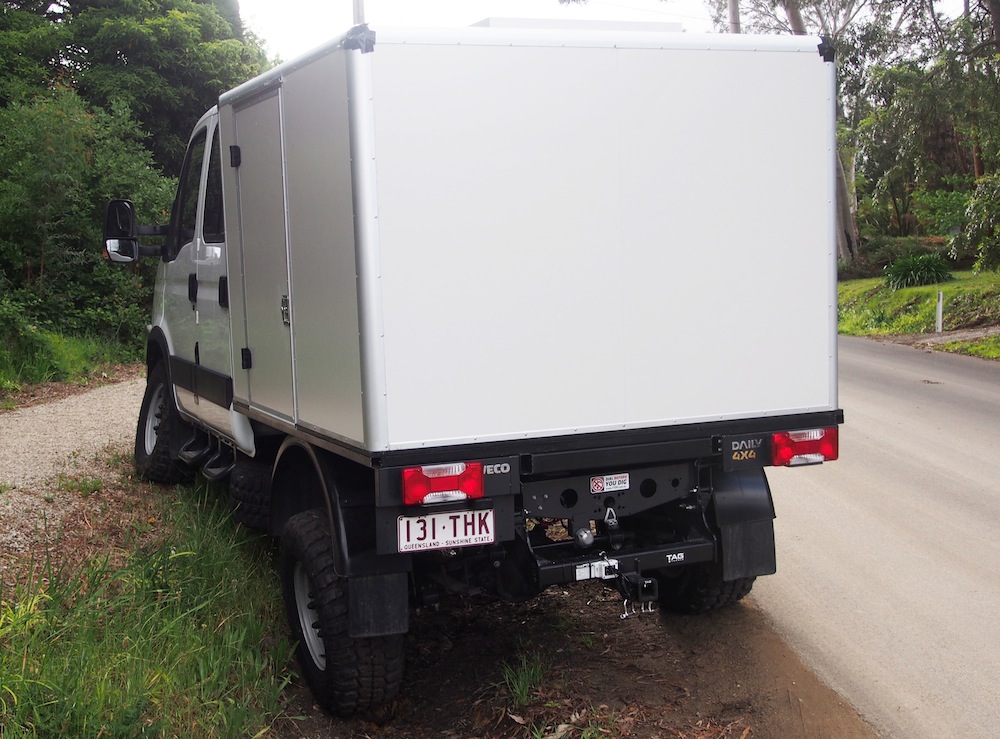
 I bought 4 x 50mm coolroom Expanded Polystyrene Sandwich panels 4200 long x 1170 wide, 15m C - chanell , 6m Door jamb extrusion, and 15m round outside corner to construct the box from. I decided on 50mm steel /foam/ steel panels because they are inexpensive @ $24 per sq m, and to add some weight over the rear wheels. Cost of all the materials, including rivets and mastic was $901.00. Cutting the 4200 mm panels into 3 pieces gives 1400 mm panels which gives an overall body height of 1450mm, allowing 50mm for a 200W solar panel, top of the solar panel will work out the same height as the roof on the Cab.
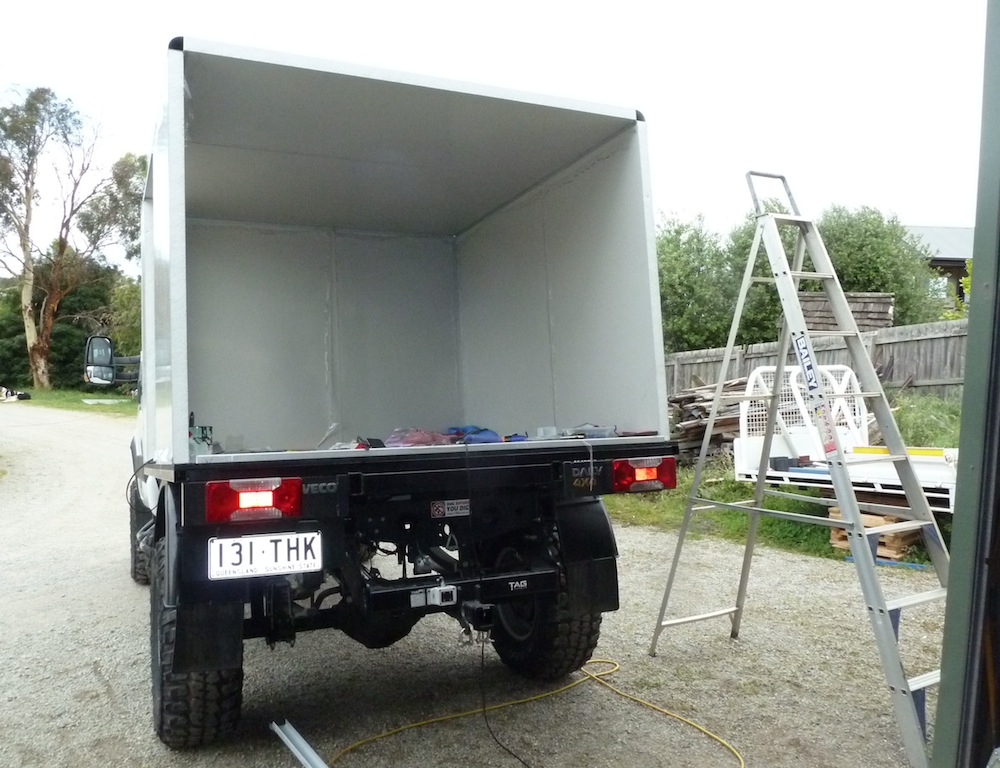
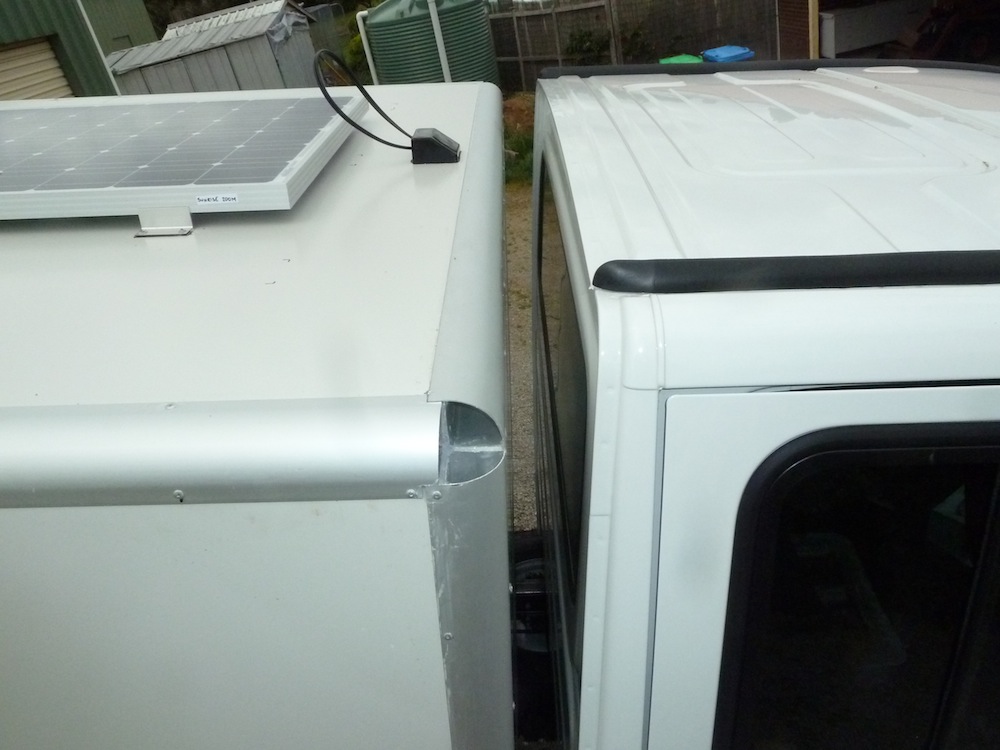
We chose to use 50mm x 50mm round outside corner coolroom extrusion (an offcut is shown in one of the photos) just because we think rounded corners look better than right angled corners, finished result should be similar to a U-Haul trailer. I will also use the hollow corner extrusion for electrical wiring duct
(progress is slow, the weather in Melbourne has been abysmal )
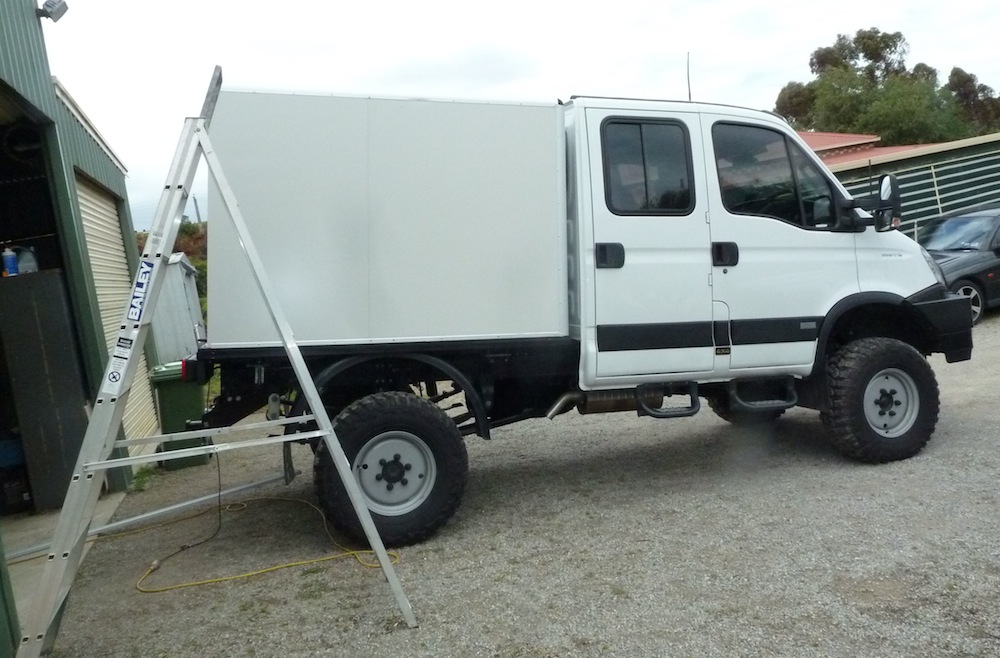
 Once all the body panels were glued and riveted together I drove the truck up onto some 'ramps' to check the chassis flex, was suprised to find even tho the suspension was nowhere near fully crossed up the chassis had actually about 10mm flex, as seen in the photo at right. The theory is the tray and body stay rigid and compression springs take up the flex, hopefully there is enough movement in thos springs on full crossup.
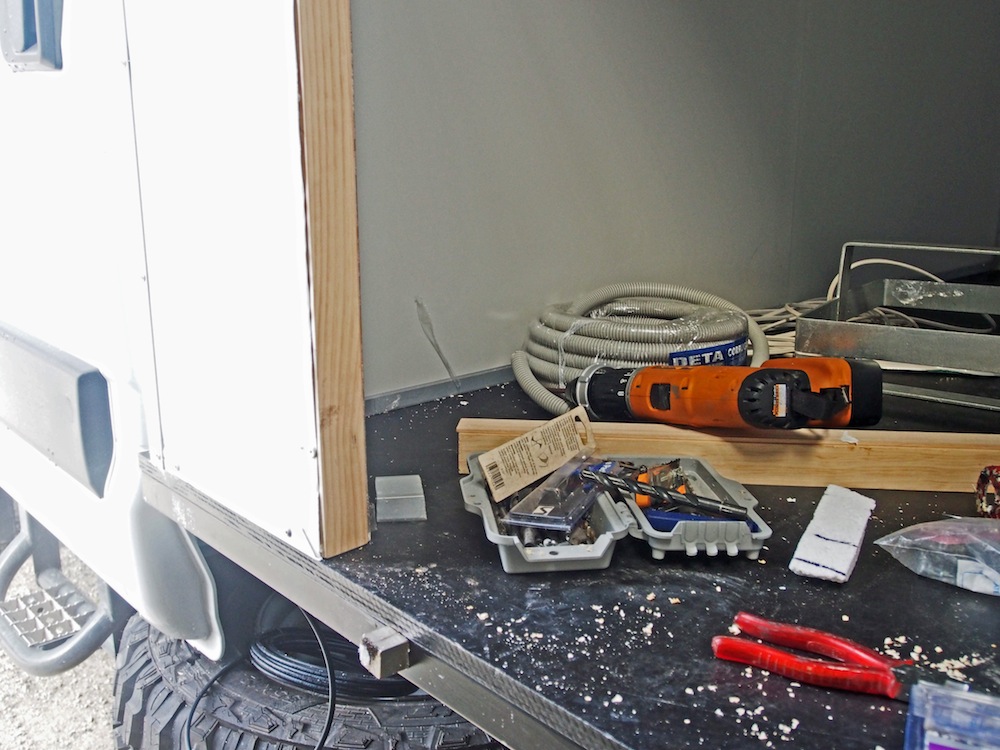
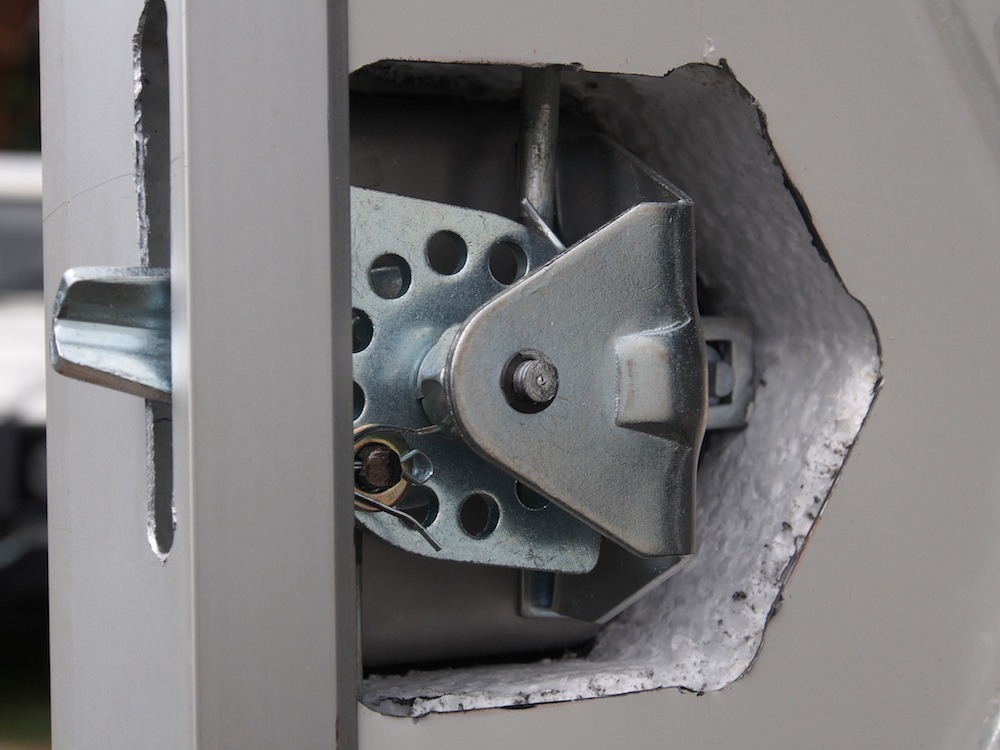
 Having never used coolroom panels, or indeed built any truck body before, building the door presented a challenge, Just screwing hinges to the panel skin would not work as the skin might de-laminate. I 'scooped' out 50mm x50mm styrene with a hot wire and inserted 48 x48mm timber in its place, capped with alum c-chanel. The hinges are screwed thru the Alum / Steel / Wood and is very sturdy, Same method used on Latch side. Also installed some 3/8 rod onto the cam action of the door latch so that the door is secured top and bottom, simply heated the end of the rod and melted a hole thru the foam. Just need to make a cover for the inside of the latch.
another Flex Test
Solar Panel
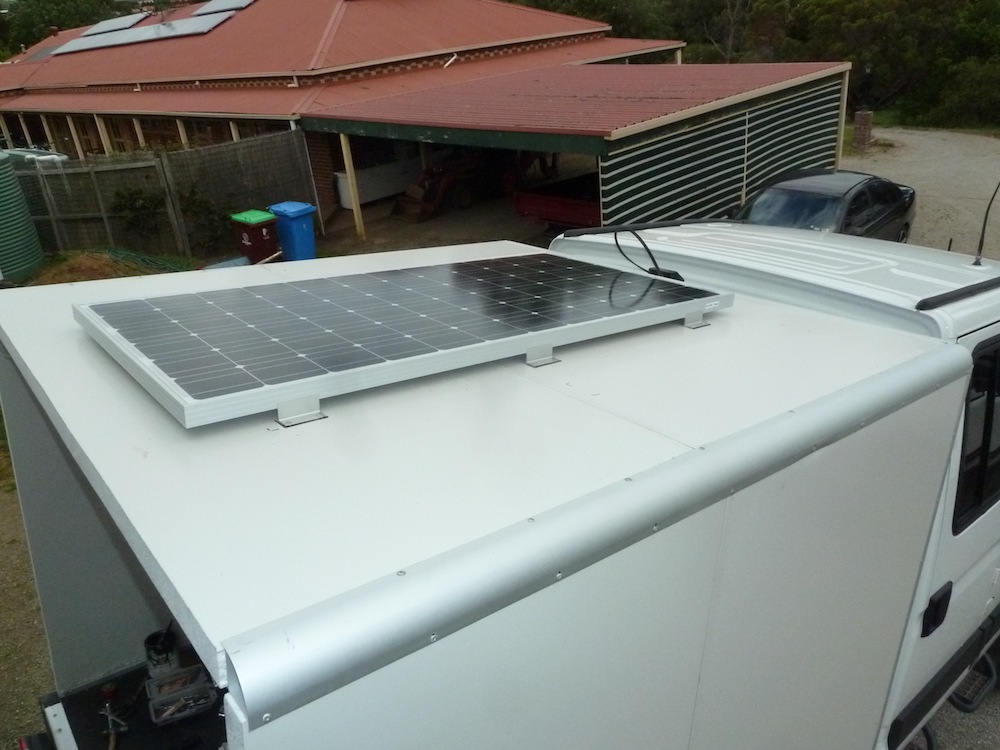
Solar panel is a Sunrise 24V 200W Monocrystaline panel meant for the top of a house, looks huge almost taking up half of the roof area. Charge controller is a MPPT which efficiently converts the 24V to 12v. Instead of directly charging the house battery my idea is to use the solar controller to keep the truck battery in float and a "Aux battery isolator/ charger" to keep the house battery charged, should keep the truck battery fully charged and fridge running indefenitly.
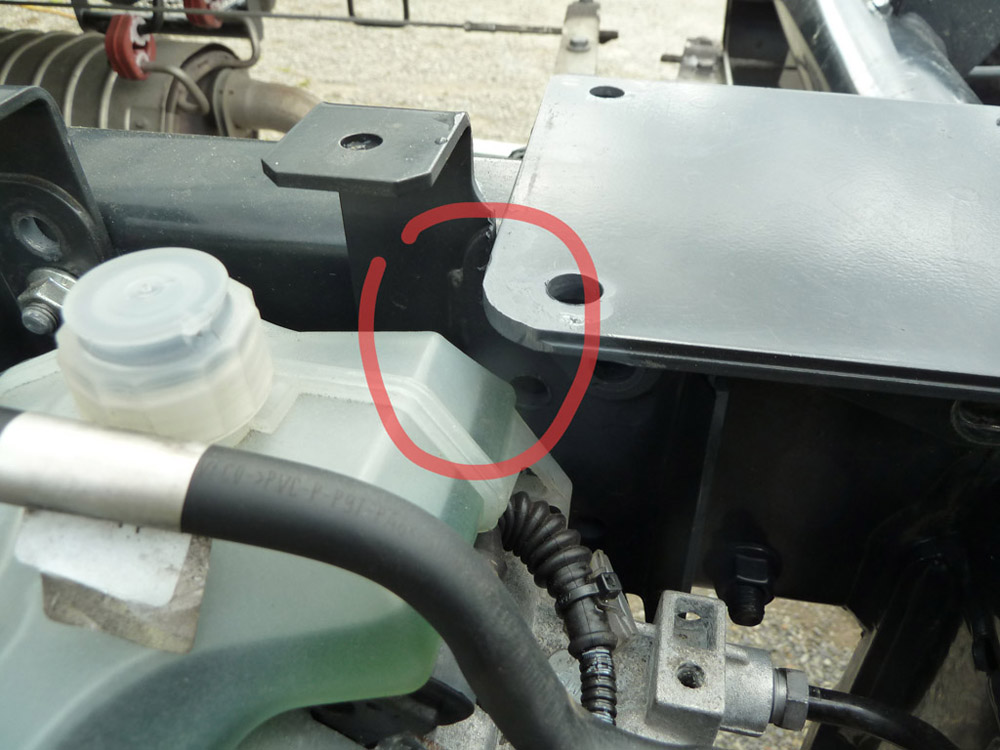
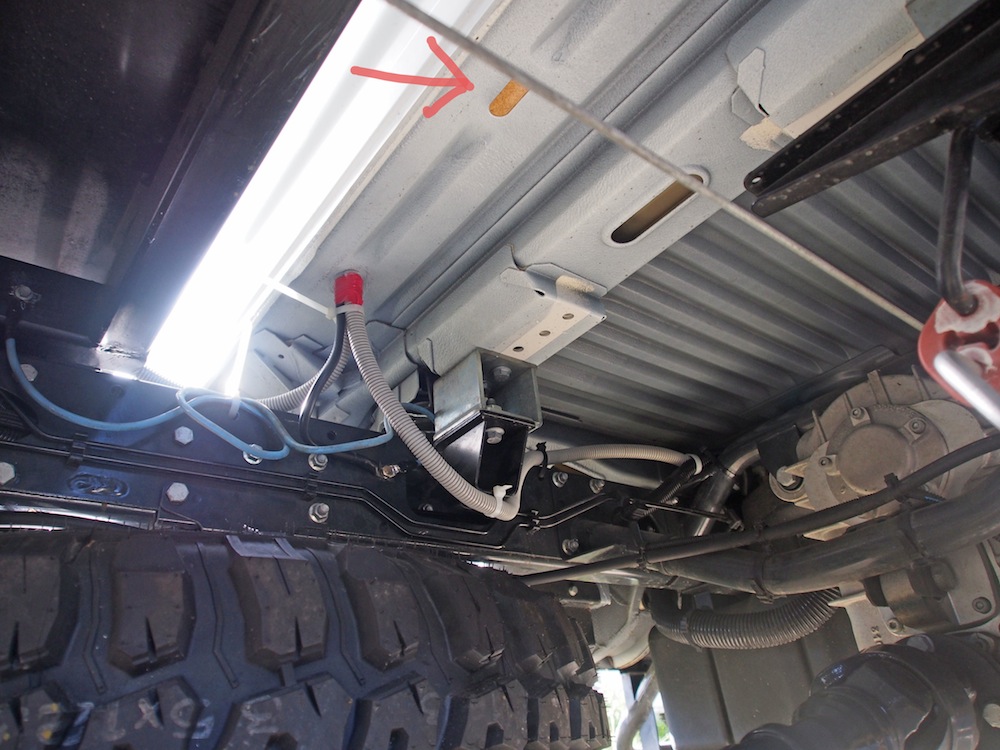
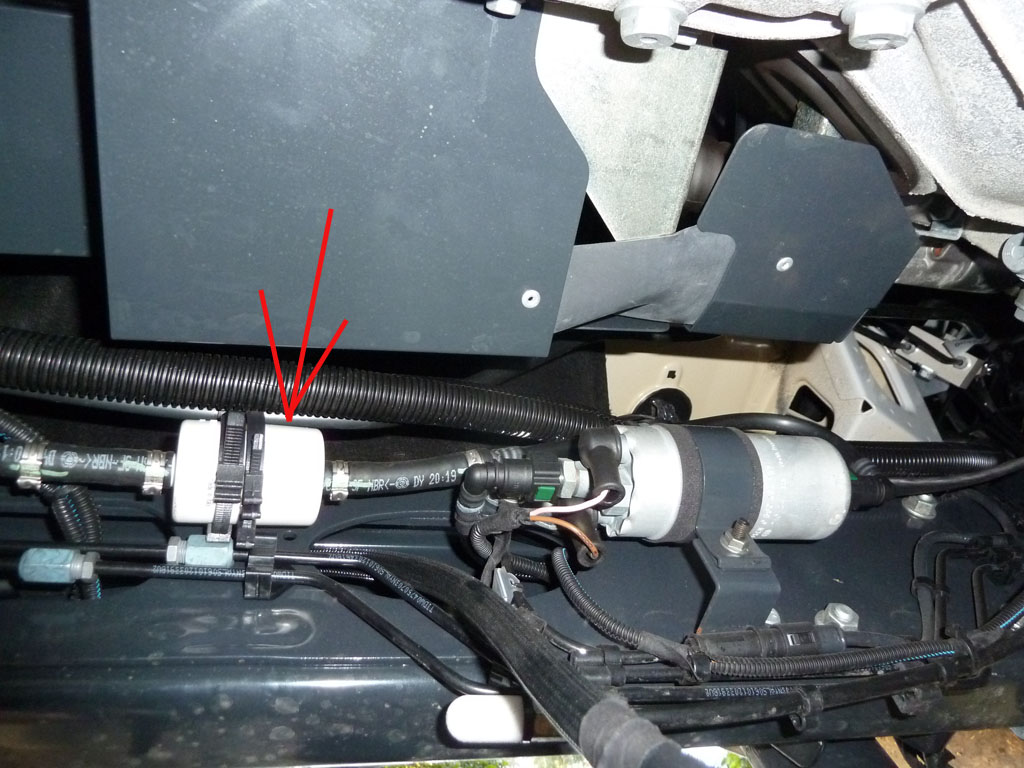
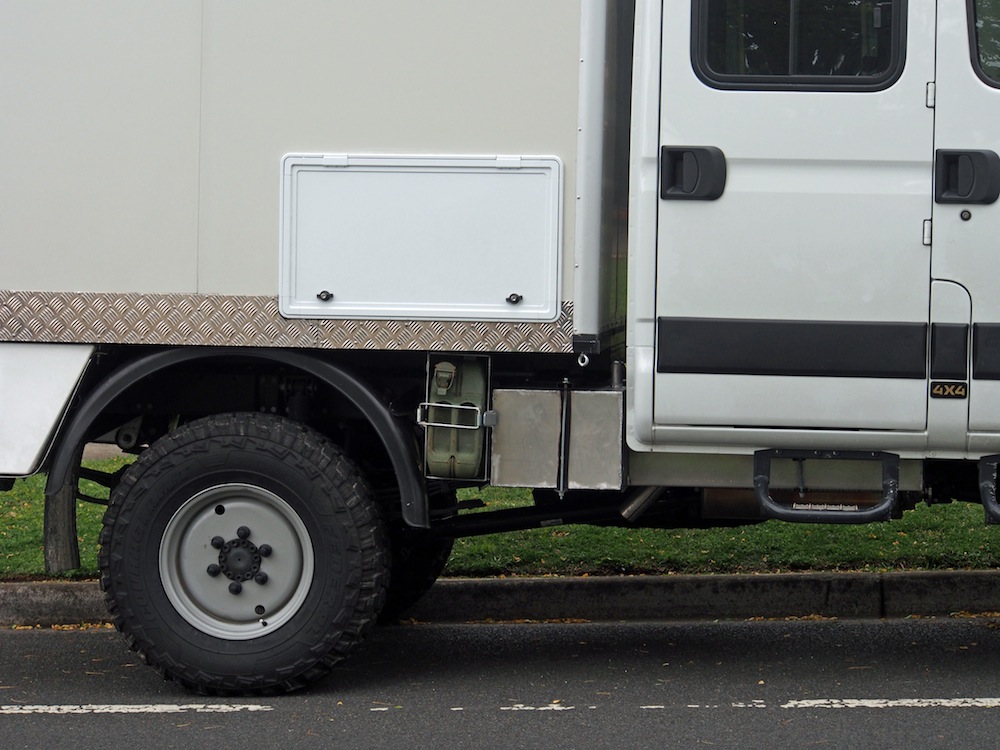
I found some factory holes under the cab floor (shown with red arrow in pic 3 above) These holes are factory sealed with what appears to be a piece of self adhesive cork tile under the floor mat beneath the back seat. This seemed a perfect place to bring my Auxilliary cabling . I have seen other trucks with holes drilled, glands fitted to run cables in, I hate needlessly cutting or drilling holes in cars, so far I have needed to drill only one hole for an earth cable mounting point.
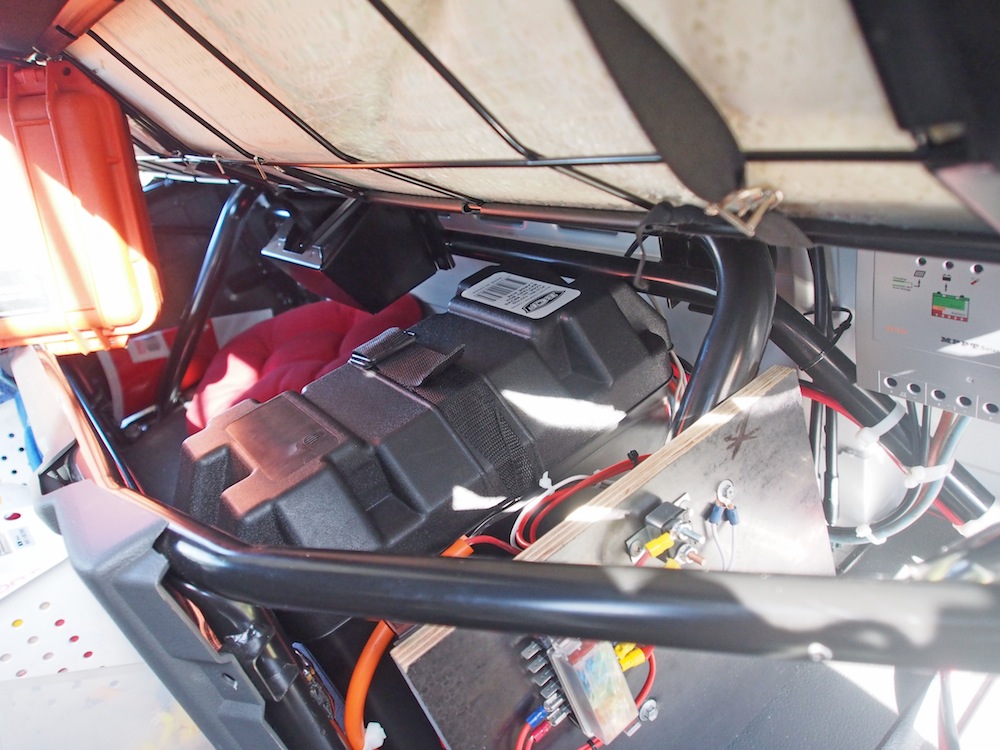
Whilst under the back seat I decided it was as good a place as any to mount my house battery, fits perfectly in a boat box from BCF, also mounted my MPPT Solar controller and aux fuses under there. Whilst at it I hooked up an accessory 50A Anderson Plug and 12V Merit plug for the fridge. In the Landrover the Fridge would last 3 days before autoshutdown due to low battery, I had the fridge running all night and checked battery condition at 9.00 next morning to find battery already fullycharged (in float at 13.8v). Whilst on electrics I also mounted a 1200 / 2000W 240V pure Sine Inverter under the front passenger seat.
Fuel & Water Tanks
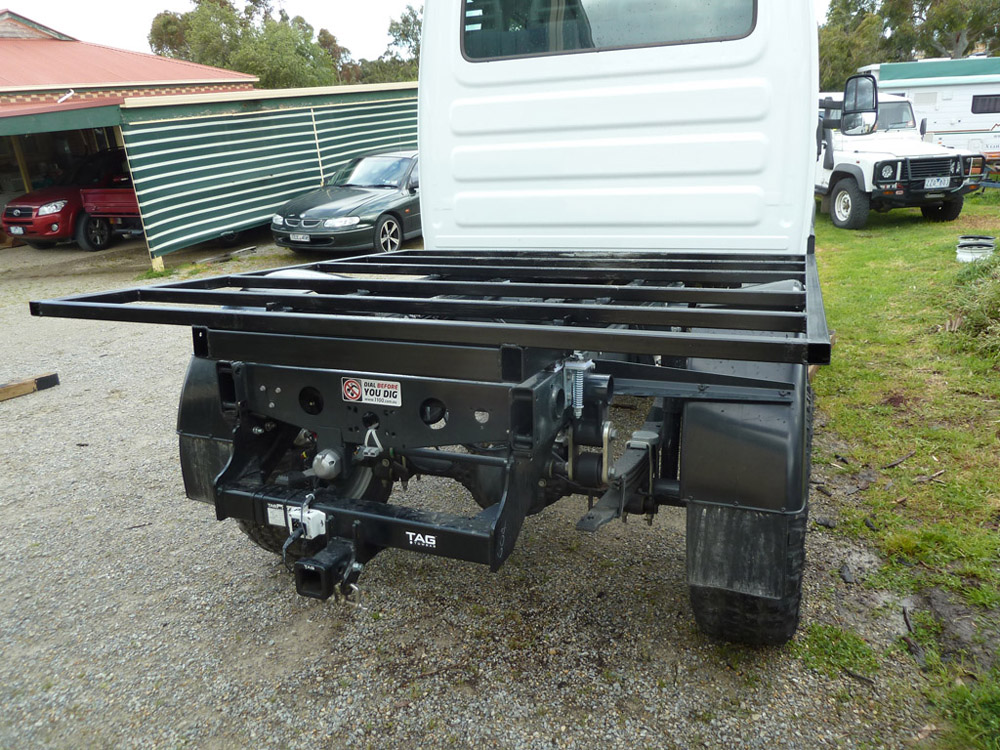
Our Iveco has excellent fuel consumption, about 12.5L/100 km about town and 16.5L/100 towing the van, highway cruising (95 -100 k) but the fuel tank @ 90L is still too small, Daily fill ups are not viable in Remote travelling. Ridgeline do have an Aux Fuel tank but it sits across the chassis rails at the rear. Their tank wont work for me because I have made my subframe over the chassis rails (rather than outside them)
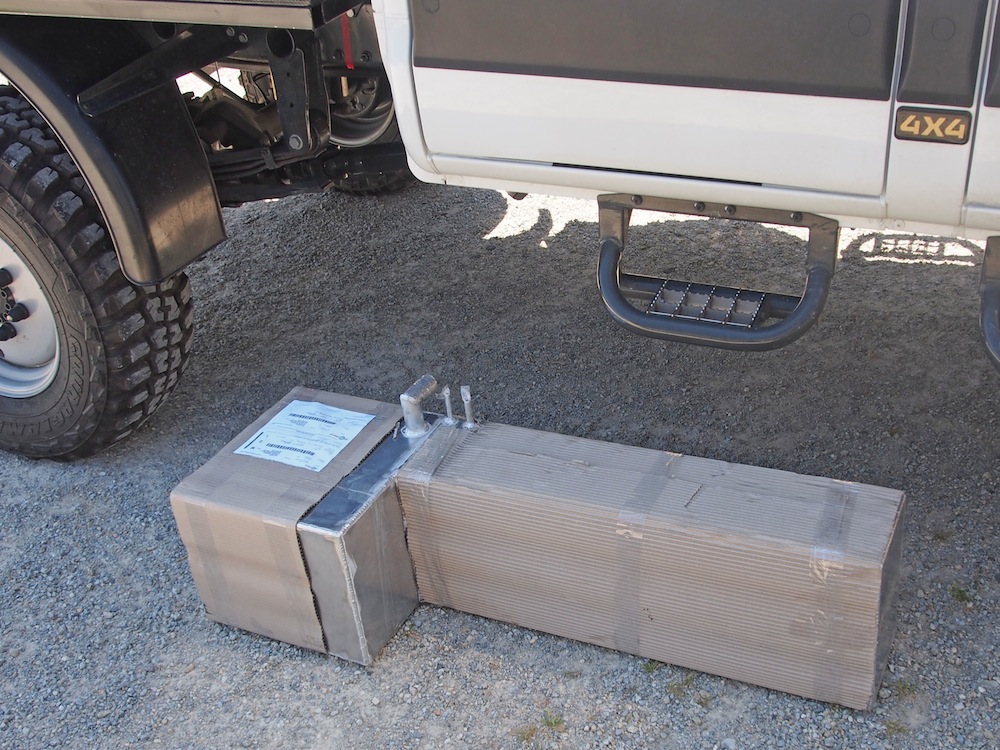
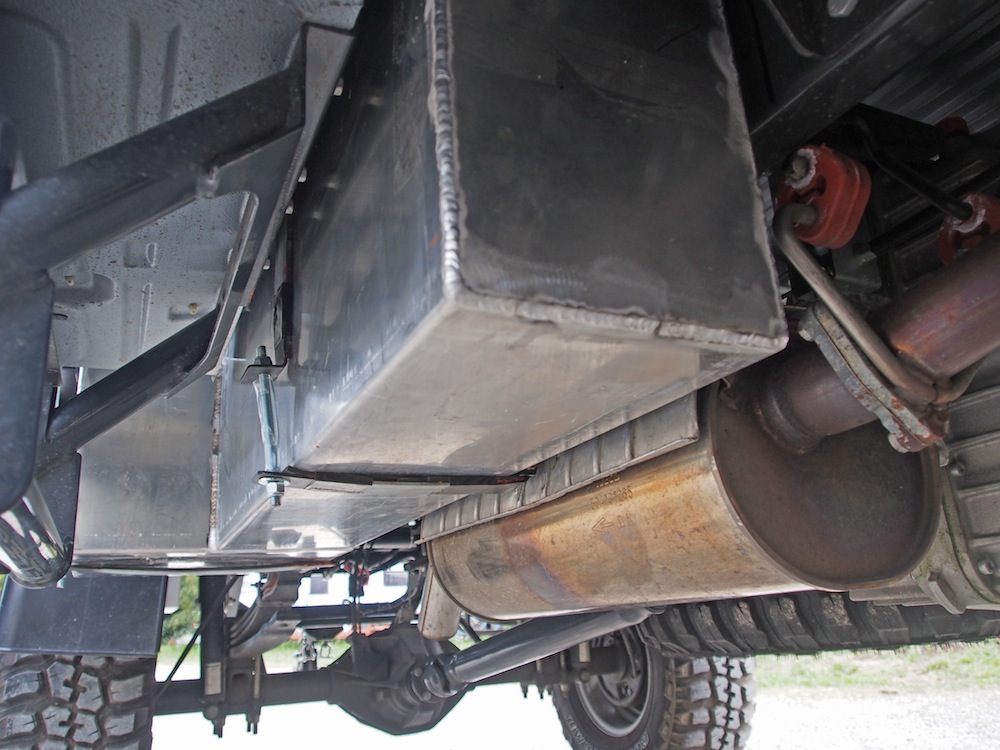
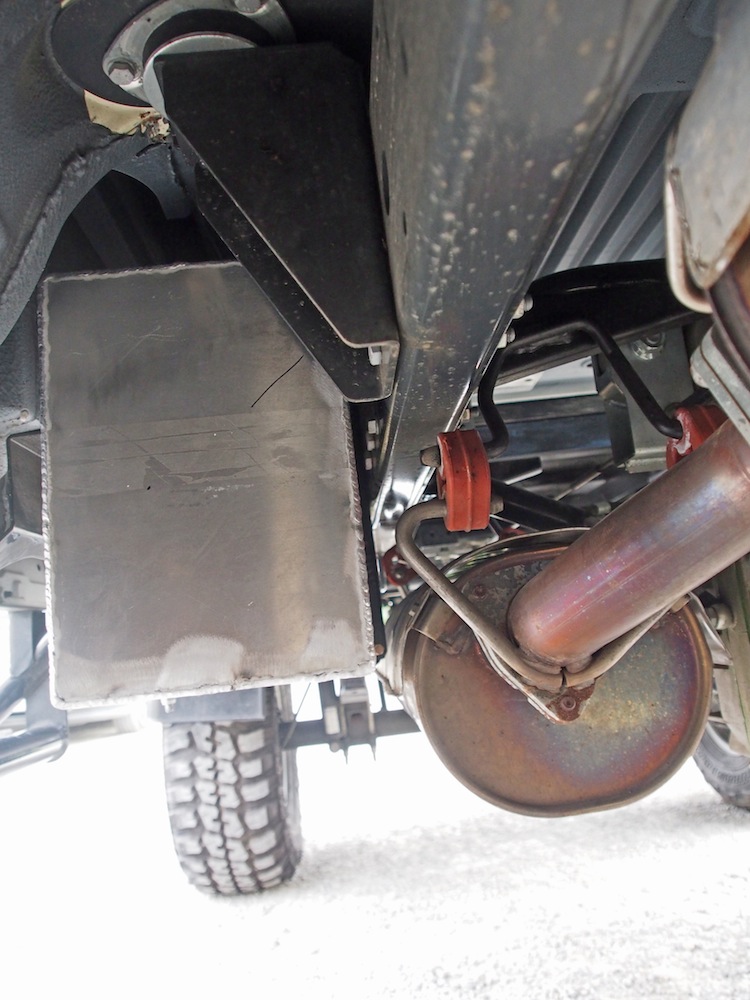
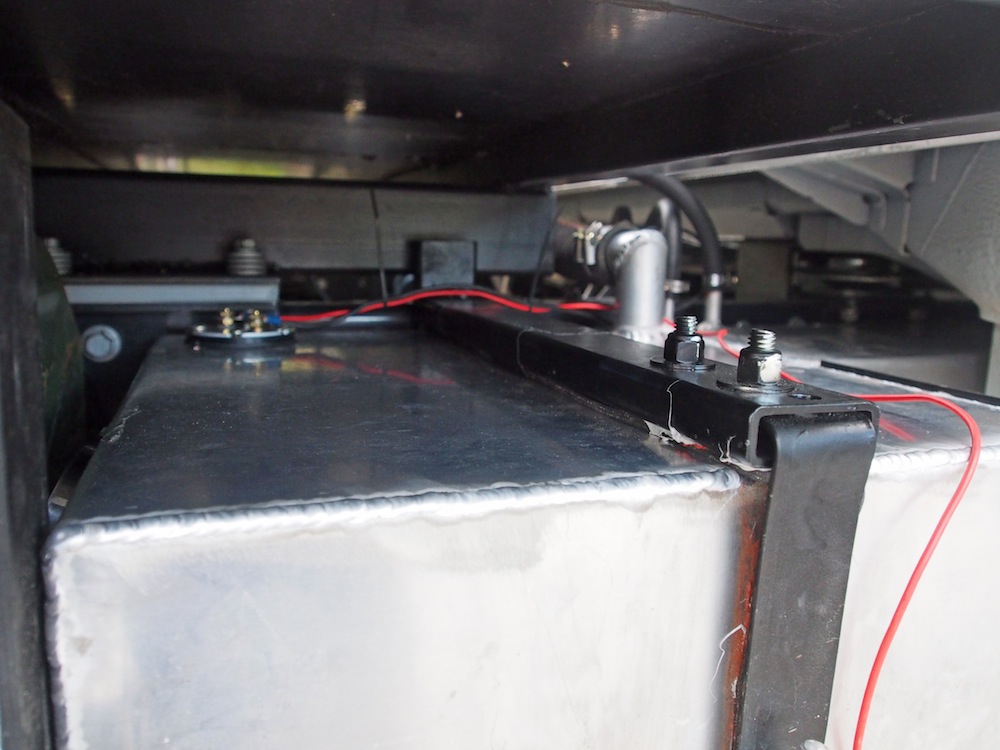
I drew up a 100L alloy Fuel tank, made by Pro Fish Boats, ( $595 ) to fit on the outside of the RHS chassis rail.
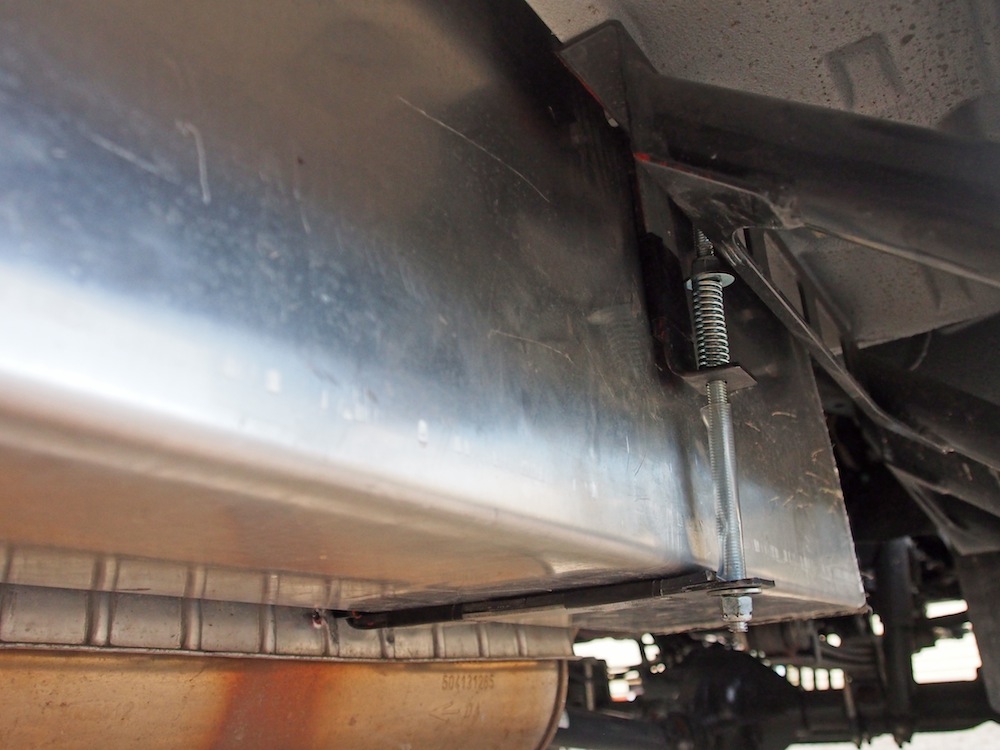
I added a tank sender and lined the tank with liquid tank sealer, this puts a rubber like liner inside the tank, In this instance I used Slosh, but have used Kreem and KBS in the past. Great idea for offroad use incase the tank gets hit with a rock or has a stress fracture, minimises chance of a leak in the future. Also spring mounted the tank to account for chassis flex.
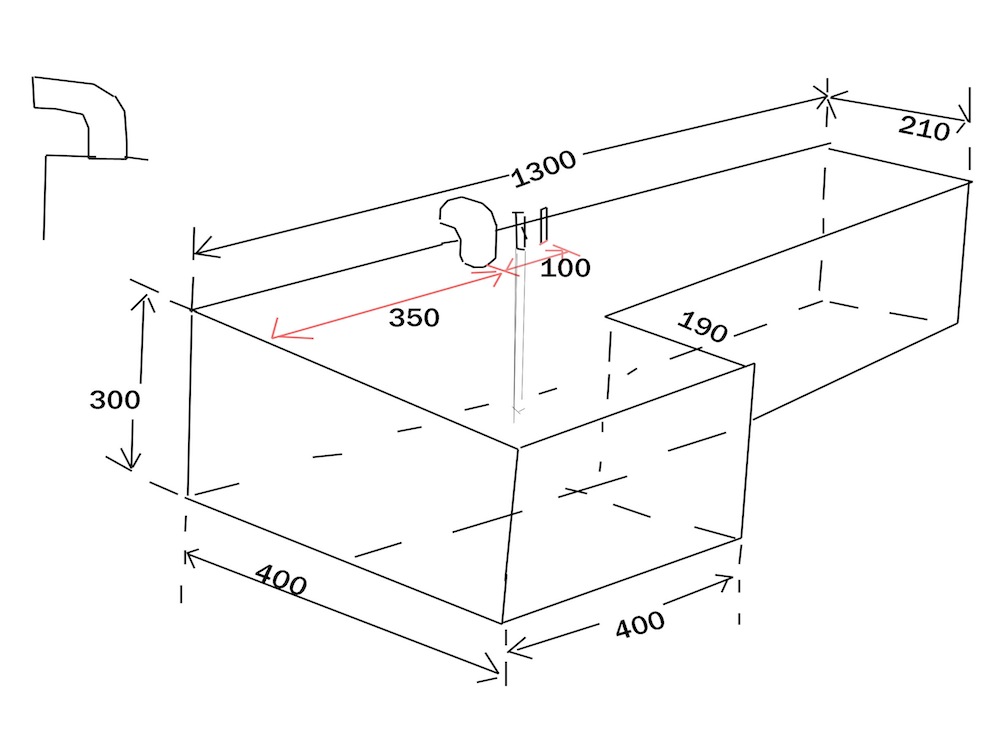


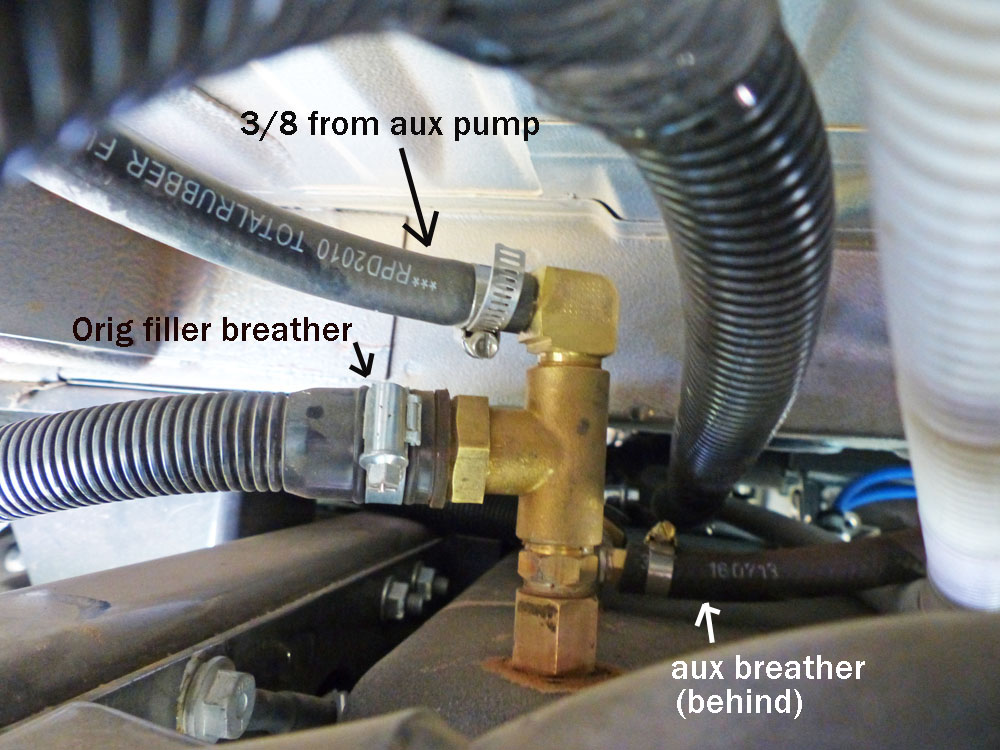

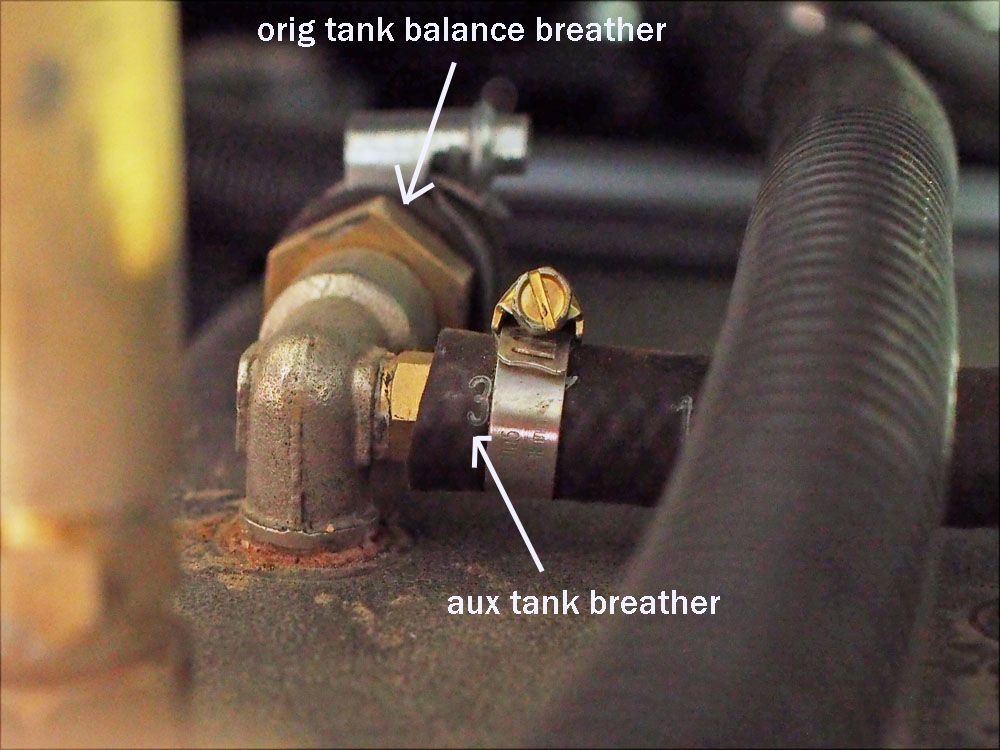
When the main tank gets low I will pump fuel from the Aux tank into the main tank with an electric lift pump (Facet), I was going to plumb the Aux Tank to fill from the original fuel filler on the LHS, but didnt want to cut the conveluted PVC filler hose so added a seperate filler with a locking cap mounted on the subframe, (didn't want to drill holes in the cab). Finding a place to mount Aux fuel gauge was a problem, rather than attack the dashboard with a hole saw I settled on the gear stick binnacle, there is just enough room for a 2" gauge (but a low profile one would be better).
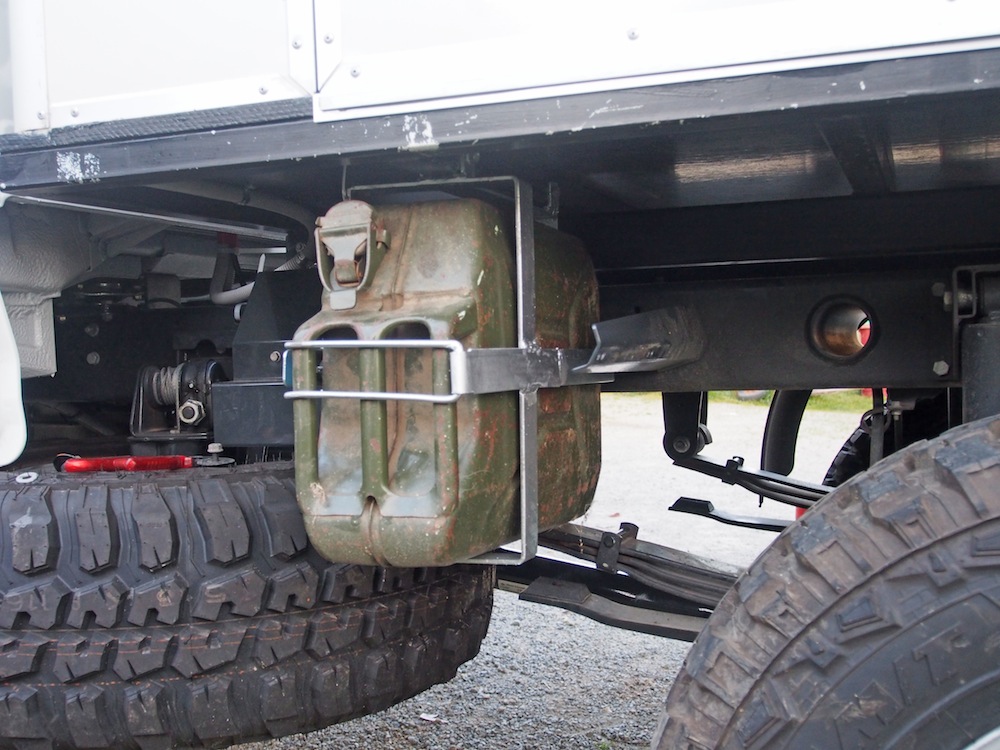
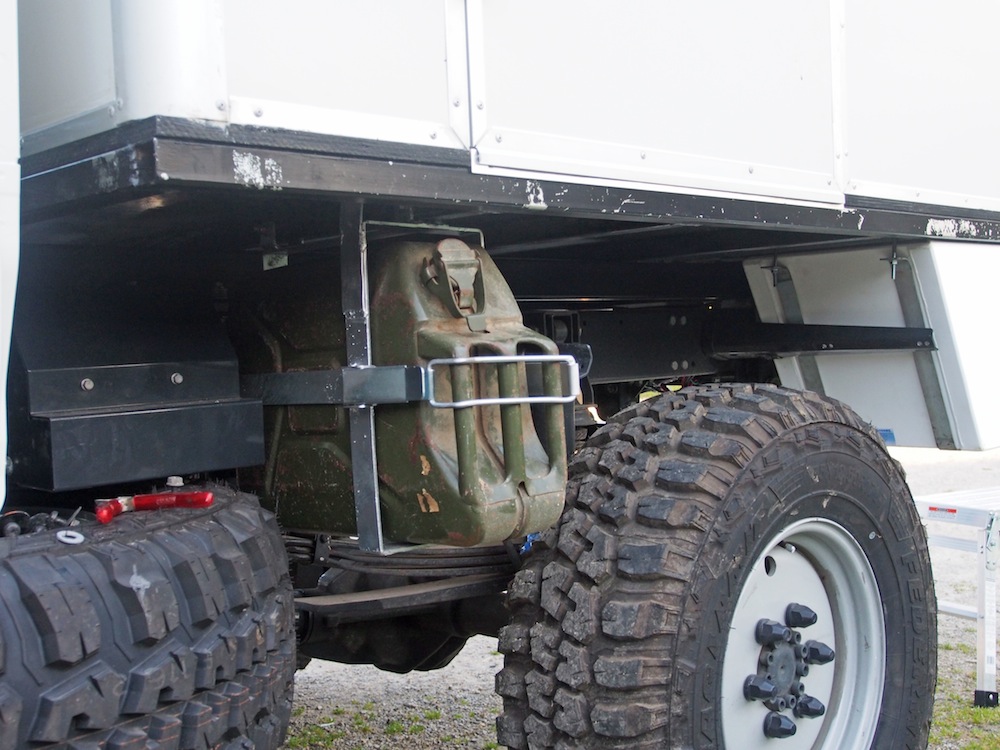
Also decided to mount a Jerry Can in a spare position under the left side of the tray. Val got to work with the blowtorch and anvil to make the latch which I added to the basic jerry can holder. There will also be room for another Jerry Can holder behind the RHS Aux tank
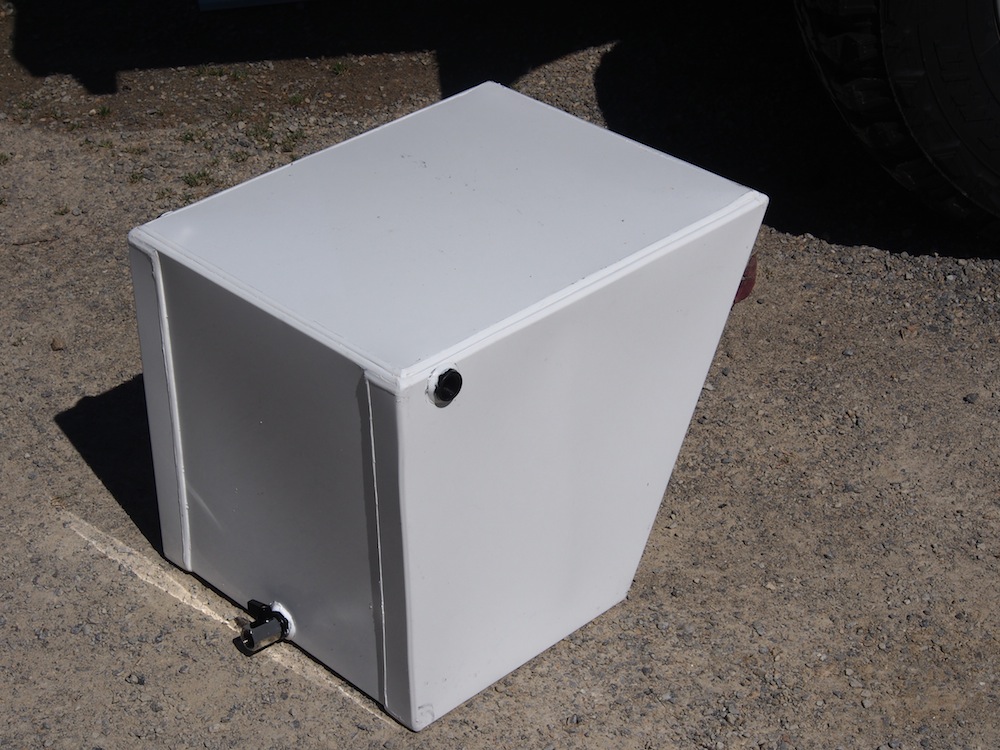
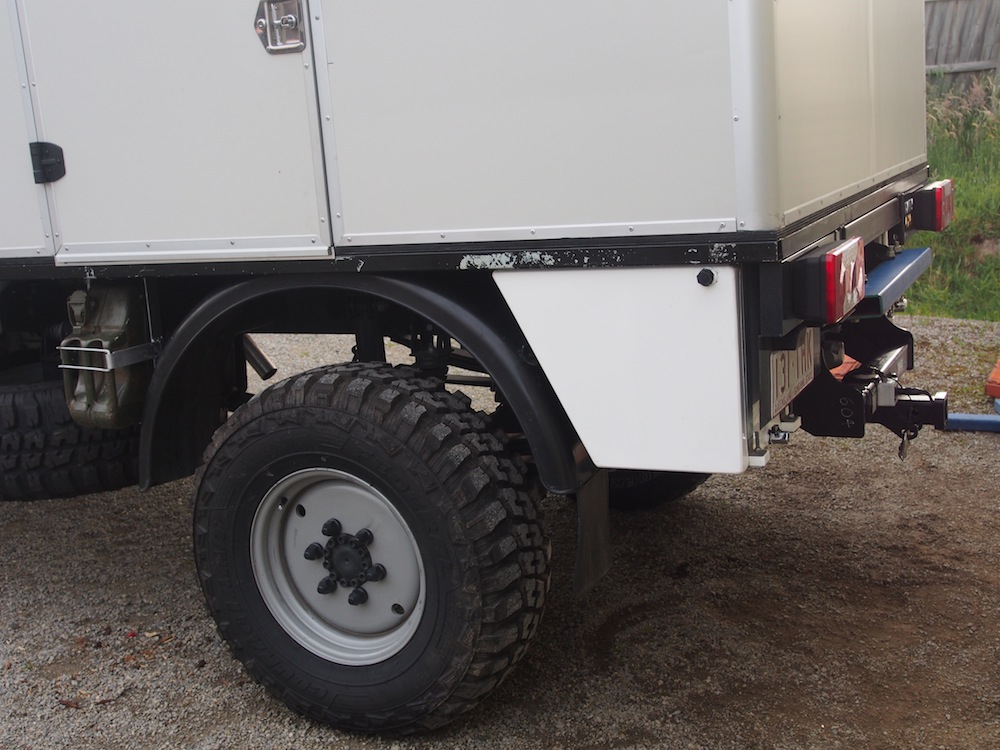
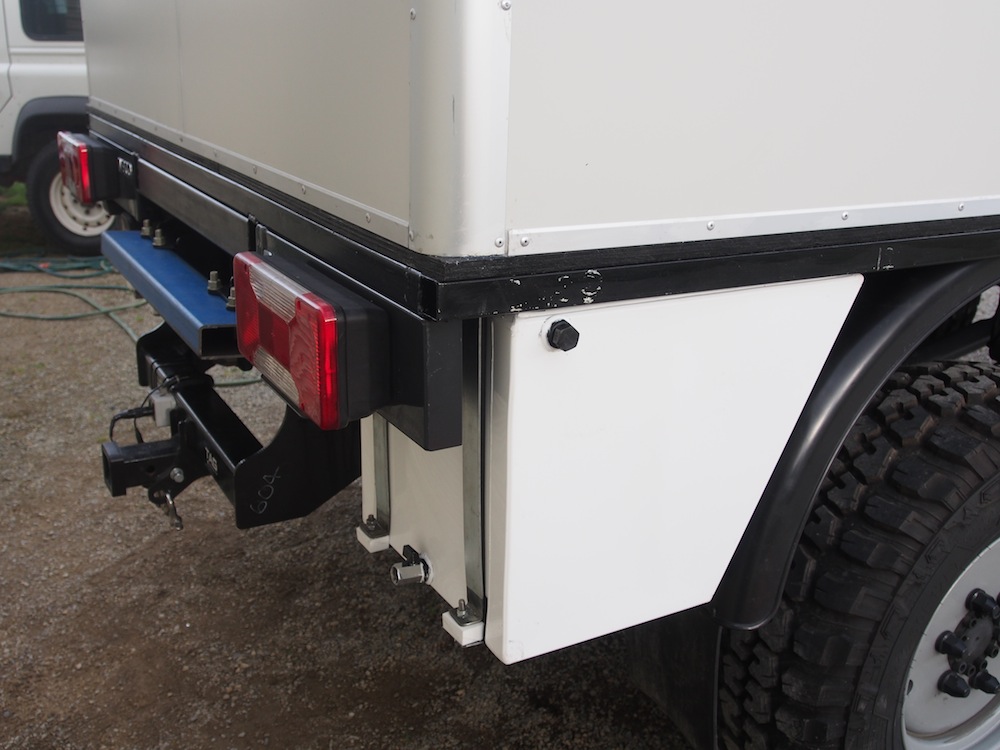
Also had a pair of 60L Polypropelene tanks made to go behind each rear wheel under the tray. ($240.00 each & less than a week to make) The Drinking water tanks were custom made to my size by AbberTanks in Burpengary (Brisbane), If anyone else needs some Chris has my dimensions.
Fuel Filter
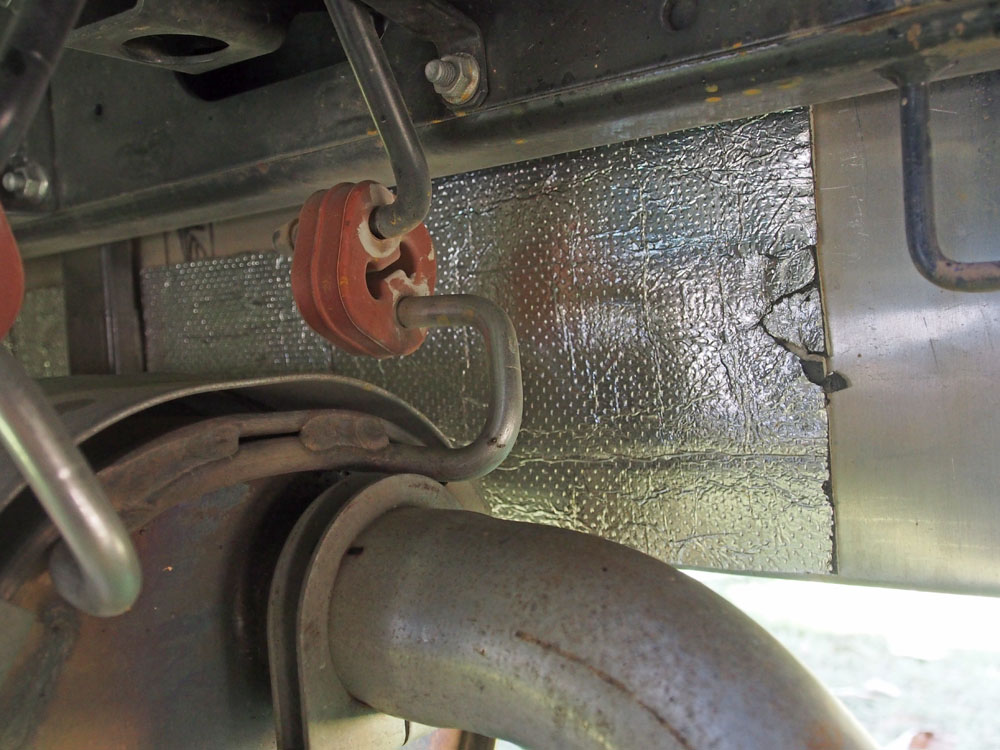
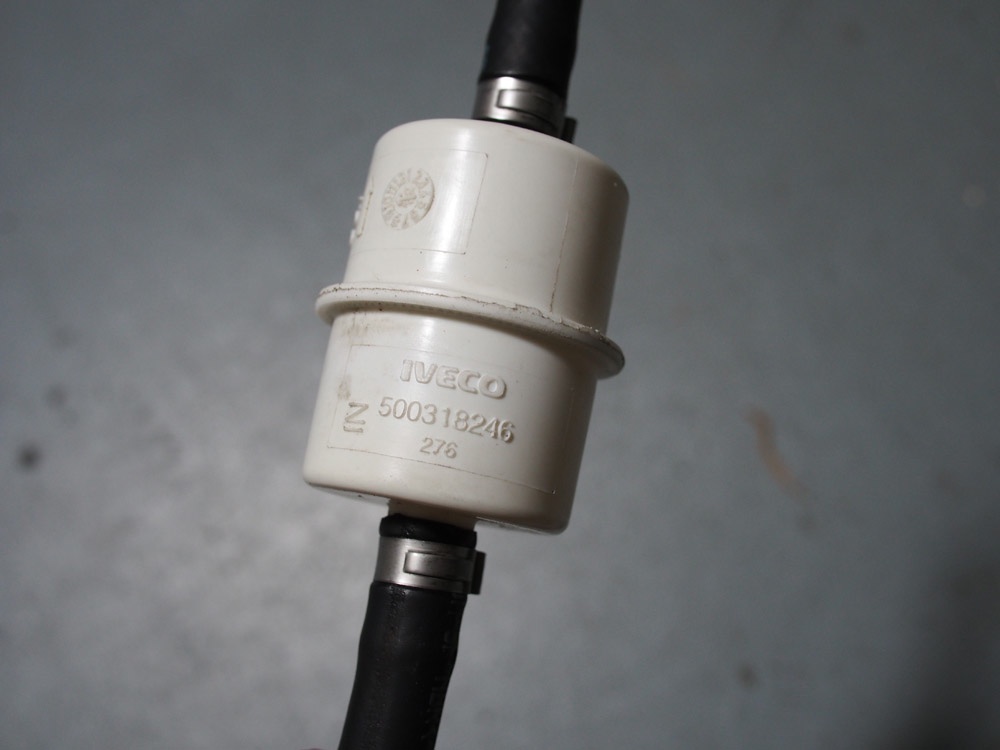
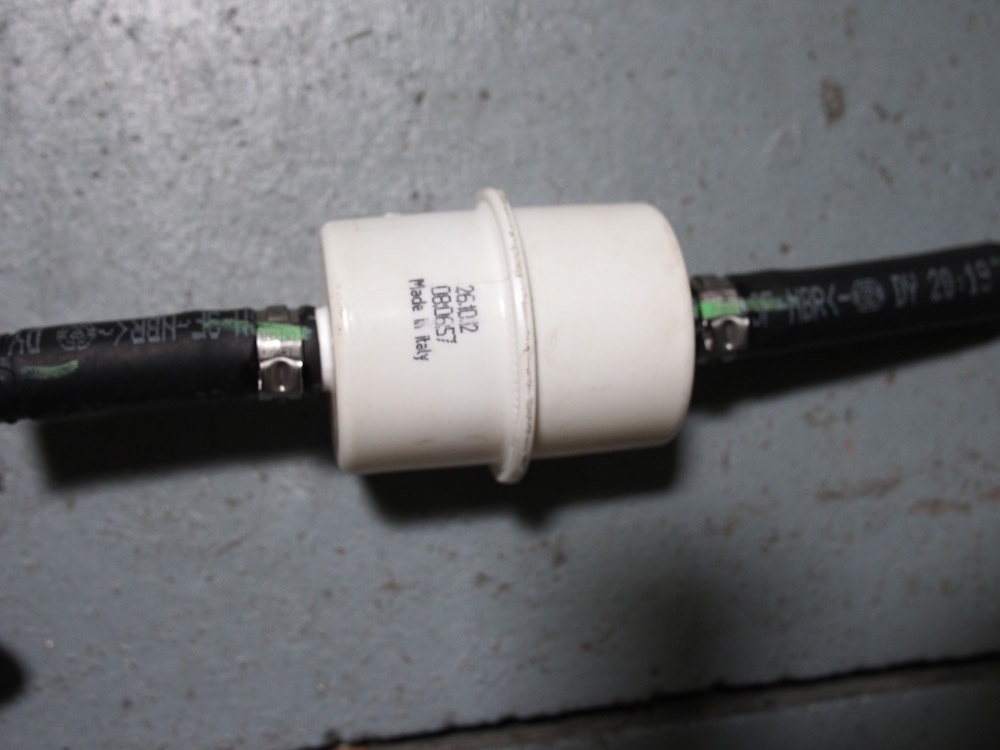
The Iveco has a small gauze pre-filter between the main tank and the lift pump, about the size of a lawnmower fuel filter, part no 500318246 . This filter may be to stop small rocks from getting into the lift pump, not a bad idea, but it will easily pass water or condensation. European spec trucks have an optional spin on pre filter, much better idea
In Australia the fuel supplies at many outback areas are a bit dubious, The main problem being water from condensation in storage tanks and as a consequence … rust. I decided to replace that filter with a Racor style filter from BCF , uses cheap Easterner Mercruiser cartriges.
I just removed the lawnmower filter and extended the lines with 5/16 fuel injection hose, Much better to replace a $5 element if you get some bad fuel than try to order a $80 filter to some remote location. Plus the lift pump is not going to get contaminated.
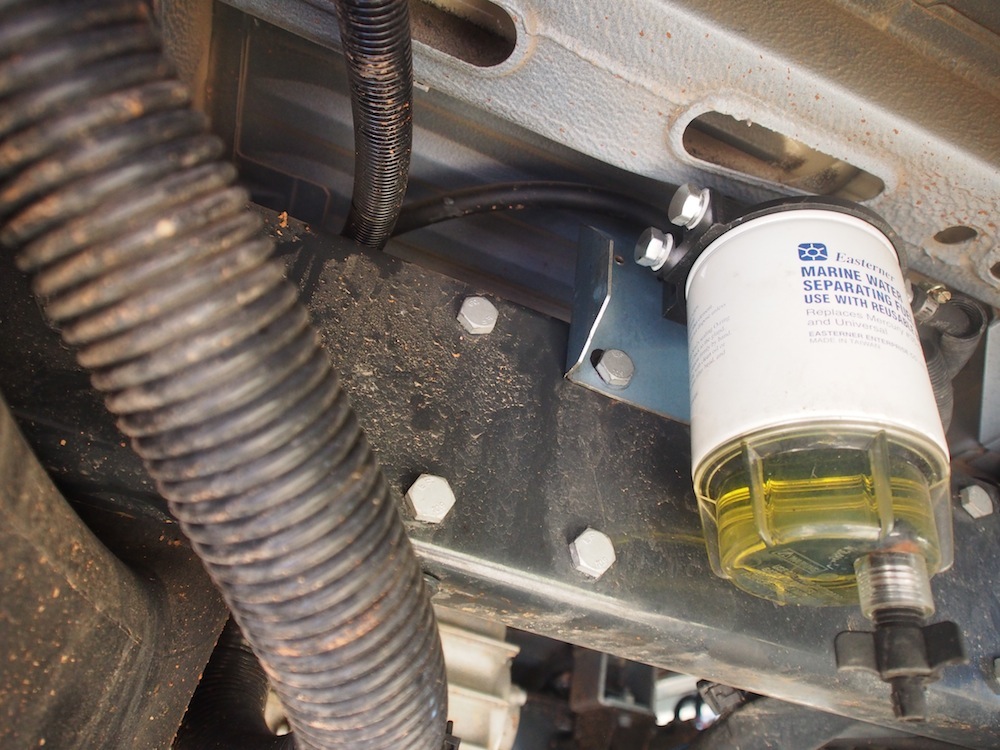
 You can easily bob down to look under the step to inspect for water or sediment. This is an easy daily check, Water or contaminates can be drained off here.
A small price to pay for peace of mind, you never know when you might pick up some dodgy fuel, and Common Rail Diesels do not like dodgy fuel. My Injectors and High Pressure pump can rest easy and the $80 Factory Fuel filter on the engine is now going to last the 40,000 km between the Iveco Joke scheduled service intervals, no worries !!!

This image shows the location existing Iveco main Fuel Filter , visible from underneath the passenger front wheel splash guard. It is a cartrige type filter, running a decent prefilter & water trap will prolong the life of this filter .
Just about done

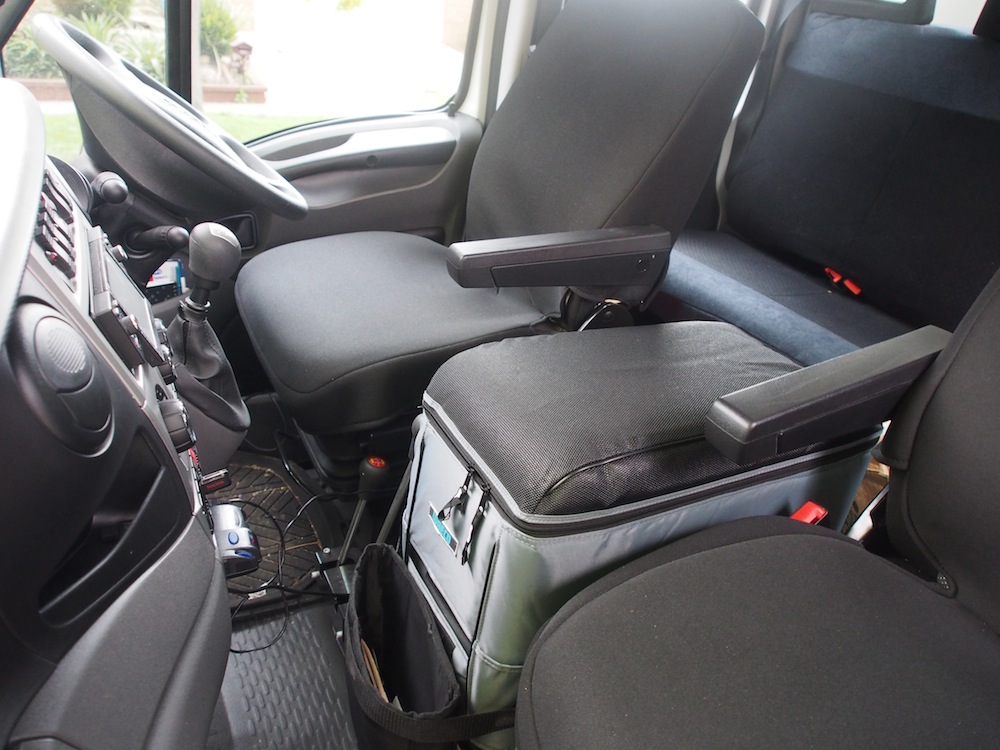
Fridge between the seats is a Waeco CF25 , perfect dimensions and the fridge cover suits the Iveco upholstery perfectly. The fridge runs from the Aux battery, even after running all night the battery is back in float after only a few hours of overcast light on the Solar Panel the next day.
Seatcovers are RuffNuts,
Double Din Radio
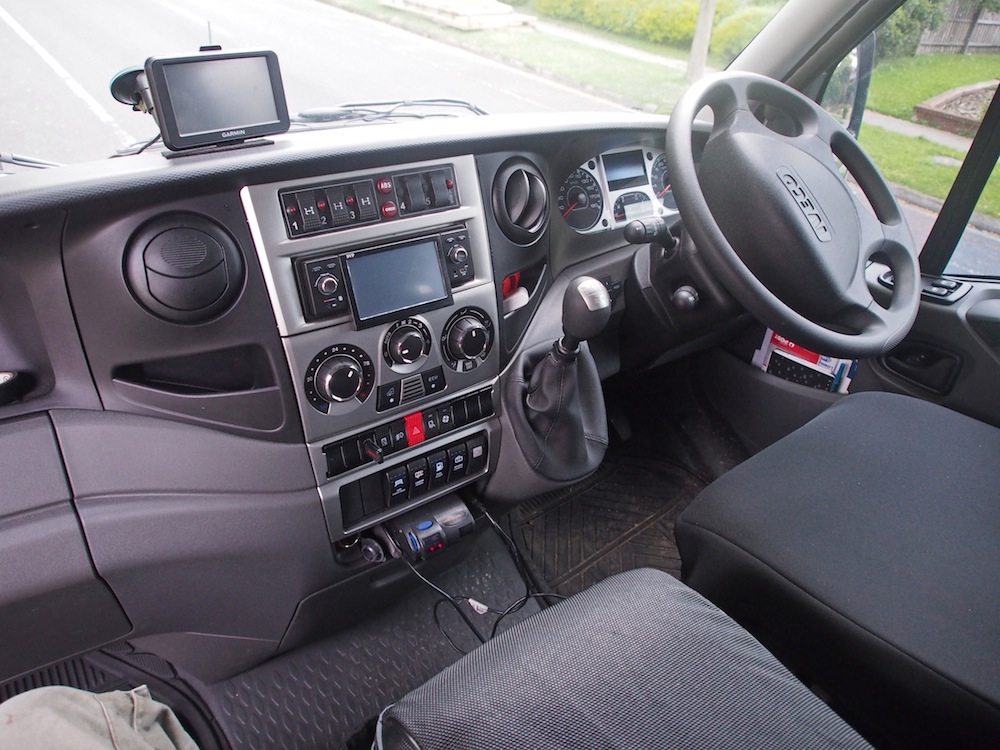
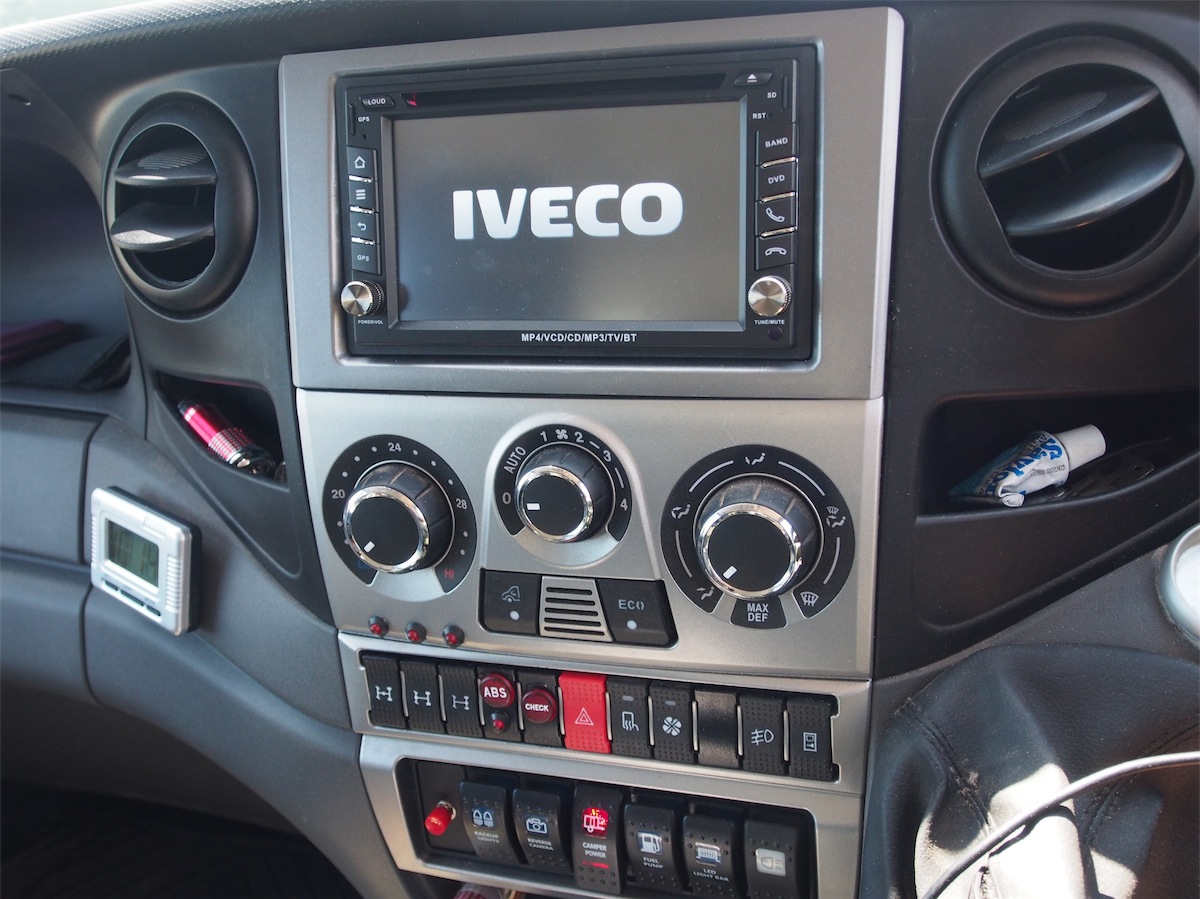 After seeing the Double Din solutions that other owners have adopted I decided to move my Diff Lock switches and lights to spare locations next to the Hazard switch. Some DIY modifications and soldering was required here and drilling into the heater fascia for the Diff Lock engagment lights was was a bit scary but all good in the end.
A chinese 2Din ebay unit, this is a Erisin 7610 (meant for a Nissan) Head unit, which runs Windows CE so that I can load OziExplorer and Hema Maps, It also has IVECO as one of its startup logo screen choices. All Good !!
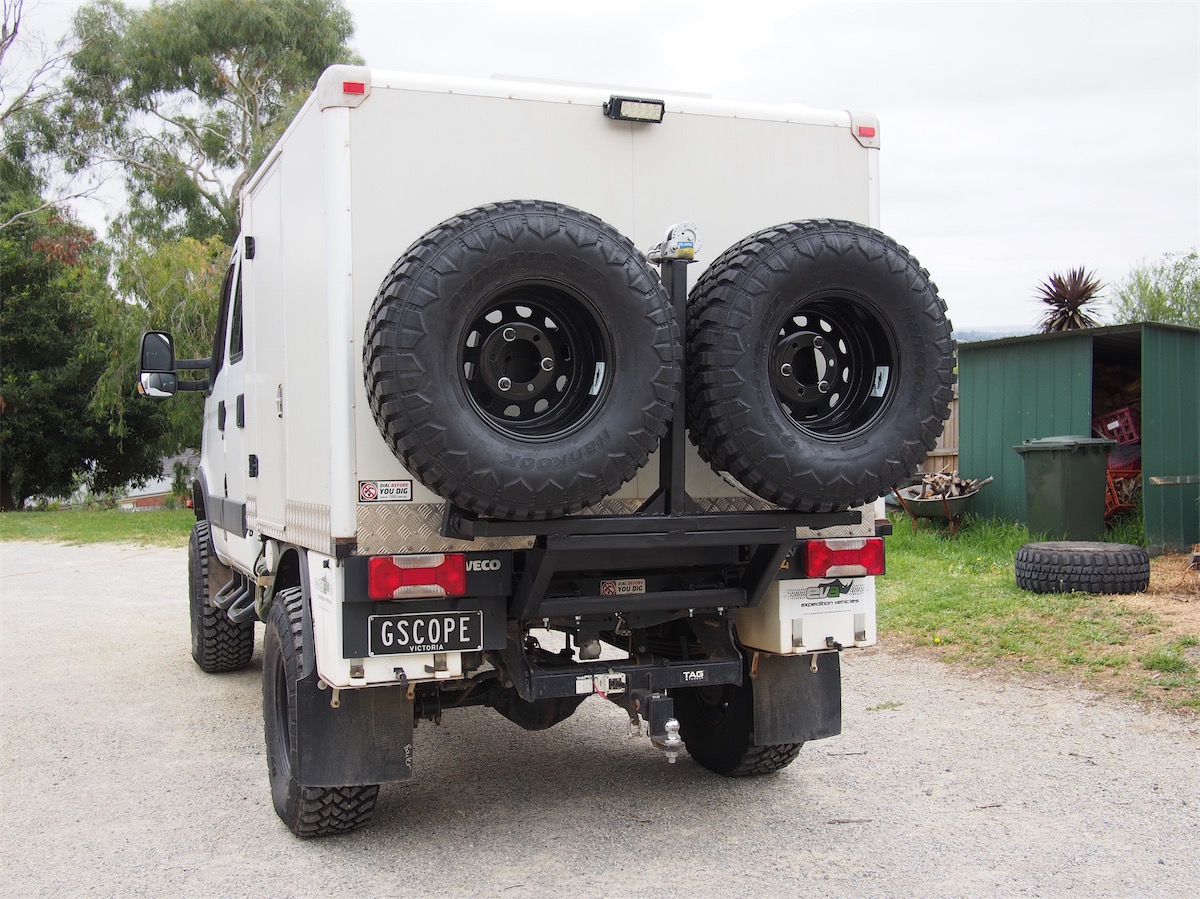
EVA Steel Rims
 After 45,000 km on the TT Rims and 35" Federal Couragia MT's it time to upgrade. The Federal MT's wear well but I had a carcass failure with radial splits in sidewall on 2 tyres. Also I believe the Rims I had were contributing to my overheating brake issues.
 I chose to use EVA Steel 17x9 rims, they have 25mm less offset than the TT rims, (so the overall wheel track is 50mm wider) . The rim outer is 4mm steel as opposed to 5mm and as a result are considerably lighter.
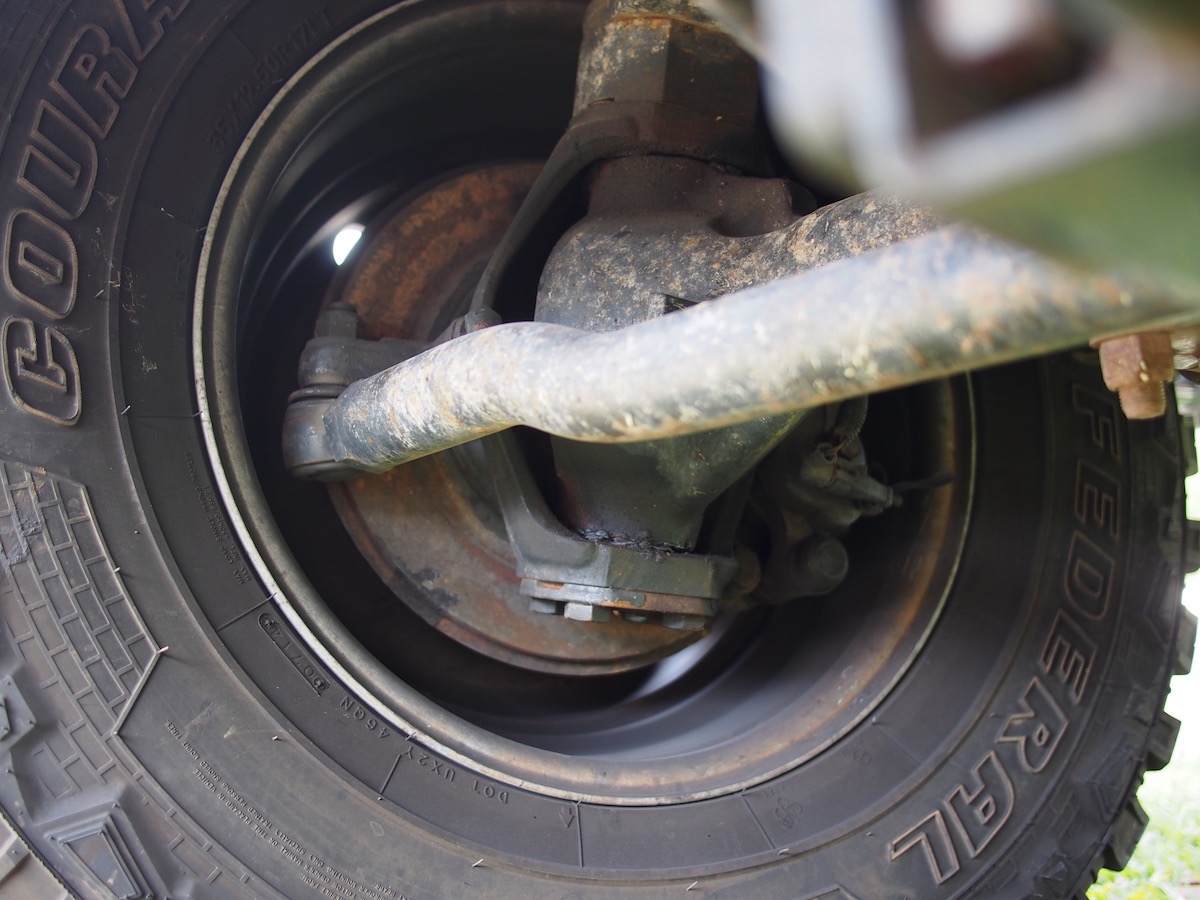
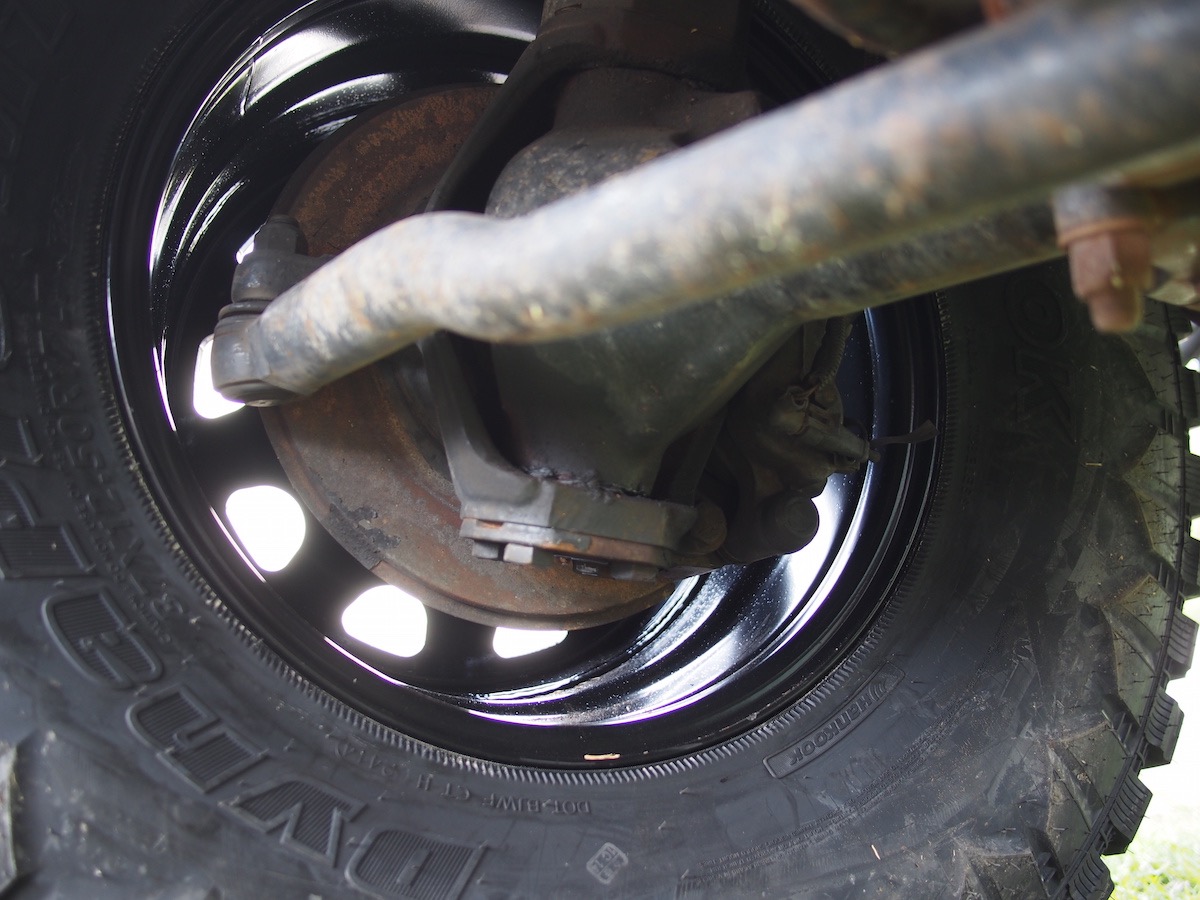


comparison of brake cooling ducts, old steel rims vs EVA steel rims, Front and Rear
My new tyres are Hankook Dynapro MT 37x12.5R17 , Im running Australian ABC dynamic balance beads (inside tyre) which is why you see no wheel weights, and I am very impressed with the ride and handling compared to the old rim and tyre combination, and much quieter too !!
Link to EVA Steel Rim information
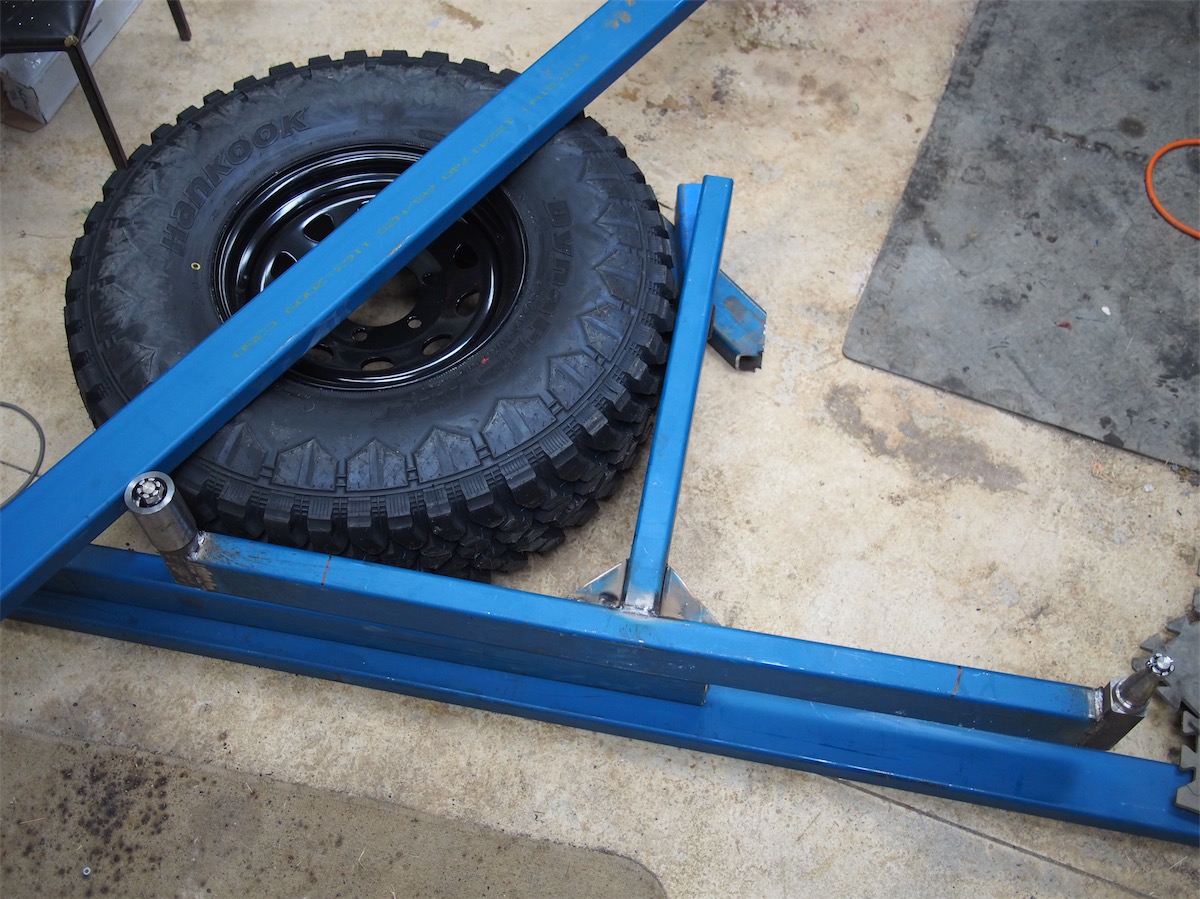
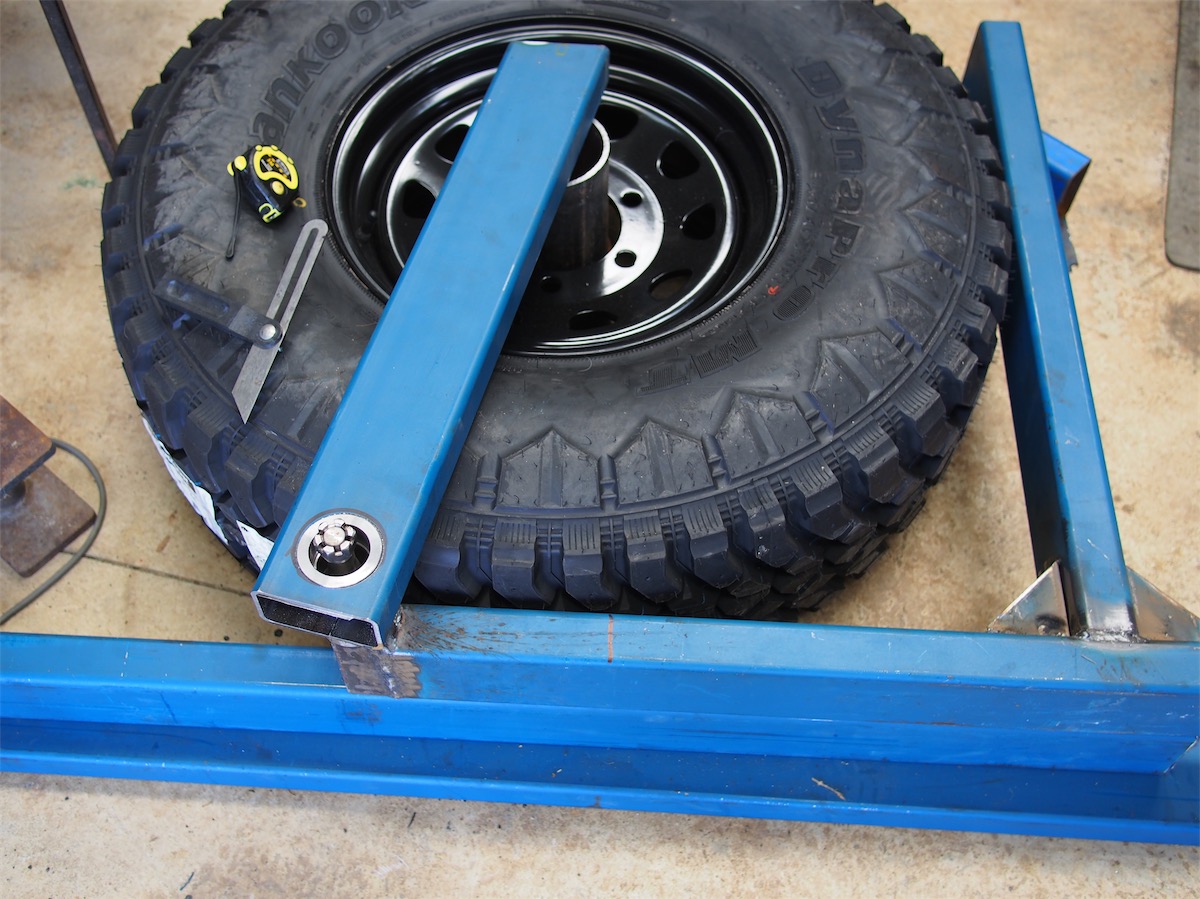
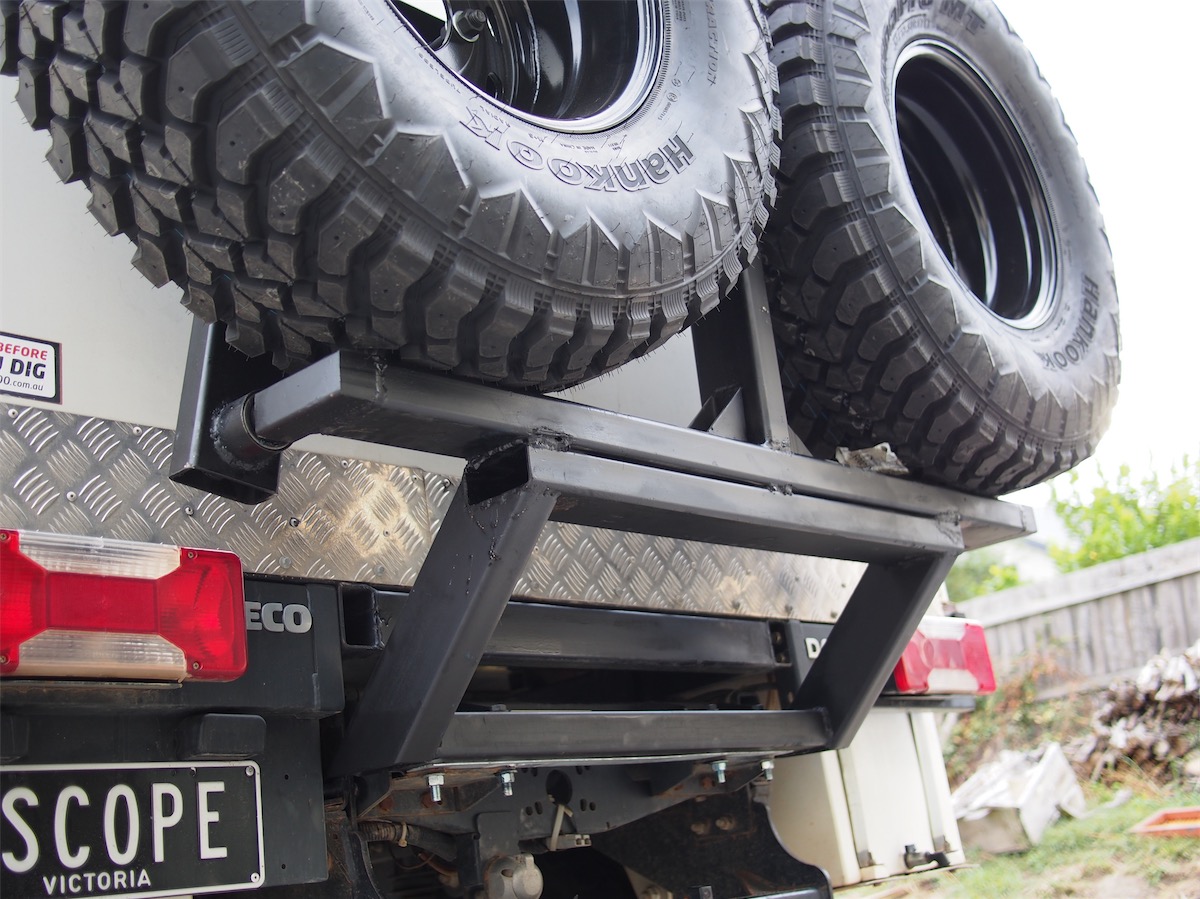
New dual wheel carrier
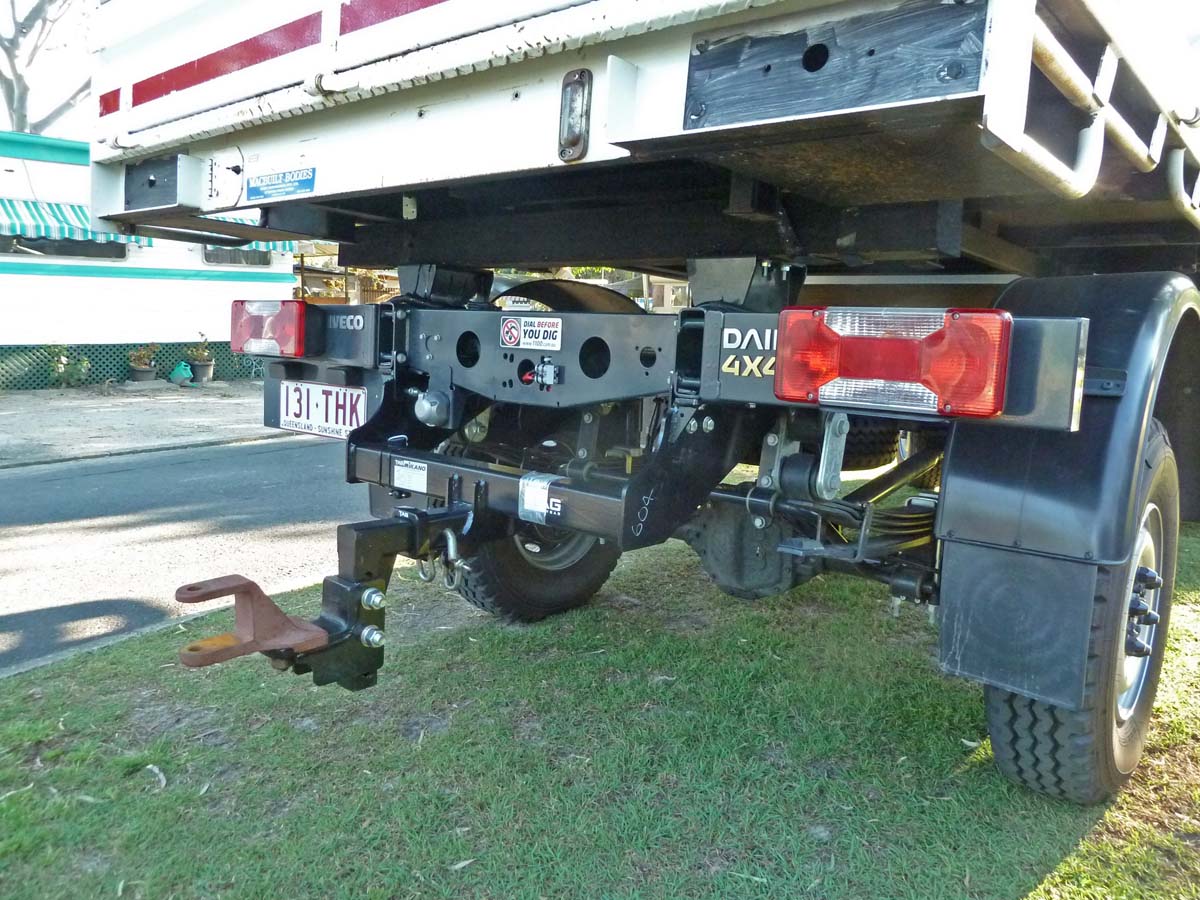
Because of the fact that we are now carrying 2 spare wheels I needed to make a new rear wheel carrier, previously the rear carrier was for tyre carcass only (without rim)Because we are towing most of the time, the avaliable dual carriers on the market were not suitable as you need to unhitch the caravan and drive forward before lowering the wheel down backwards
With my new design either wheel can be lowered outward and down with or without the small handwinch. The swingarms pivot on a pair of 750kg trailer stub axles.
Here are a few more build ups, other 55S17W's
Read all about it !!! Compleat Idiots Guide to Iveco Daily 4x4 55S17W (buy the book :)

Iveco Daily Links